You can offer your Sponsor/Exhibitor to have an in-app meeting calendar, giving the attendees the option to book meetings with the assigned contact persons of the Sponsor/Exhibitor.
Click here to see the video guide.
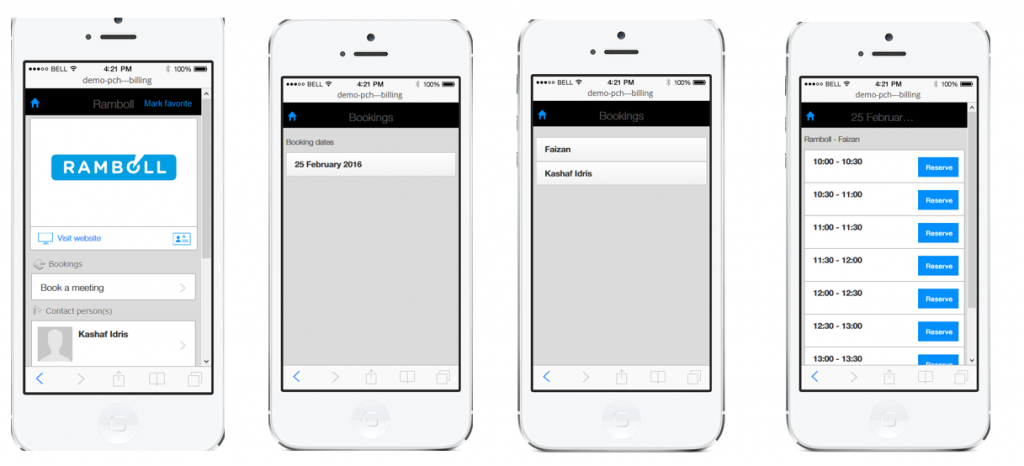
The meeting calendar could look like this in the web app: (the calendar is not available for the native app yet)
There are different ways to set up the calendar – either the organizer sets up everything in the event center or the calender is set up individually by each assigned contact person. The main difference between the 2 options is, that when booking slots are made by the organizer, then all contact persons for each Sponsor/Exhibitor have the same booking slots. If the calendar is made individually either by the contact person – or by the organizer logging on as the contact person – then all time slots can be custom made.
If you want to go for option 2 – where booking slots are handled by the contact person – see the guide here.
Option 1 – organizer handles the calendar
First you need to activate the booking module and adjust the settings.
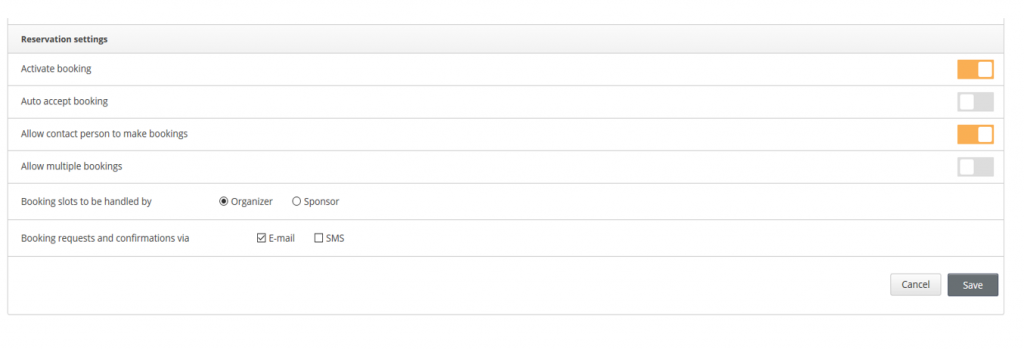
- ‘Activate booking’
- ‘Auto accept booking’ – determines if bookings should be confirmed automatically, alternatively the contact person has to confirm.
- ‘Allow contact person to make bookings’ – determines if contact persons can book meetings themselves
- ‘Allow multiple bookings’ – can one attendee book meetings with more than one contact person with each sponsor/exhibitor
- Click ‘Organizer’ in – ‘Booking slots to be handled by’
- ‘Booking requests and confirmations via’ – confirmations are sent by email or sms. Sms will be subject to an extra charge.
- ‘Reset booking’ – deletes the booking slots already done.
- Save
Once the settings are made, you need to be sure all Sponsor/Exhibitor profiles are done – including assigning all the contact persons. To see a guide for creating profiles and assigning contact persons – click here.
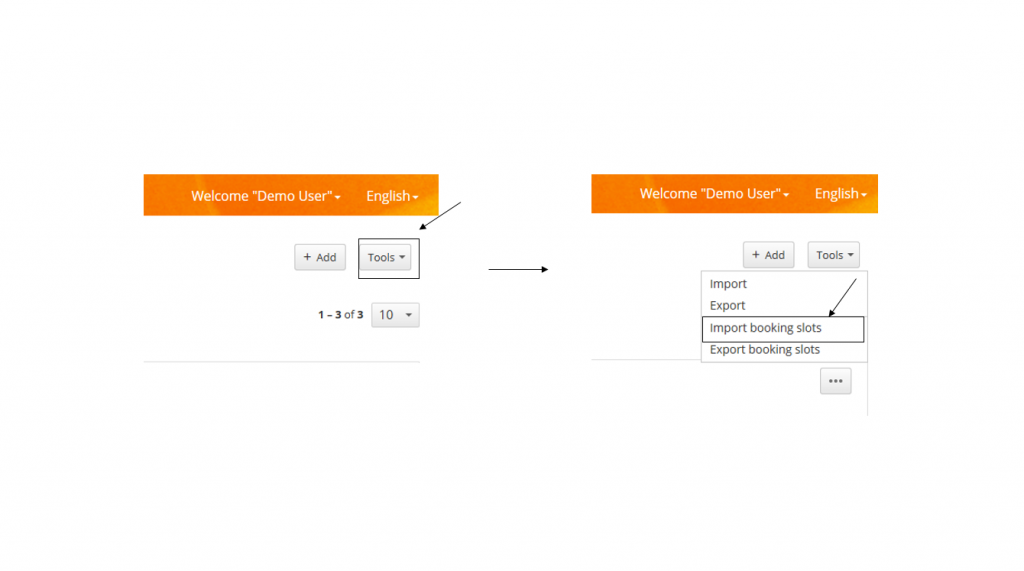
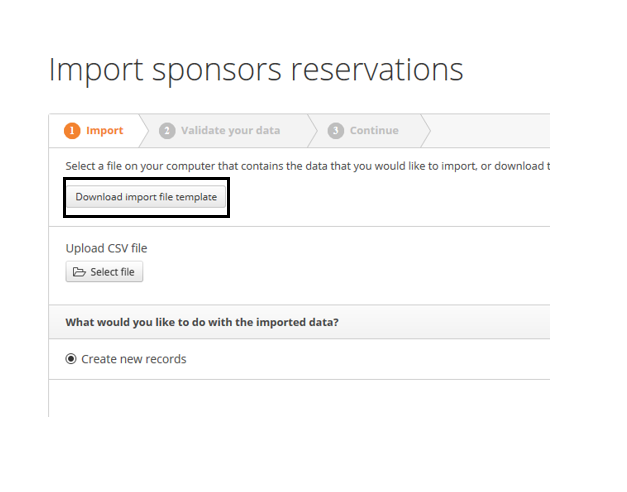
Import booking slots
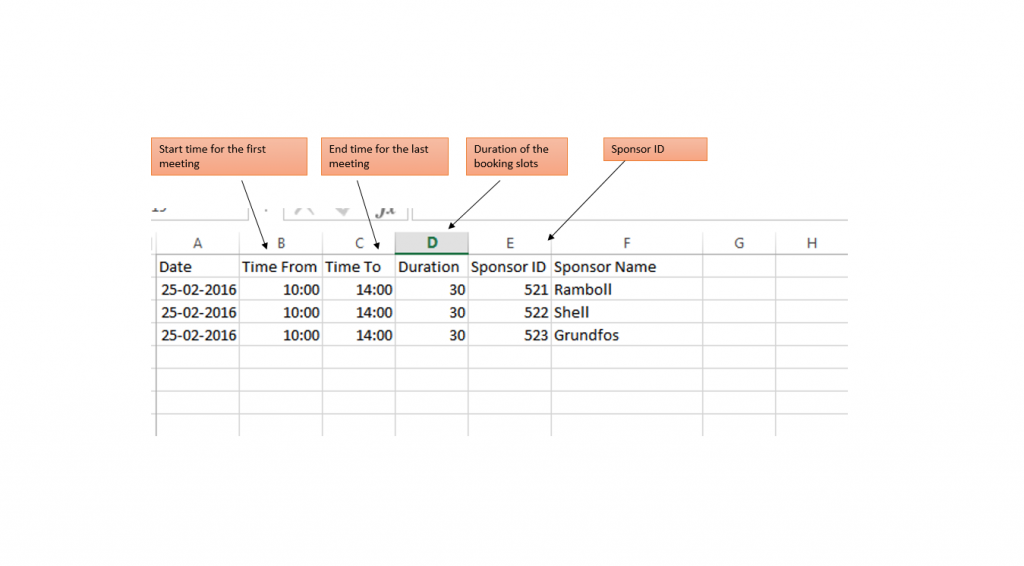
Time slots are created by importing a CSV file. To create CSV file with time slots, you need the relevant Sponsor/Exhibitor id’s. You find them here:

To create the CSV file do the following:
Create the CSV file as below – as you can see, it is possible to have different timeslots for the different Sponsor/Exhibitor – but all assigned contact persons will have the same calendar.
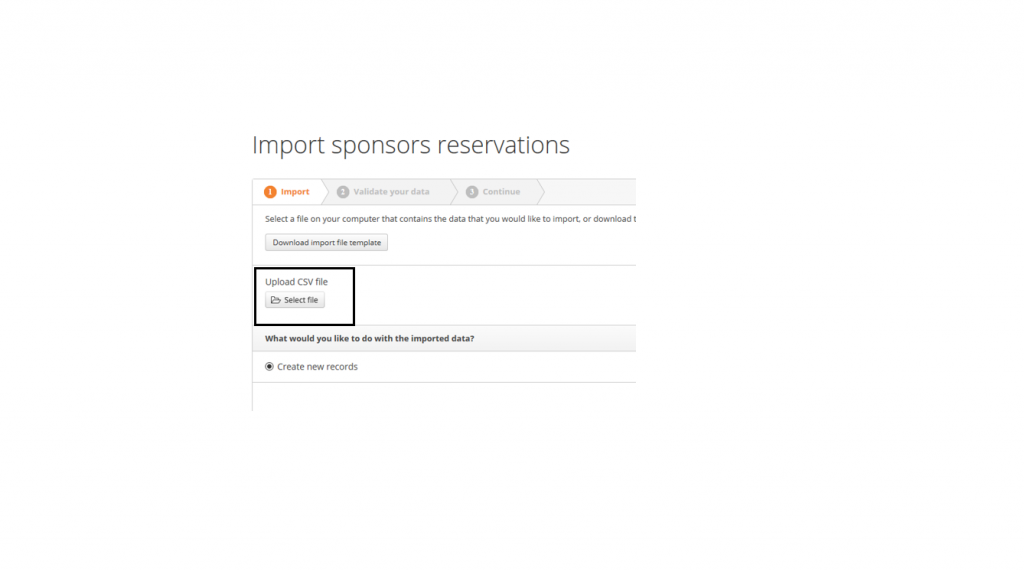
Now you can import the file:

Booking calendar is now visible under the relevant Sponsor/Exhibitor. Last step before you are ready to go, is to customize the email templates which are generated when bookings are made.
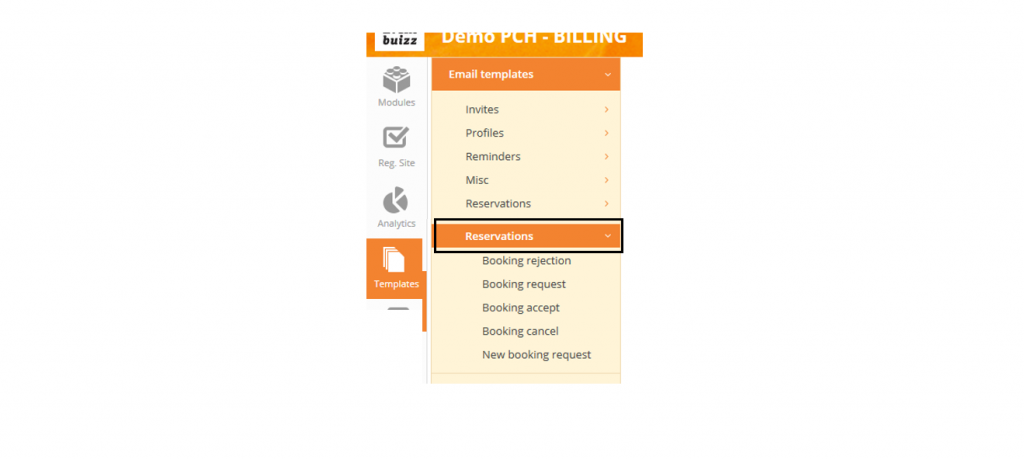
When attendees book a meeting, different emails are automatically sent out. Make sure the relevant emails have the correct content before booking is released:
- New booking request – email/sms the contact person receives when an attendee requests/books a meeting
- Booking cancel – email/sms the contact person receives if the attendee cancels the booking
- Booking accept – email/sms the attendee receives when meeting is confirmed – either by auto confirmation or by contact person
- Booking request – email/sms the attendee receives when they book, but are awaiting confirmation from the contact person
- Booking reject – email the attendee receives if contact person rejects meeting request
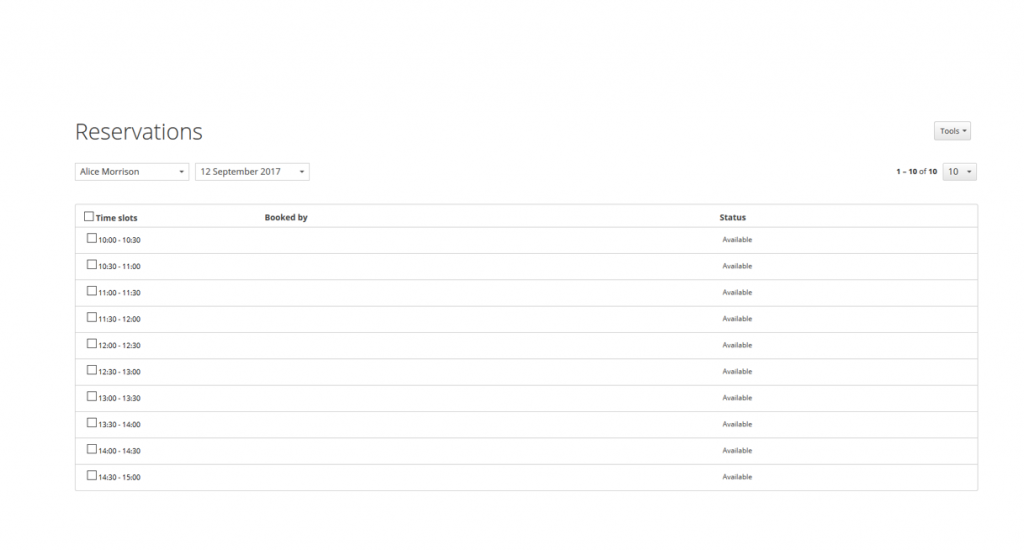
As an organizer you have access to all the bookings in the event center.
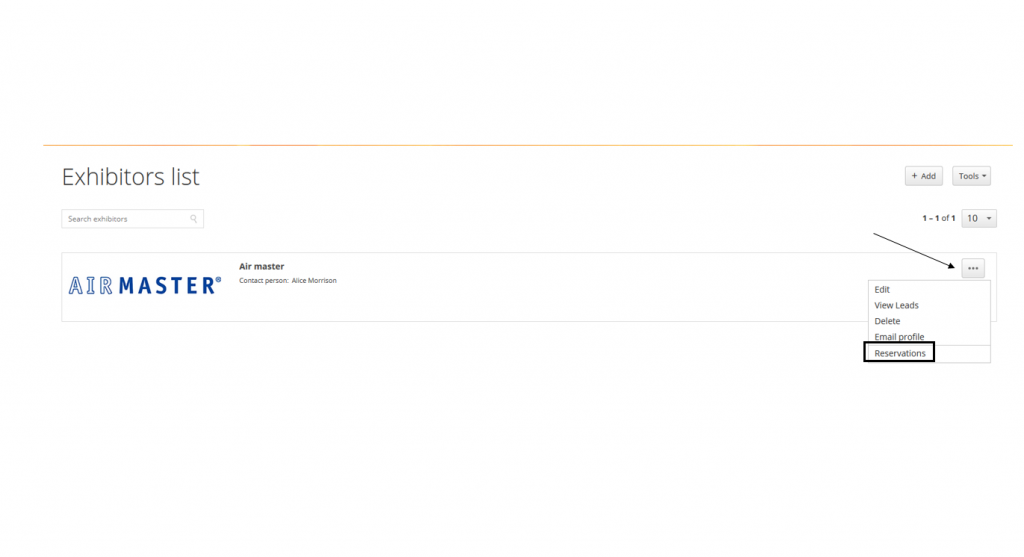
Overview of the booking calendar:
You should now instruct your Sponsor/Exhibitor contact persons in how to manage their calendar.
If you did not activate ‘auto confirmation’ when you adjusted the settings to begin with, then you can provide your contact person with this guide:
2 Contact person check and manage meetings
If you activated ‘auto confirmation’ when you adjusted the settings to begin with, then you can provide your contact person with this guide:
1 Contact person check and manage meetings