To upload documents in the App, you have to create sub-folders first. Once the sub-folders are created, you can start uploading documents. Speakers and Contact persons to Exhibitor/Sponsor profiles – can also upload their documents themselves, as long as you have created a sub-folder for them and activated the setting: Display manage documents in either Speaker or Exhibitor/Sponsor settings.
Upload documents in app – click here to see the video guide.
Upload documents for registration site – sponsor/exhibitor only – click here to see the guide.
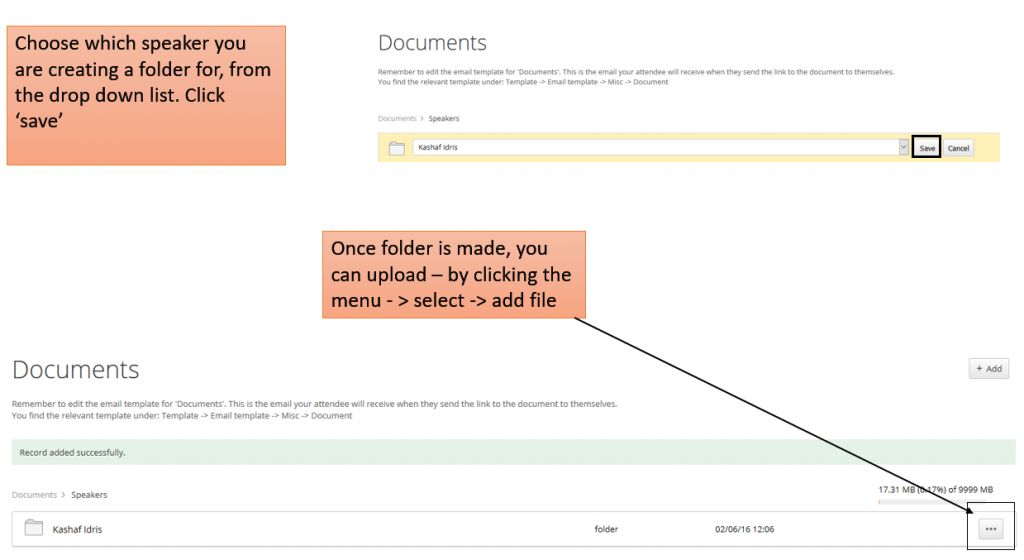
Create sub-folders
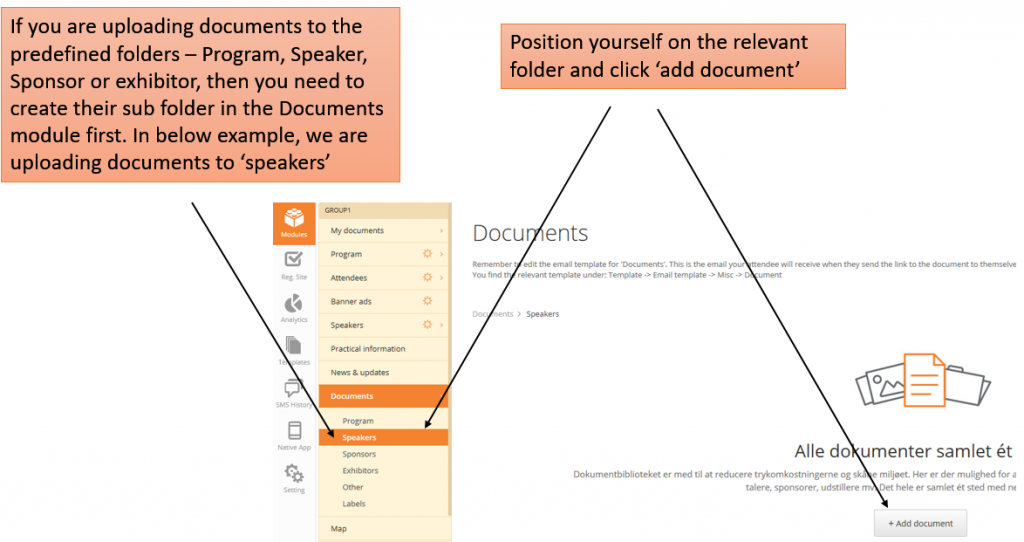
In the example below – we are uploading documents to speakers profiles, but the procedure is the same in the other folder. Except the folder ‘Other’, where you do not have to create sub-folders.
Speaker or Contact person uploads their own documents to their profile
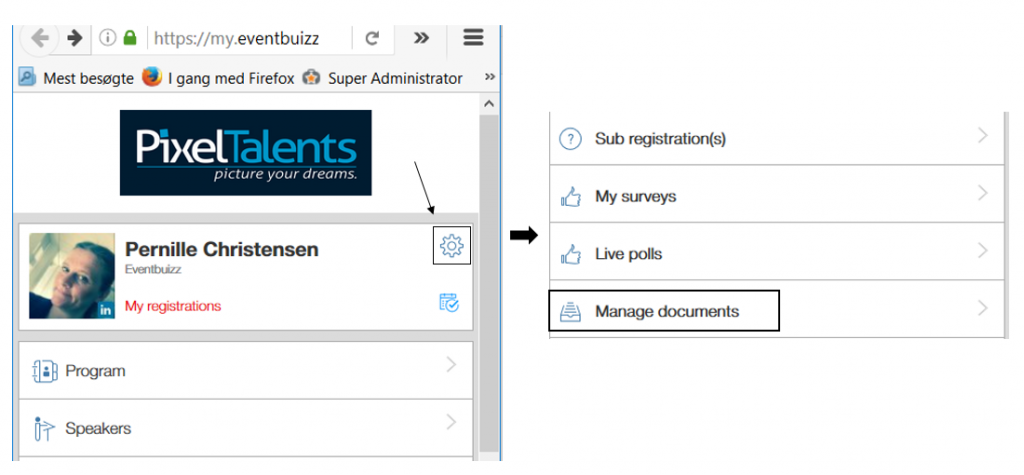
If you ask the speaker or contact person to upload their own documents, they have to do it by logging on to the App. As mentioned in the beginning, you have to activate the setting Display manage document in either Speaker or Exhibitor/Sponsor settings.
When they log on to the web app – they will then be able to upload their documents. They can also create folders if they have a lot of documents.
Be aware that you do have a maximum limit on your customer account for uploading documents, so before giving access to this possibility, please check your remaining space limit in the module – Documents.
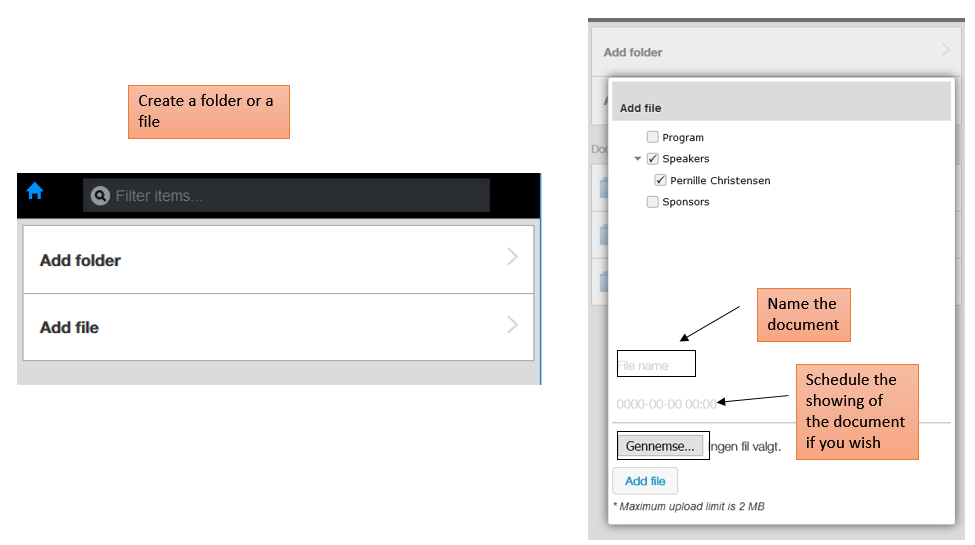
To upload documents, they do as follows after logging on to the web-app:
Here you can access a quick guide to your Speakers or Contact persons, so they can easily upload documents.