Go to App Store or Google Play and search for “Eventbuizz Lead scanner” or follow these links:
IOS: https://apps.apple.com/gr/app/eventbuizz-lead-scanner-2-0/id1634773771
Android: https://play.google.com/store/apps/details?id=com.eventbuizz.leads2&pli=1
With your Eventbuizz QR code scanner, your smartphone can serve as an efficient lead scanner. You can offer your Sponsor/Exhibitor to quickly scan the attendees QR codes to gather all the details needed to contact them afterwards. The Sponsor/Exhibitor contact person can even add personal notes when they scan. All leads can be exported as an excel file, which can be emailed straight to the contact persons email address or company email.
The attendees must either have the QR code on their name badge or find it in the event app.
Preparations for lead scanning
As the organizer, you need to first make sure that all Sponsor / Exhibitor profiles are created in the event center – and also make sure all contact persons are assigned to the relevant profiles. It is only possible for the people assigned as contact persons, to log on to the Eventbuizz lead scanner. For a guide on how to create profiles and assign contact persons click here.
When the profiles and contact persons are set up, then you need to prepare a guide for your contact persons, so they know where to find the Eventbuizz Lead scanner and also see how the scanning works.
As a minimum, you need to insert 2 things in the presentations – the Event code and a name badge example with a QR code, which they can make test scans on.
Event code
You find the event code for your event here:

In the app – Login
First the app will ask for an event code:
In with exhibitor portal, there is no sign-up option.
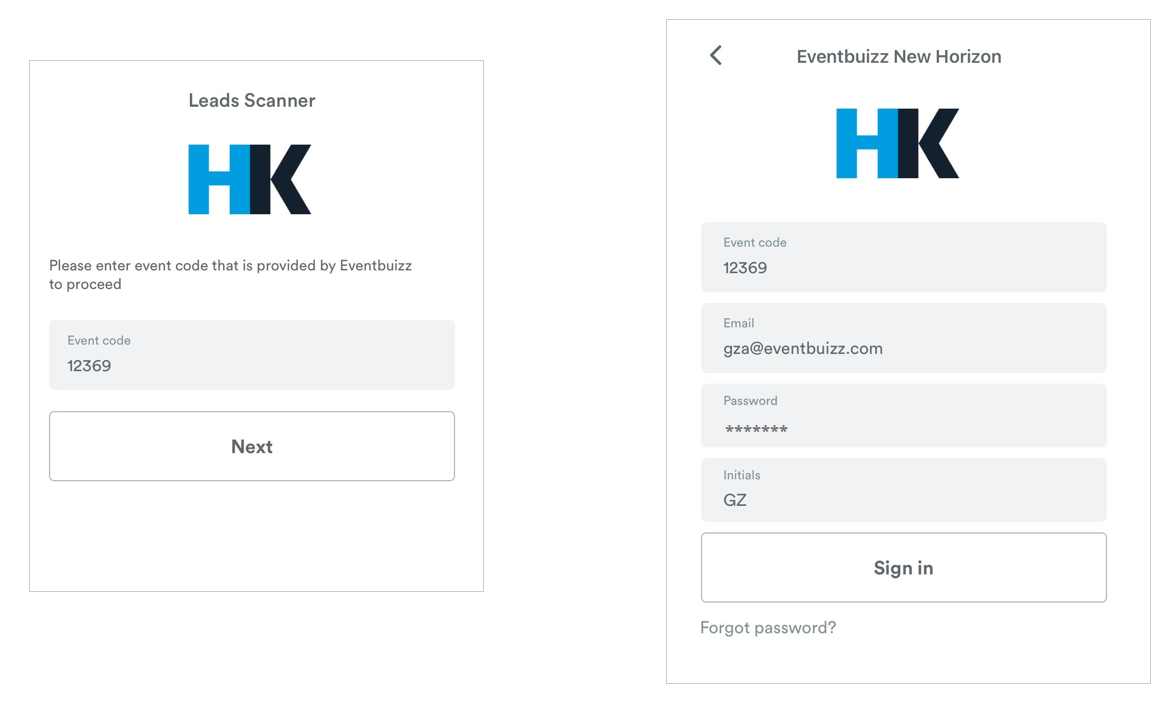
When logging in as scan leads
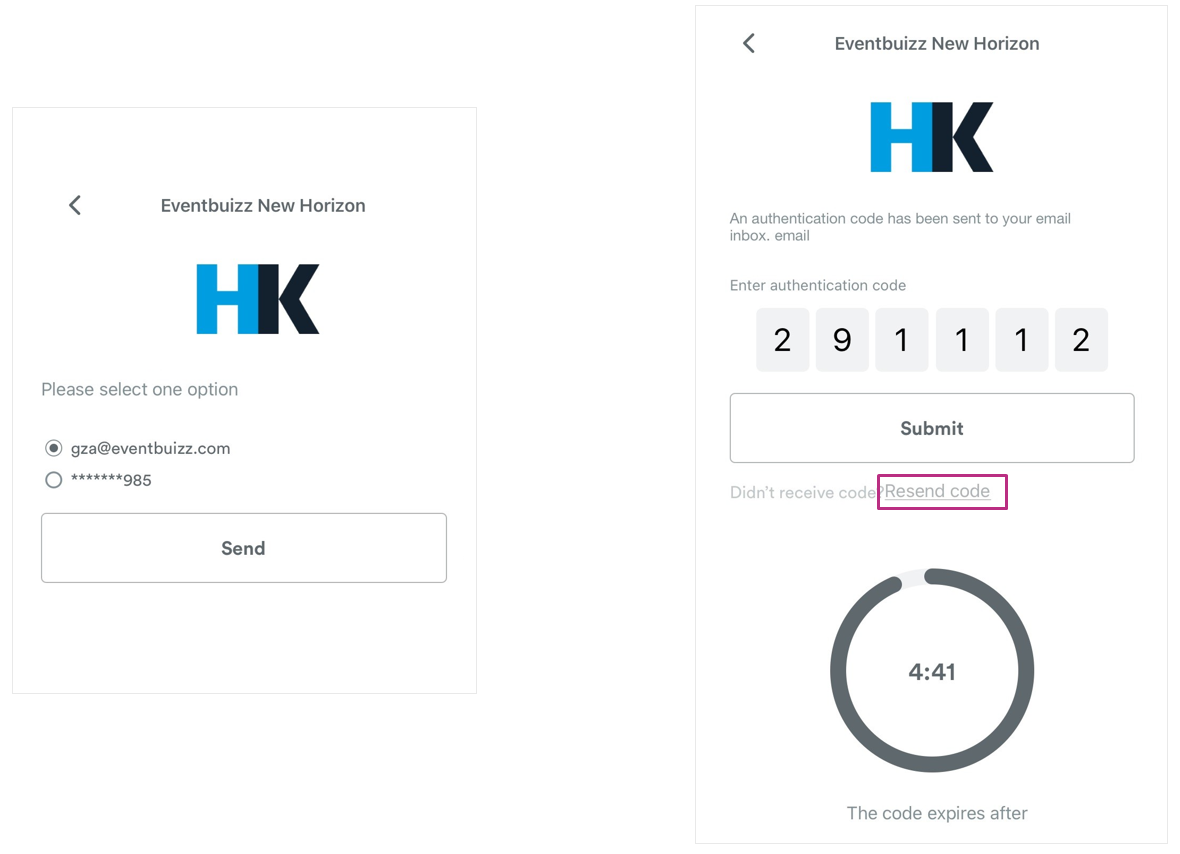
Forgot Password
In the Leads Scanner app, the “Forgot Password” feature allows users who have forgotten their password to reset it. When you select “Forgot Password,” you will typically be prompted to enter your registered email address or phone number.
An email or SMS will then be sent to you with instructions on how to reset your password, which may include a link to a password reset page or an authentication code to verify your identity. Once verified, you will be able to create a new password and regain access to your account.

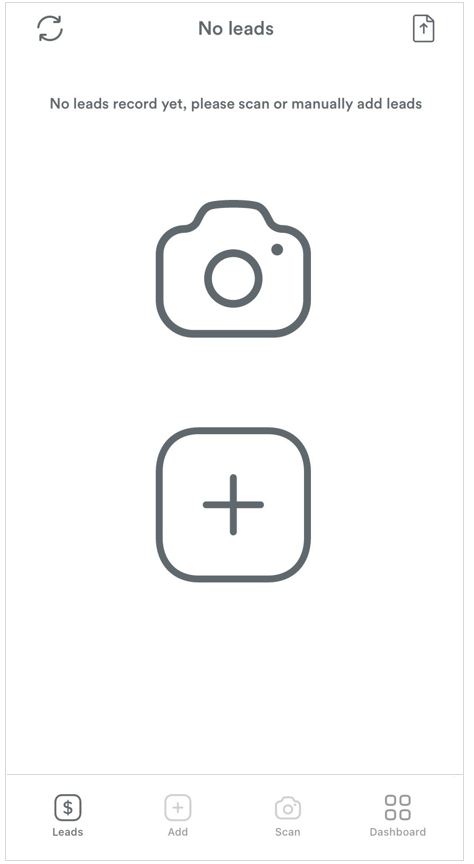
Leads Main Screen
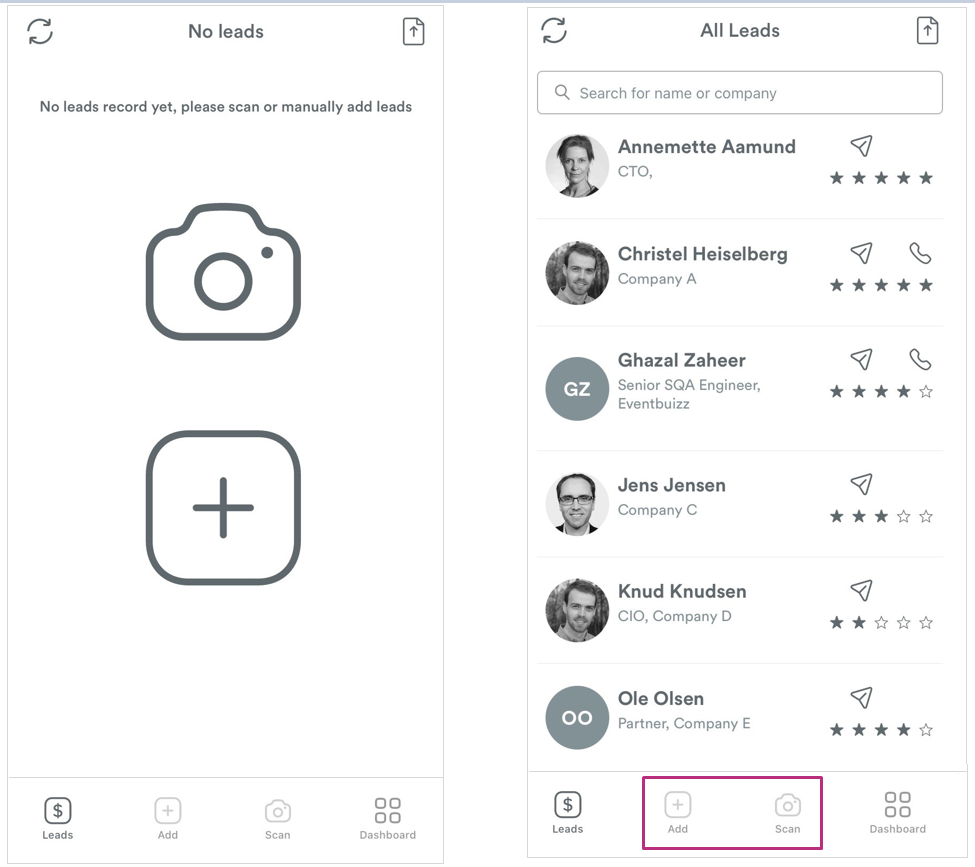
After logging in, this main screen is shown first. It has several buttons and features. Let’s explain each one step by step:
- Top Bar:
-
-
- Refresh Icon (top left): This button likely refreshes the leads list to check for any new or updated leads.
- “No leads” Text: Indicates that there are currently no leads recorded.
- Share Icon (top right): This button probably allows you to share the leads data via email, messaging, or other apps.
-
-
Main Area:
-
- Camera Icon: This button likely opens the camera or scanner feature to scan QR codes to add new leads.
- Plus Icon: This button is for manually adding new leads. Tapping it might open a form where you can enter lead information manually.
-
-
Bottom Navigation Bar:
-
- Leads Icon (dollar sign): This button probably takes you to the main leads list, where you can view all recorded leads.
- Add Icon (plus sign): This button might be another way to access the manual lead entry form.
- Scan Icon (camera): This button likely opens the scanning feature to capture new leads via the camera.
- Dashboard Icon (grid): This button probably takes you to the dashboard, where you can see an overview of your leads, analytics, and other relevant data.
-
These features collectively help the user manage and organize their scanned leads effectively within the Eventbuizz Leads Scanner app.
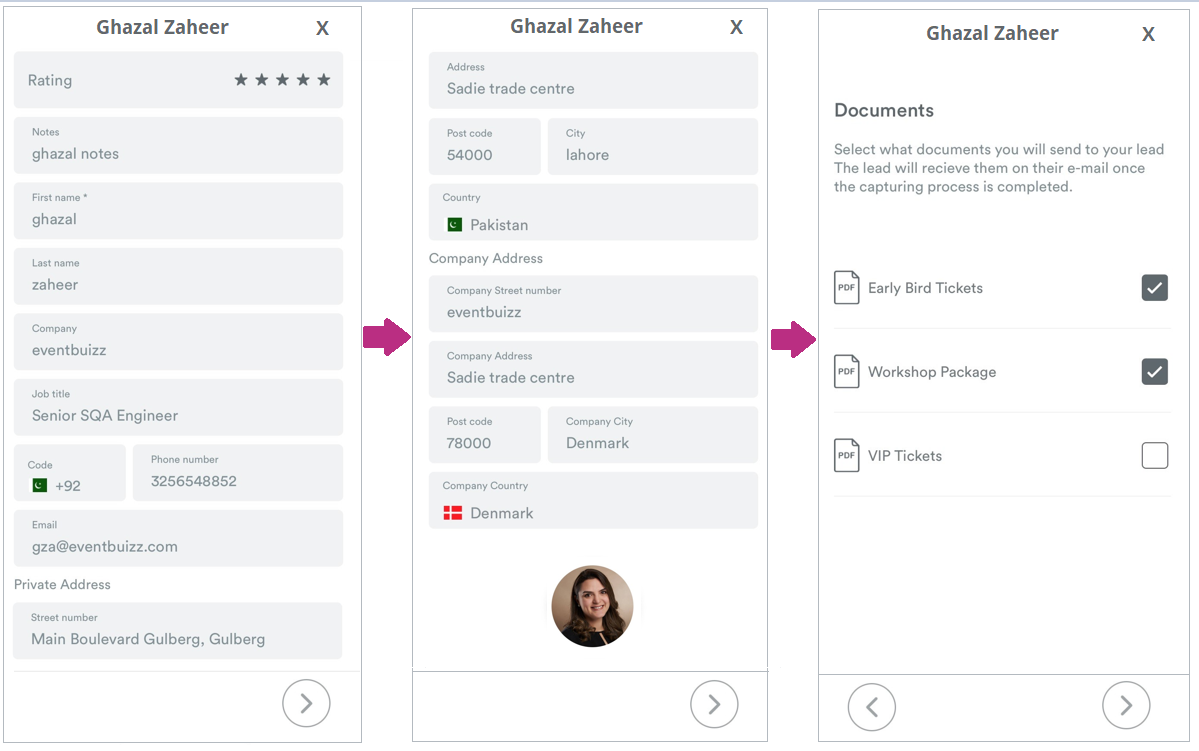
Add new lead
Click the add button -> This button is for manually adding new leads. Tapping it might open a form where you can enter lead information manually.
If the Signature or Terms and Conditions settings are turned ON, they will be shown in the Leads app.
Scan new lead:
- Navigate to the scanning feature which is accessible via a “Scan” button on the main dashboard or menu.
- Position the QR code within the frame on your phone’s screen. The app will automatically scan the code.
- After scanning, the attendee’s information will appear on your screen. Verify the details.
- Save the lead by confirming the information. You might have options to add notes or categorize the lead according to your preferences.

We have terms and conditions in two places:
-
In the event center – these are for all sponsors/exhibitors.
-
In the exhibitor portal – these are for a specific sponsor or exhibitor.
If a sponsor/exhibitor does not have Terms and Conditions added in their exhibitor portal profile,
then the system will show the event center > leads management Terms and Conditions in the leads app.

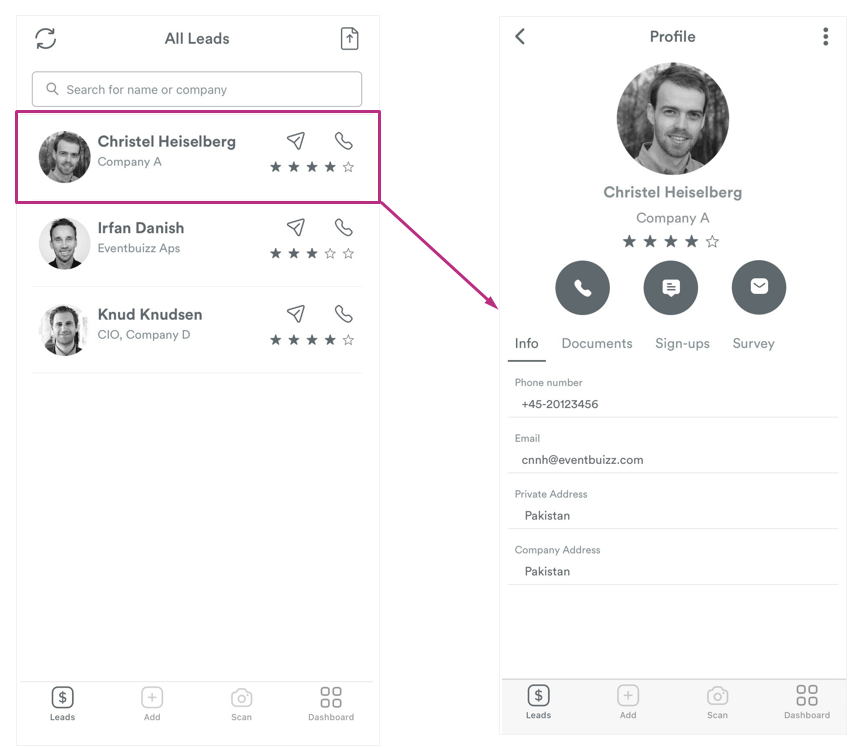
Leads Listing
Your list of leads is now shown. As the organizer you can mange from Leads overview for with exhibitor portal in Leads management with exhibitor portal.
Top header bar:
-
Sync Button (Circular Arrow Icon): This button is used to manually sync your leads with the server. By pressing this button, any new or updated lead information will be uploaded to the cloud or server, ensuring that your data is backed up and can be accessed from other devices or platforms.
-
Export Button (Document with Arrow Icon): This button is used to export your leads. By pressing this button, you can download the lead information as a file (e.g., CSV or Excel) or send it to your email or CRM system for further processing and follow-up.
You can review all your scanned leads within the app. All leads are typically found under a “Leads”

If you want to view information about a lead, click on it, and all the details for that profile will open.
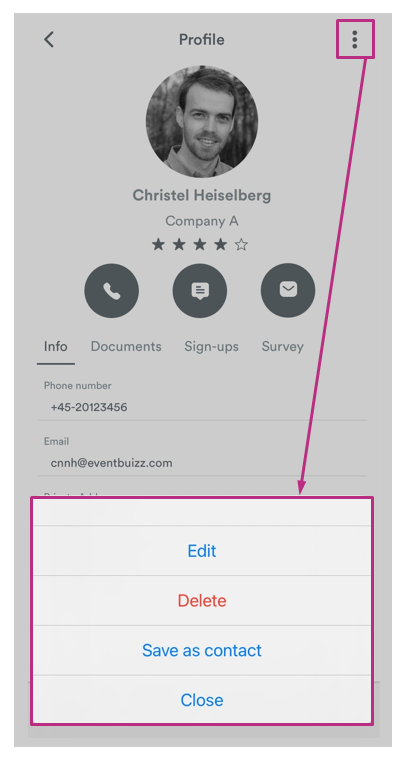
To edit, delete, or save your lead as a contact, click the three dots icon in the top right corner.
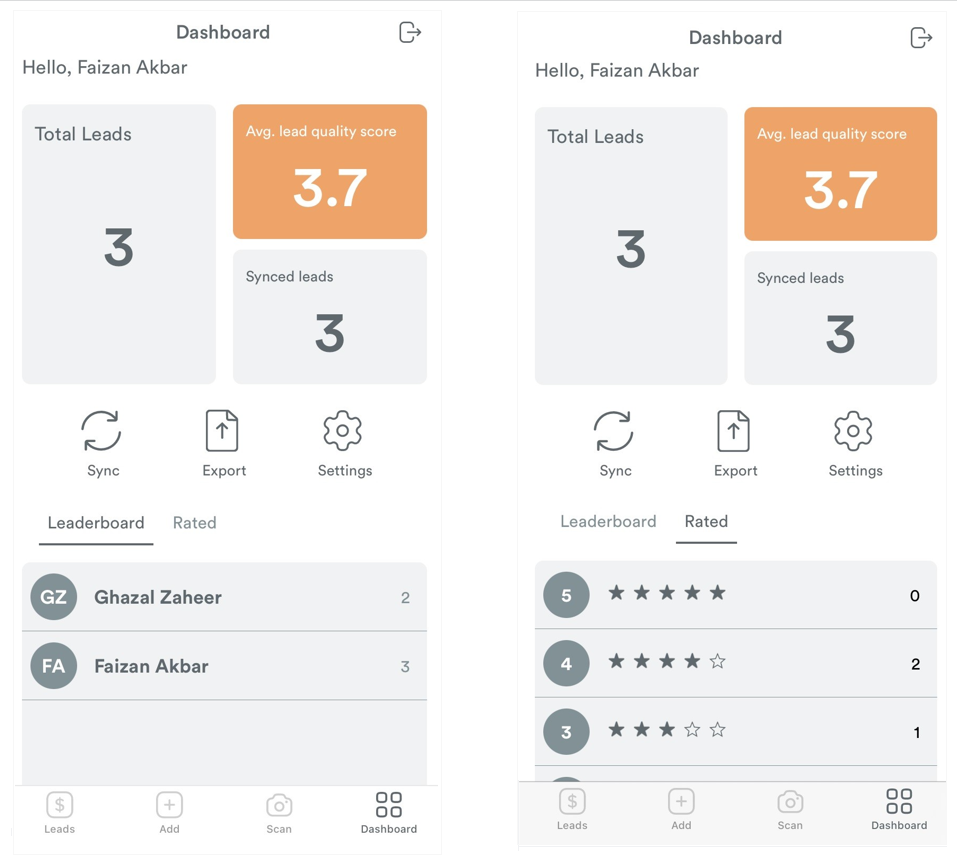
Dashboard
Let’s go through the features displayed on the dashboard of the Eventbuizz Leads Scanner app as shown in the image:
- Total Leads: This section shows the total number of leads that have been scanned. In this case, the user has scanned 8 leads.
- Average Lead Quality Score: This section shows the average quality score of leads. Here, the average score is 3.4.
- Synced Leads: This indicates the number of leads that have been synced with the server or cloud. In this instance, all 8 scanned leads have been synced.
- Sync Button: This button allows user to manually sync their leads with server or cloud. This ensures that all scanned leads are backed up and accessible from other devices.
- Export Button: This button allows the user to export their scanned leads. The exported data can typically be sent to an email or save as a file.
- Settings Button: This button takes the user to the settings menu where they can adjust app preferences, update profile information, change sync settings, etc.
We have further two tabs:
Leaderboard
The leaderboard is a feature that ranks and displays the top performers (contact persons) based on the number of leads they have collected.
Rated
In the leads app, the “Rated” tab is used to assess the quality of each lead. The person collecting the lead can rate it based on how likely it is to result in business. This helps in identifying which leads are more promising and have a higher chance of turning into actual business opportunities.
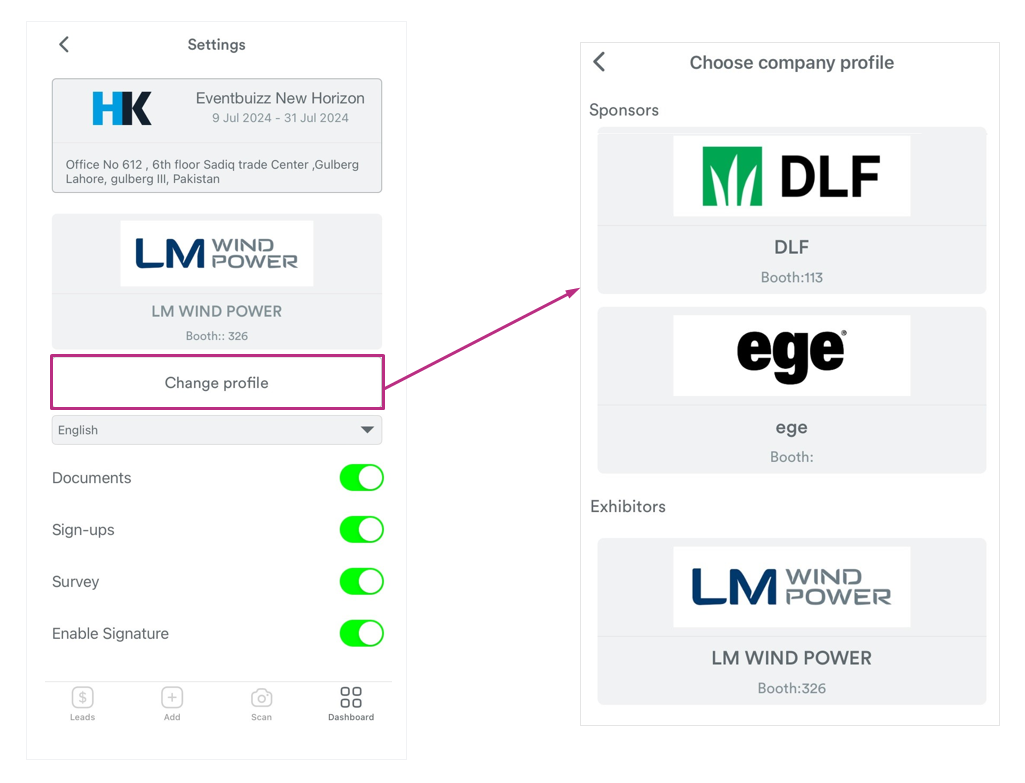
Settings
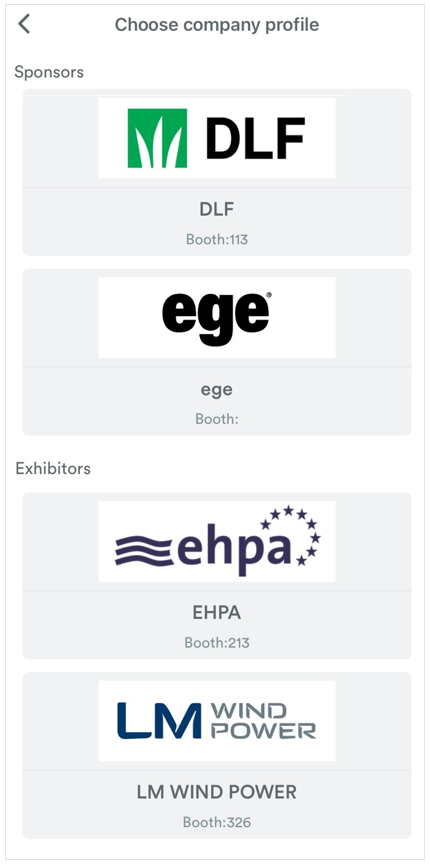
Change Profile: This button allows the contact person to change their exhibitor/sponsor profile. When you click “Change Profile,” a new screen will open, showing all the sponsors/exhibitors assigned to the current contact person.
These settings allow users to customize their scanning process, enabling features like signature collection and automatic data capture to streamline lead management. If both signature and auto capture setting is ON from event center -> Leads display settings, they will appear in leads app settings. Admin can change these settings from the app by himself.
Documents: This setting allows the user to select the documents which he wants to send with lead.. These could include brochures, manuals, or other relevant files.
Sign-ups: This setting allows the user to manage sign-ups. This could involve signing up attendees for events, sessions, or updates.
Enable signatures: This option allows users to capture a signature from the person whose lead is being scanned.
Survey: This setting allows the user to conduct surveys within the app. Users can fill out survey forms to provide feedback or gather information.
When the toggle is green and turned on, indicating that this feature is currently enabled. This means that when scanning a lead, the app will prompt for a signature. and when the toggle is green and turned on, indicating that this feature is currently enabled. This means that when scanning a lead, the app will prompt for a signature.
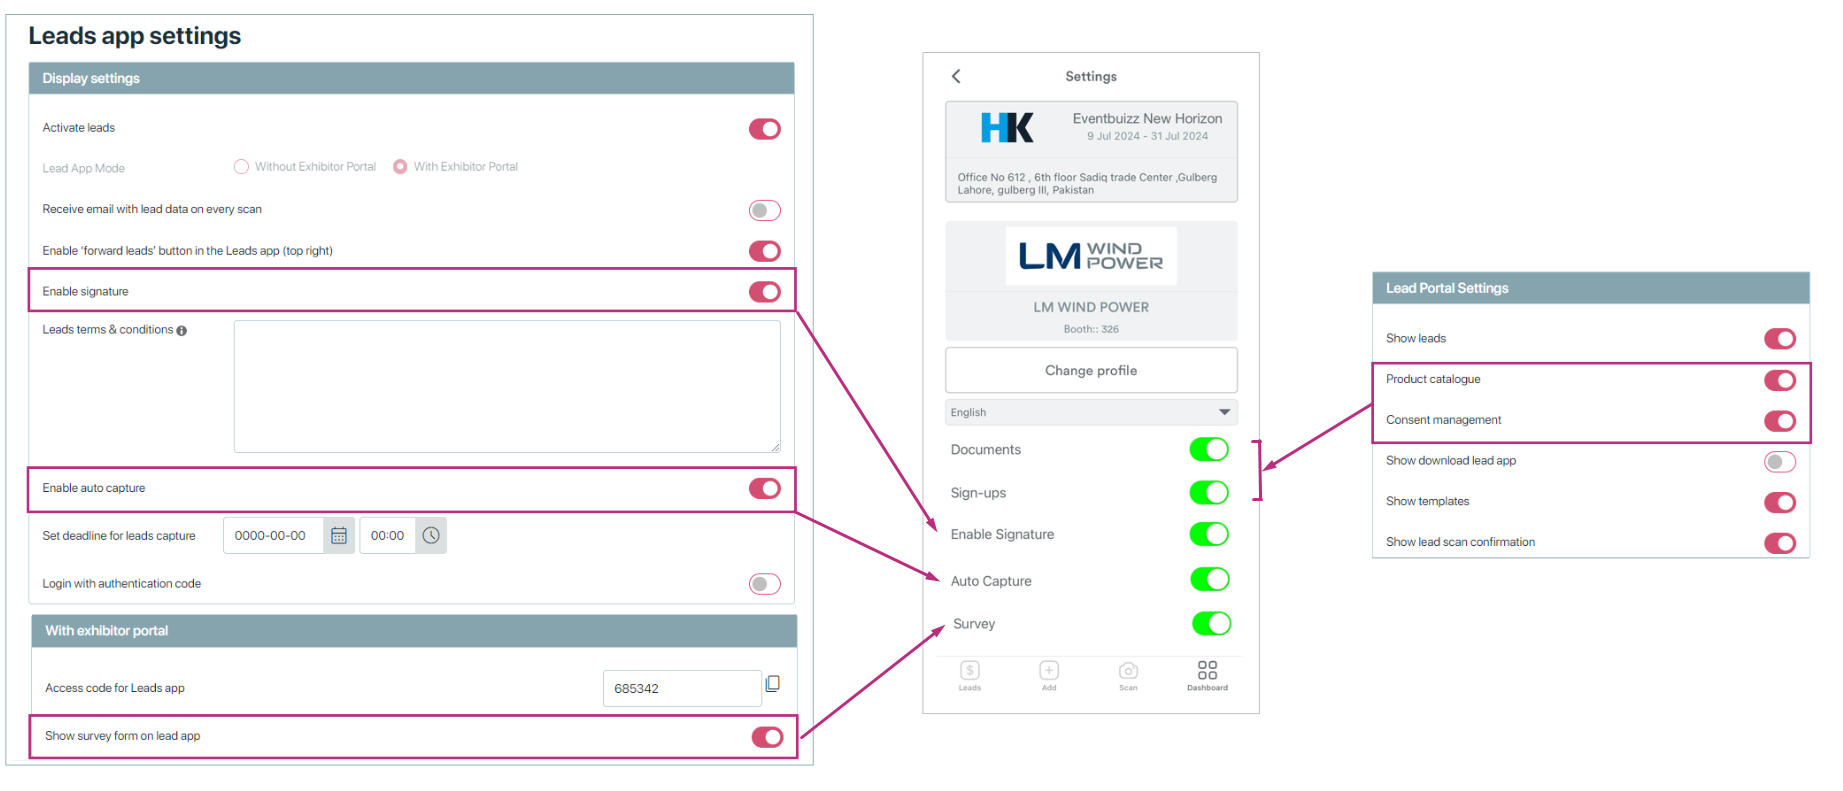
Enable auto captures: This option likely automates the process of capturing lead information. When enabled, the app may automatically scan and save the lead without requiring manual confirmation.
When you enable “Auto capture” setting from leads app, Look for the access code for in the event and add in this box.
After adding access code, auto capture feature successfully has been enabled.
