If you wish to communicate with your attendees before, during and after your event, you have 2 options: Use the module News and update or the email template App invite.
The feature “News and update” provides you with a tool that enables you to communicate with your attendees very easily. You can preschedule messages to be sent at a certain time and date or you can send out the message instantly. In addition to sending out a message you can also ask the system to send a copy of the message to the attendees email, making sure that everybody receives the message. If you always wish to send out the message as a text message, please be aware that additional cost apply.
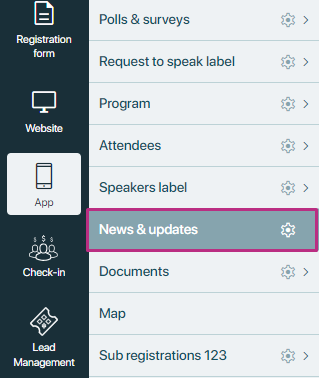
Accessing the news and update from eventcenter
Begin by locating the main menu. Look for the section labeled “Apps.” Within the “Apps” section, browse through the labeled “News and Updates.” Click on or tap “News and Updates” to enter this module. This will open a new page or interface where you can manage news and updates.
addnewsandupdate
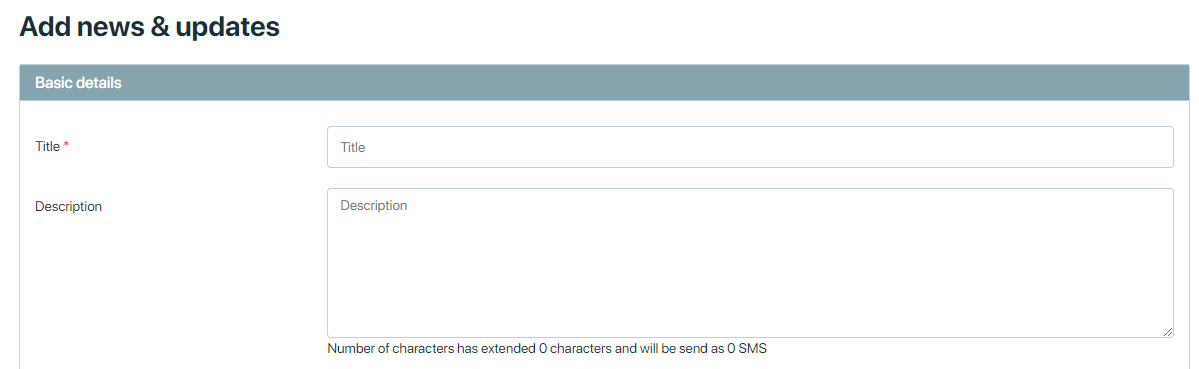
Add news and update
To add new news, look for a button “Add News”. Click this option to open a form where you can input the details of the news or update. News and update information divided into two sections.
Basic details:
-
- Title: This field is where you input the title or name of the event or notification.
- Description: This is a text box where you can provide a description or additional details about the event or notification. The text might be displayed or sent along with the title to the attendees.
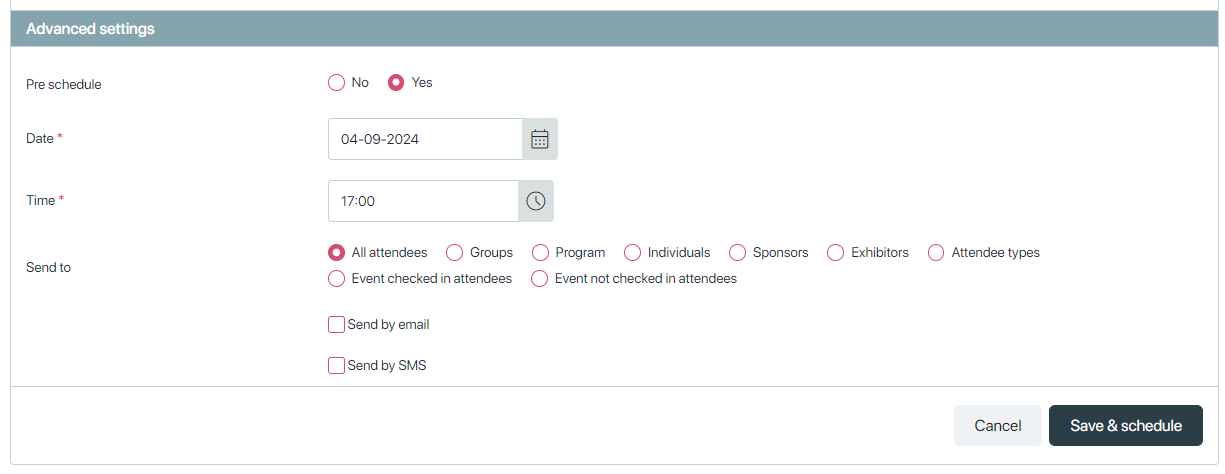
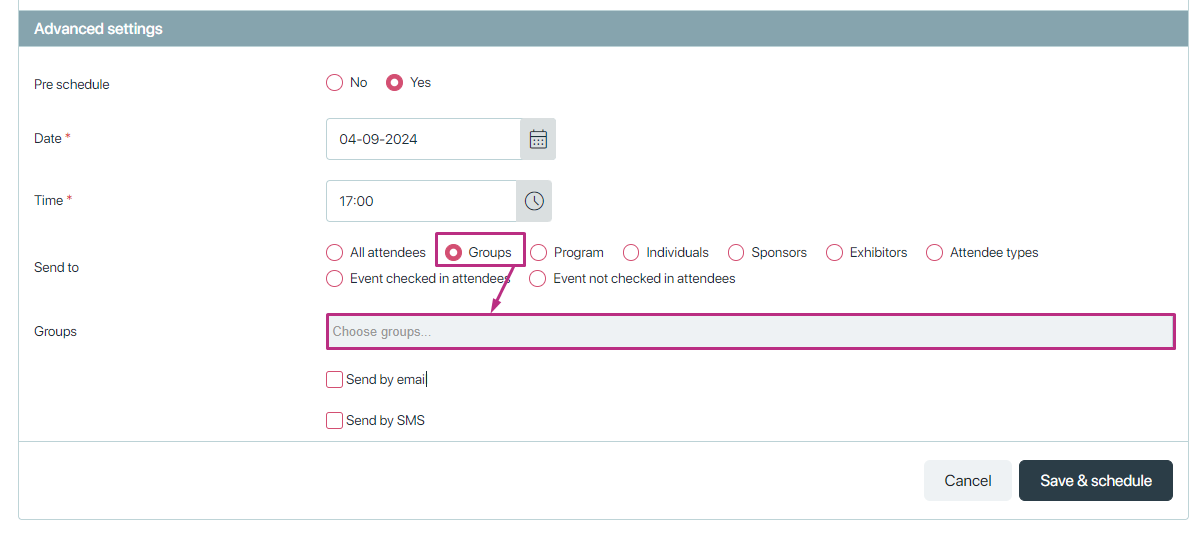
Advanced settings
The advanced settings includes pre-scheduled and send to option:
-
-
Pre-schedule (Yes/No):
This option allows you to choose whether the event or notification should be scheduled in advance. If you select “Yes,” additional options for date and time will appear.-
Date (Required Field):
-
- This is the date when the event or notification is scheduled to occur. The calendar icon allows you to pick the date from a calendar view.
- Like the title, this is also a required field, so it must be filled out before proceeding.
-
-
Time (Required Field):
-
- This field allows you to set the specific time for the event or notification. The clock icon can be used to pick a time more conveniently.
- This is also a mandatory field.
-
-
-
-
-
Send to:
You can send news and alerts to the following and If you select any option other than “All Attendees,” a field will appear where you can choose multiple options.- All Attendees: Sends the notification to everyone who is part of the event.
- Groups: Allows you to send the notification to specific groups of people.
- Program: Sends the notification to individuals associated with a specific program.
- Individuals: Allows you to send the notification to specific individuals.
- Sponsors: Targets the notification specifically to sponsors of the event.
- Exhibitors: Sends the notification to exhibitors involved in the event.
- Attendee Types: Allows for the selection of specific types of attendees to send the notification to.
- Event checked in attendees: This option sends the notification only to attendees who have checked in to the event.
-
-
-
Send by email: If this checkbox is selected, the notification will be sent via email to the chosen recipients.
-
-
-
Send by SMS: If this checkbox is selected, the notification will be sent via SMS to the chosen recipients.
-
Clicking the saves the news and update or notification details and schedules it based on the settings provided.
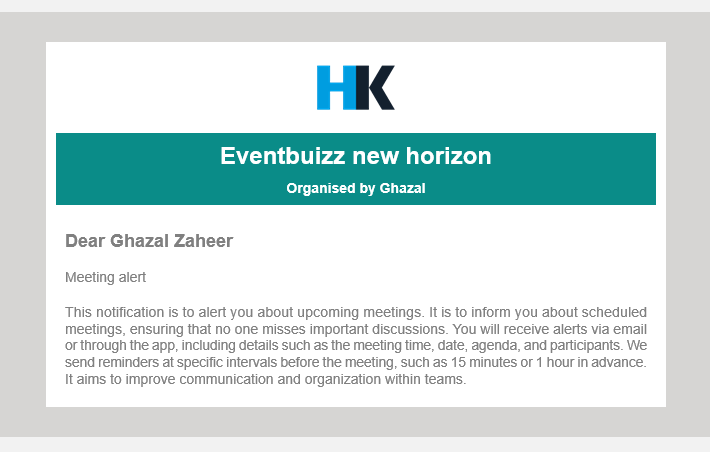
You will get an email like this:
News and update listing
News and update listing
The new updates and news that are added will show up in the list. To edit, delete and see logs. click on the three dots icon.
- Edit: Allows the user to modify or update the content of a news and update. This feature is useful for correcting mistakes, updating information, or adding new details to existing news.
- Delete: Enables the user to remove a news and update from the platform entirely. This might be done if the information is no longer relevant, contains errors, or is no longer needed.
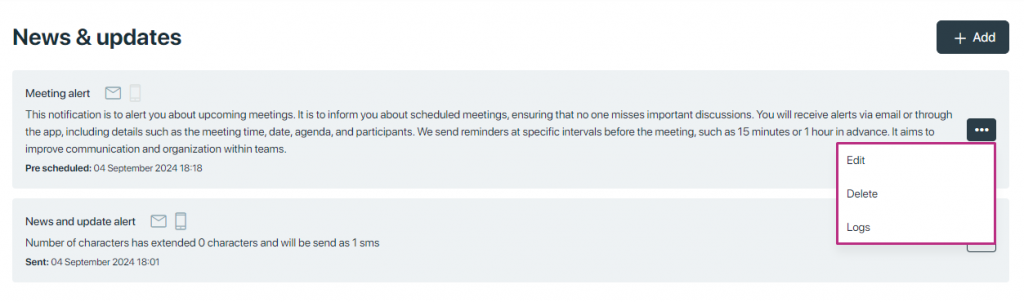
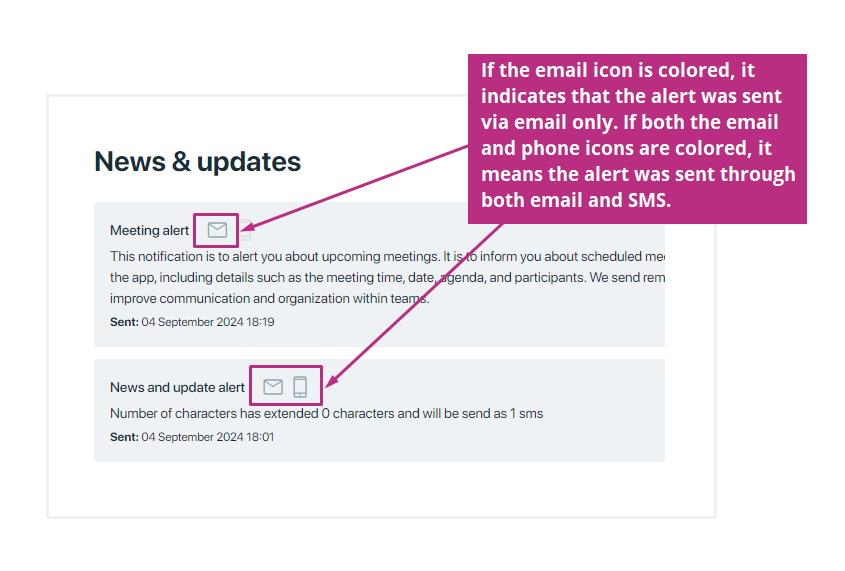
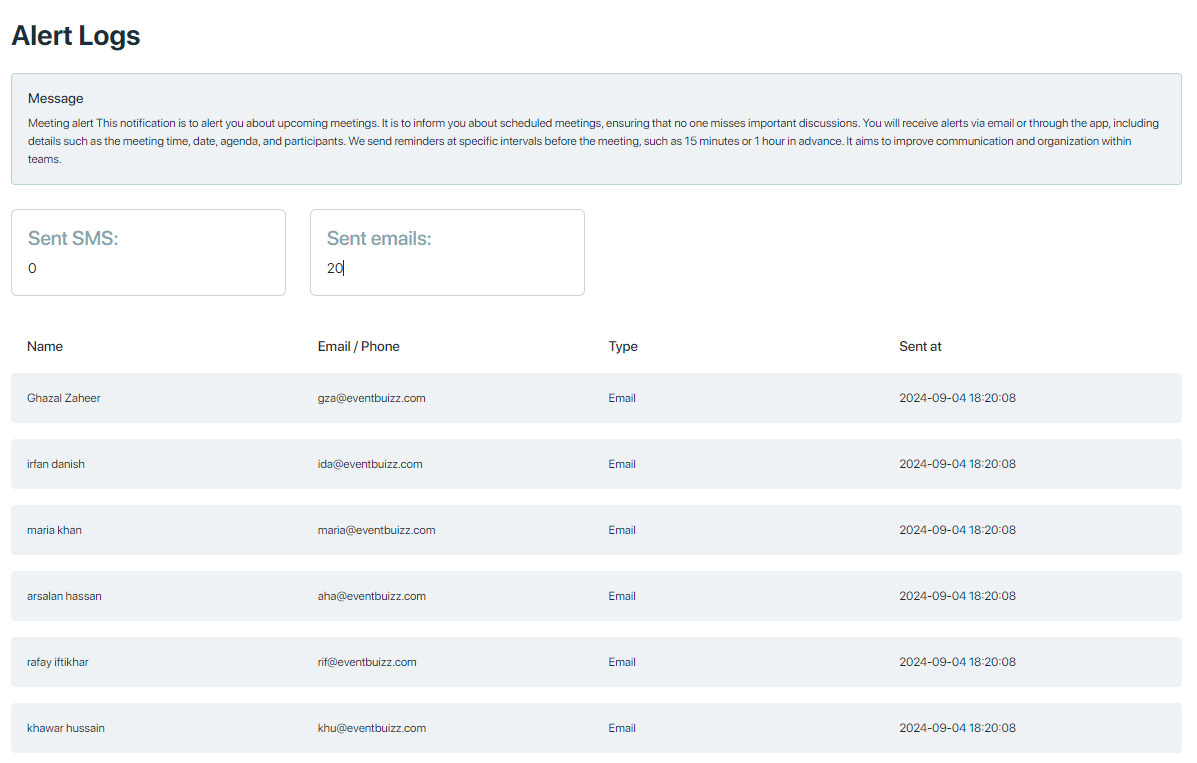
- Logs: refer to sections where logs related to alerts itself are recorded and displayed. These logs show whether the alerts were sent by SMS or email. They display separate counts for alerts sent by SMS and those sent by email.
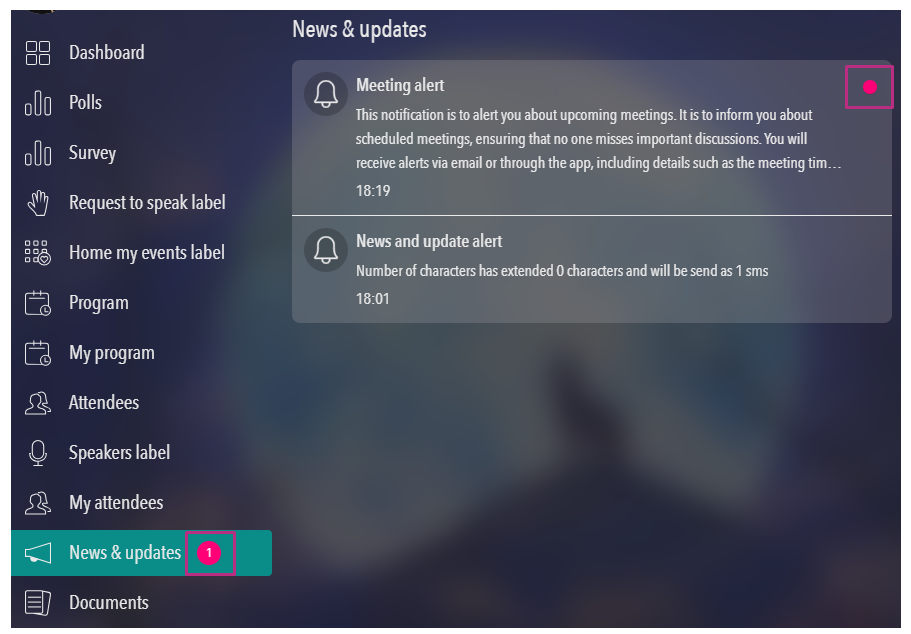
How news and update appear on app
Enable/disable module: Organizers can manage the visibility of the “news and updates” section in the app through the event center. This lets them control whether attendees can view and receive alerts for news and updates on the app.
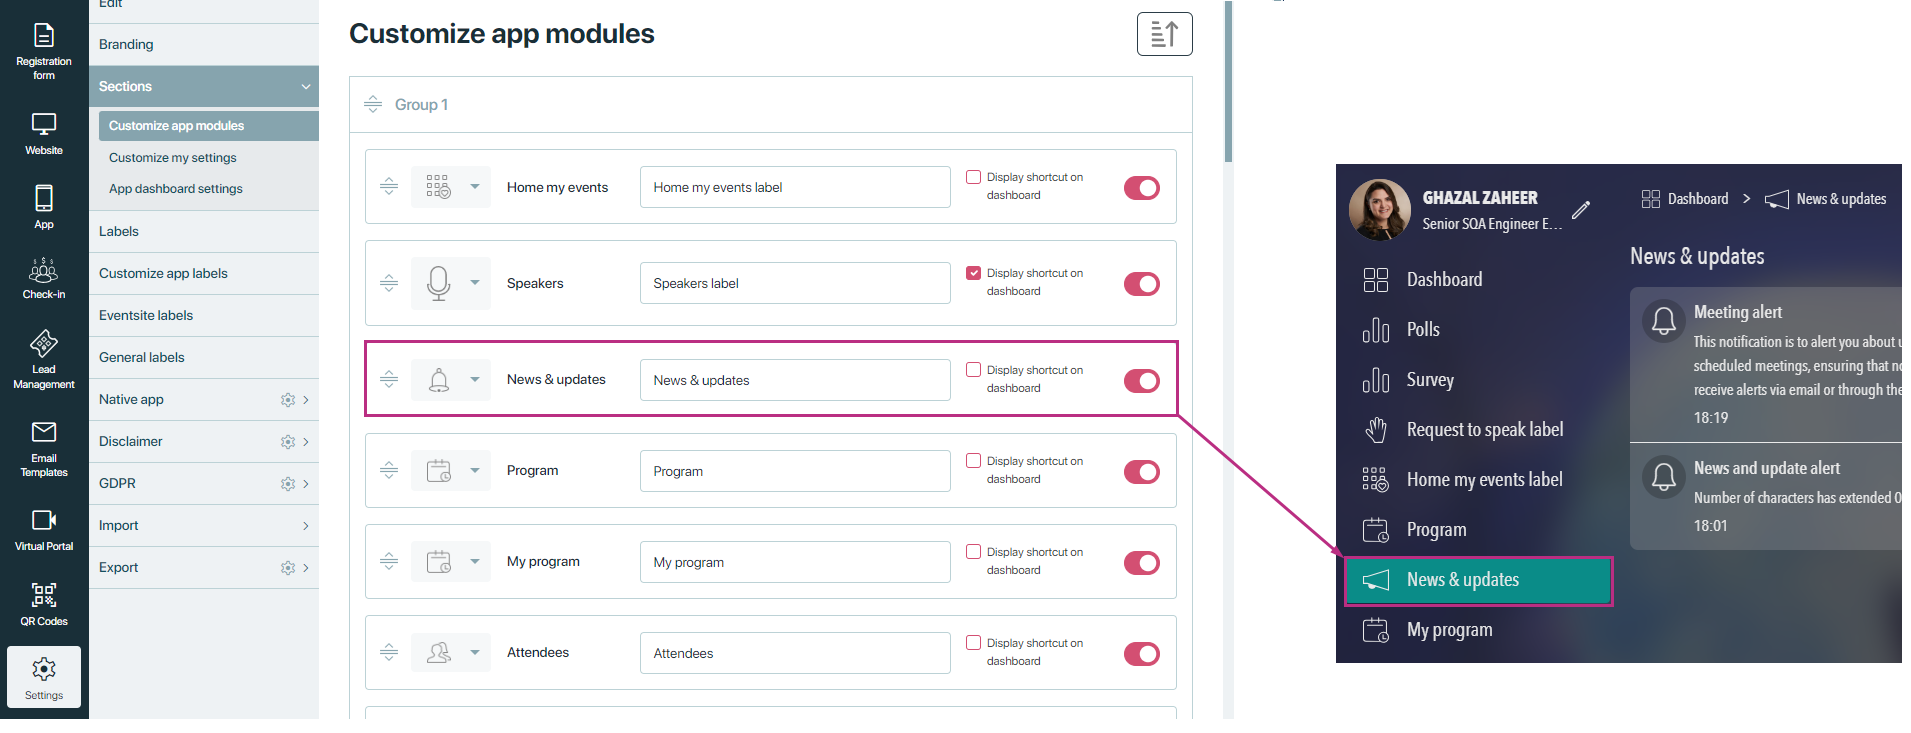
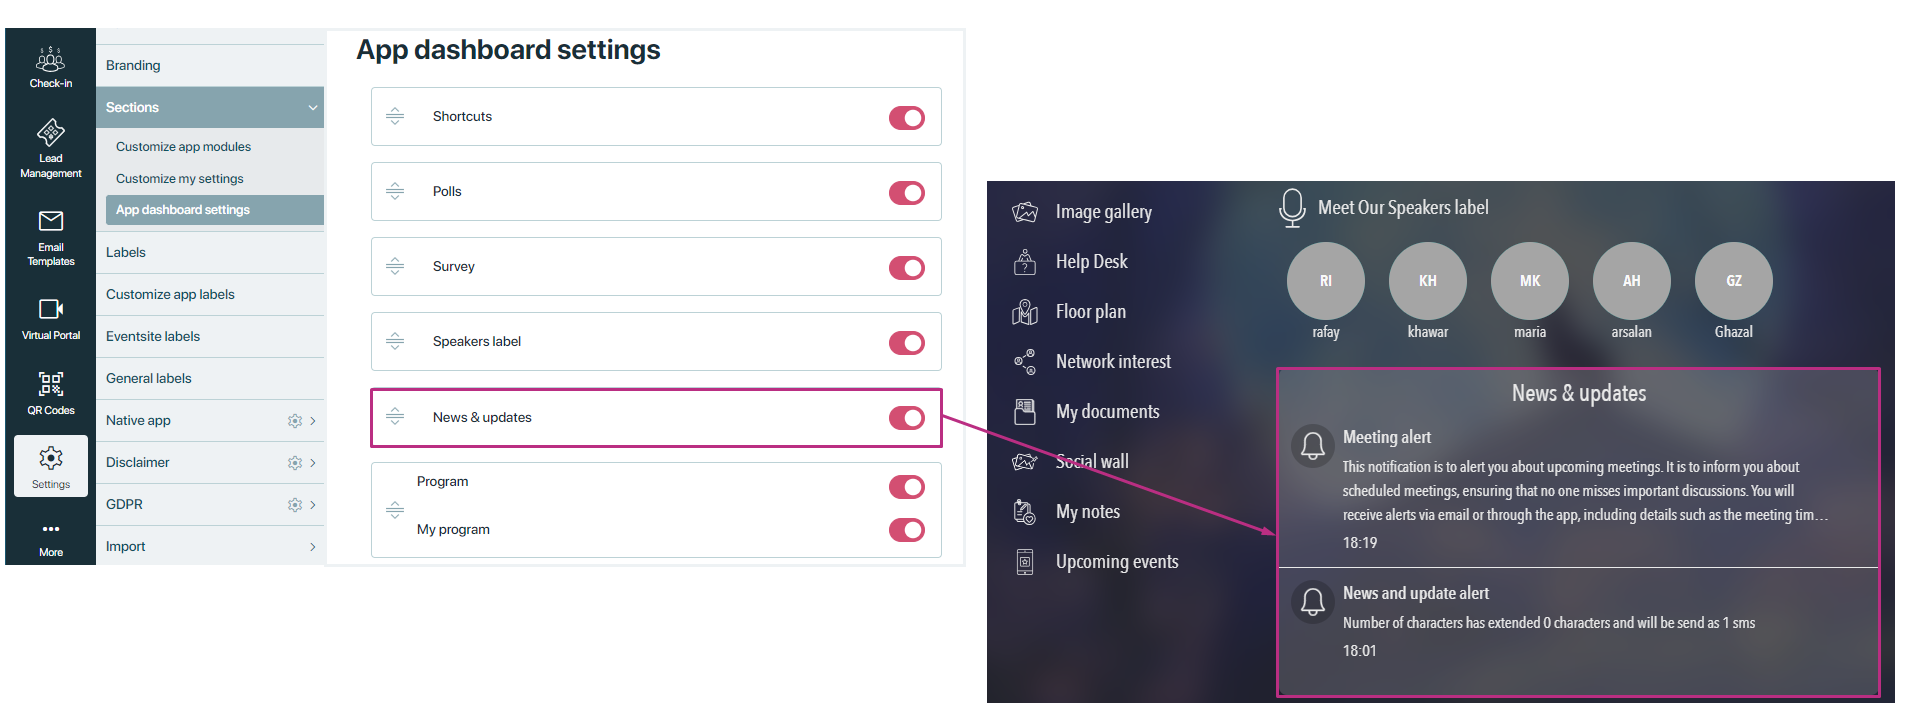
The visibility of “news and updates” on the dashboard will be controlled by settings -> sections -> app dashboard settings. If the dashboard setting is OFF, it will not affect the “news and updates” section in the left menu. However, if the main module setting is OFF, “news and updates” will not appear on the dashboard either.
The count displayed on the “news and updates” section shows the number of unread messages. Similarly, a dot is shown in the listing to indicate unread messages. Once a message is read, the unread symbol (dot) disappears.