The Registration Form Module Customisation empowers users to create a seamless and branded registration experience for their event attendees. From selecting themes to footer sections, users have the tools to design a registration form that reflects the identity and objectives of their event.
Key Features:
Registration Site Header and Footer
Theme Customisation
The Theme Customization feature allows users to personalize the appearance of their registration form by selecting from a variety of predefined themes. Each theme offers a unique layout and design, catering to different types of events and target audiences. Users can choose a theme that best represents their event’s style and enhances the overall user experience for attendees.
Different types of themes are available:
- Main home
- Grid home
- Meet up home
- Coaching home
- Symposium home
- Conference home
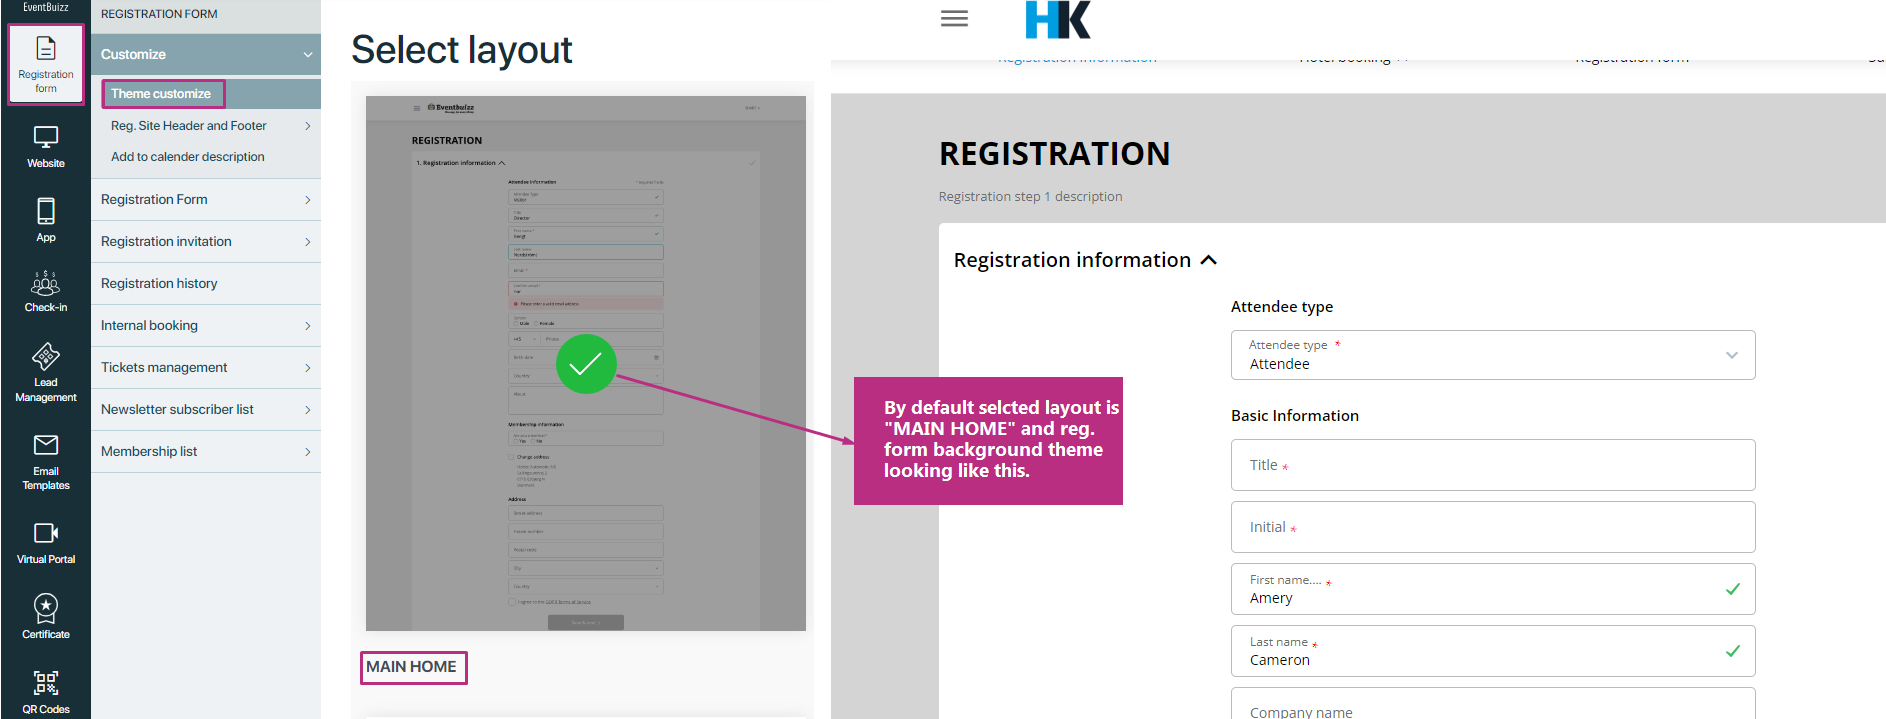
user can select theme as per their event requirements, by default selected layout will be “Main home”, here it will look like this
User can change by default theme to his own theme as per requirement of the event, let suppose user want to choose default theme to “Conference home” now registration site will look like this:

The Registration Site Header and Footer Management feature provides users with the ability to customize the header and footer sections of their registration site. This customisation enhances branding, and improves the overall user experience. Here are the three options available:
Event Opening Hours
The Event Opening Hours option allows users to display the operational hours of their event within the header or footer section of the registration site. Users can specify the start and end times of the event for particular date. Here is the explanation how user can set event opening hours.
How to add Event Opening Hours
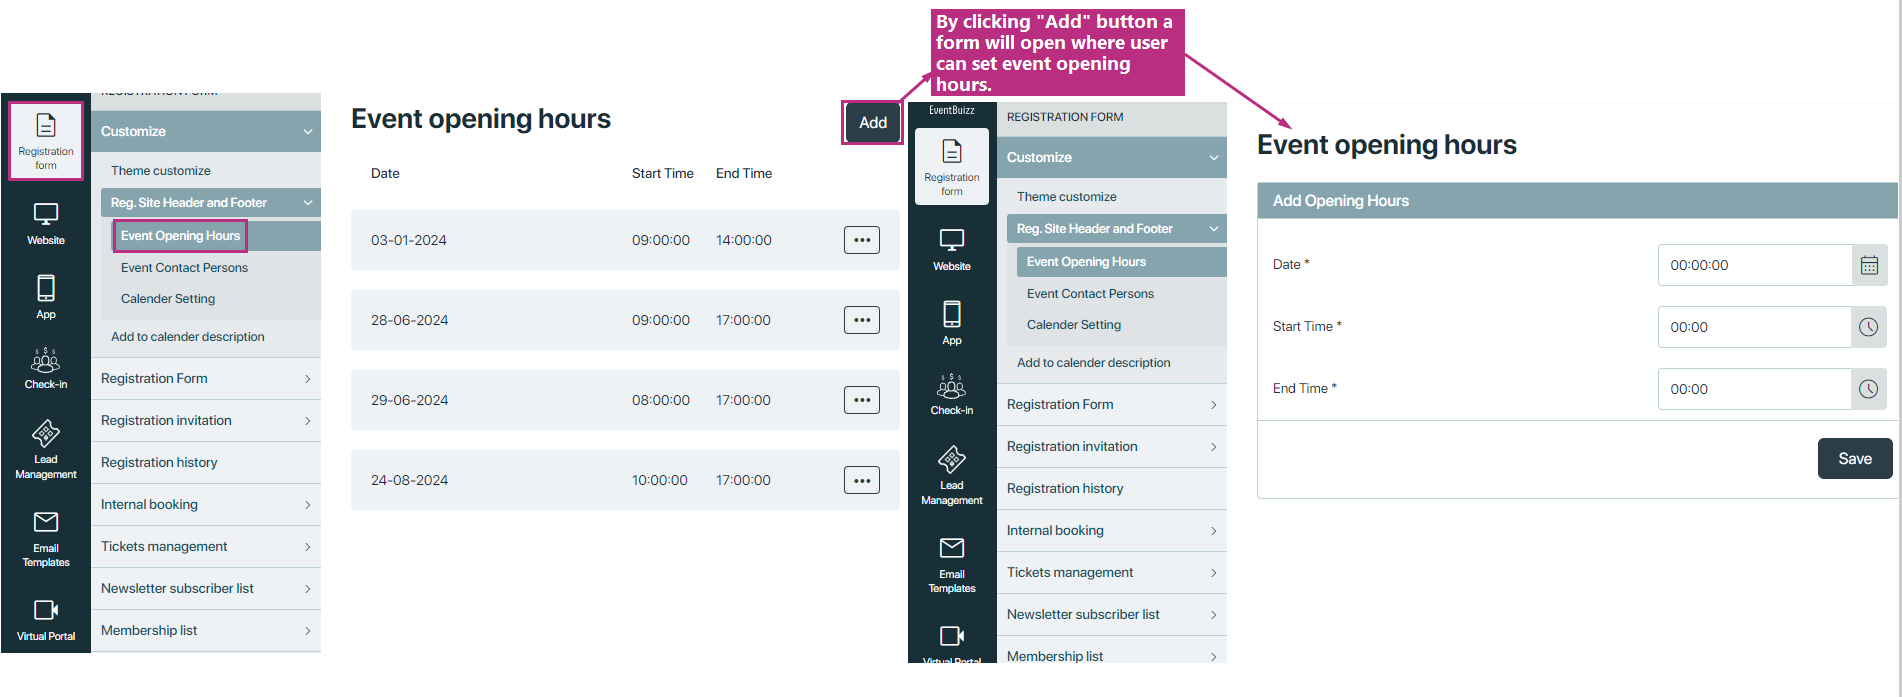
First step is to navigate on the Event Opening Hours screens, here is the path which need to follow.
Registration Form ->Customize -> Reg. Site Header and Footer -> Select Event Opening Hours from drop down list.
After navigation on the screen user will click on “Add” button and from will open where user will select date of the event and set start and end time, for better understanding check attached screenshot:
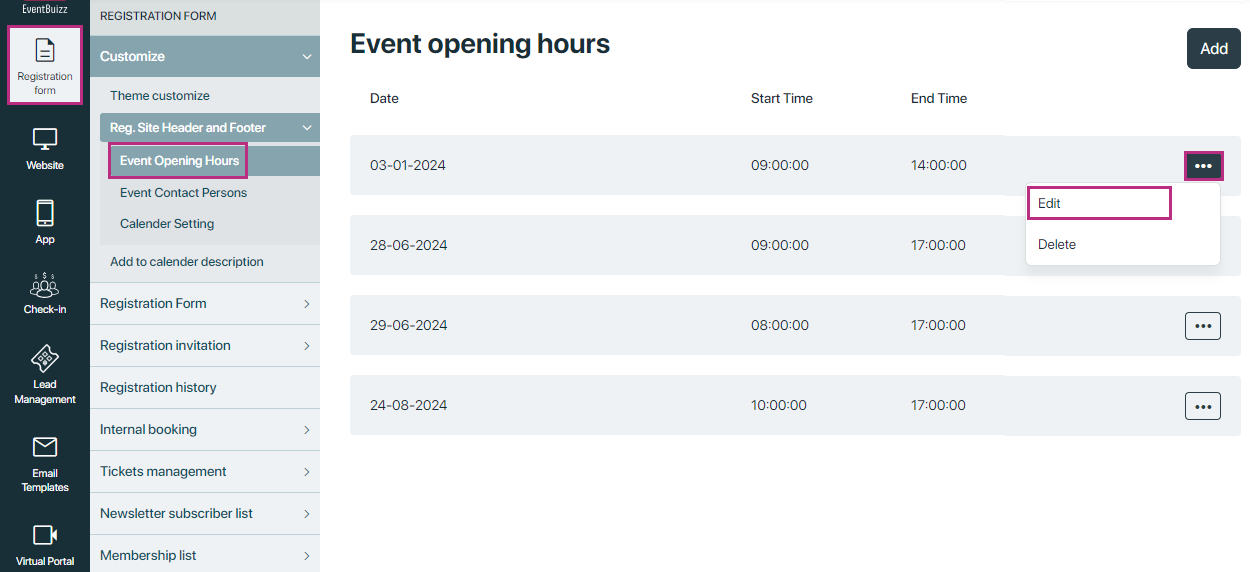
User can also “Edit” or “Delete” the created Event Opening Hours from the menu, check below attached screenshot:
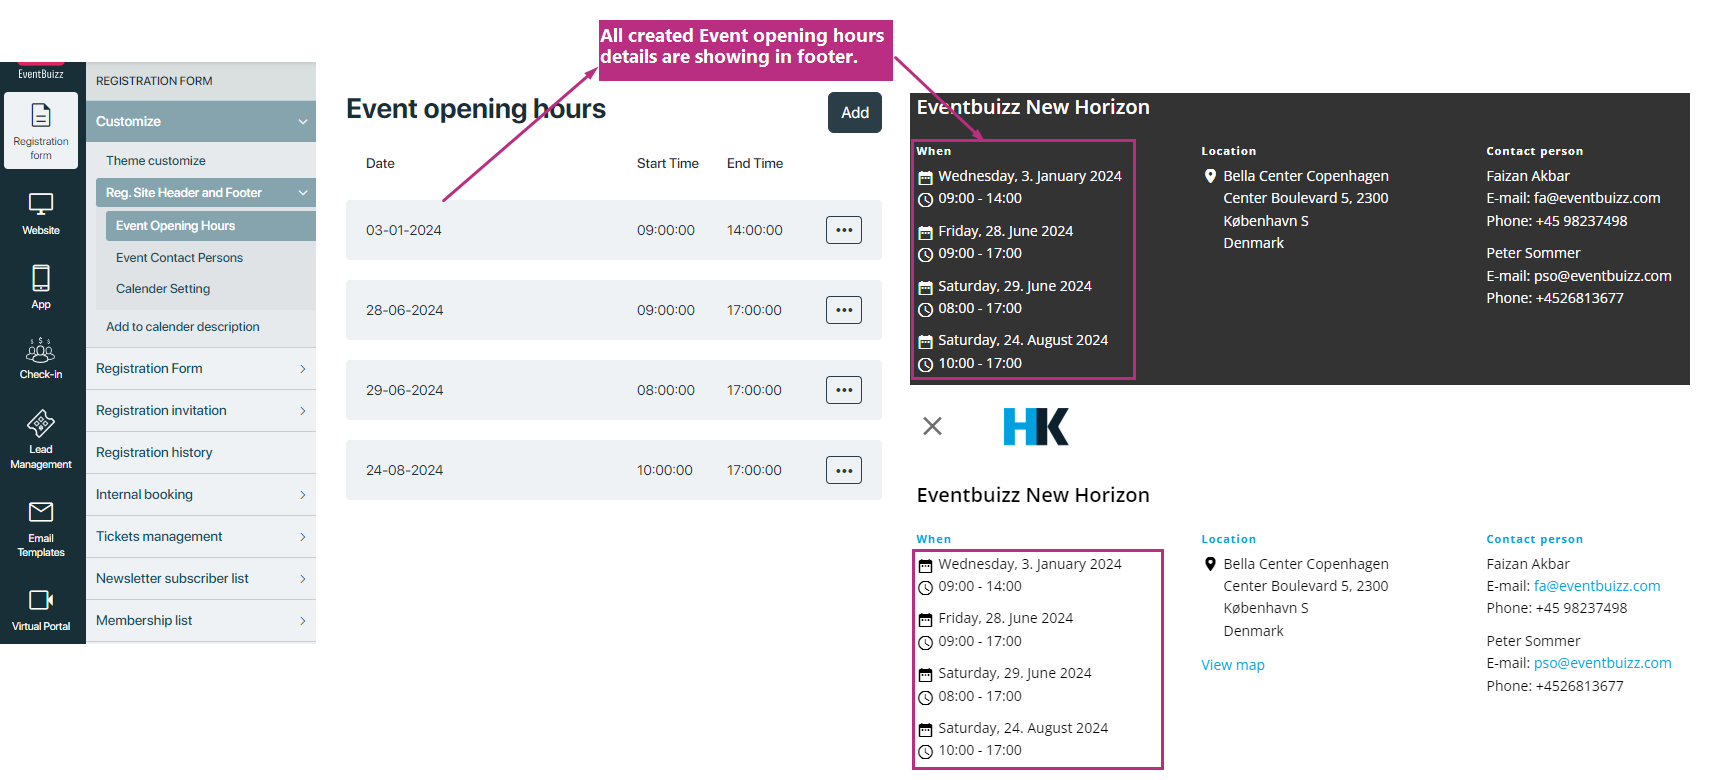
When user set Event Opening Hour, all hours for respecting dates will start showing in Registration side footer section. check below attachments:
Event Contact Person
The Event Contact Person option allows users to designate a specific individual or team as the primary point of contact for event-related inquiries. Users can provide contact details such as First name, Last name, email address, phone number. This ensures that attendees have a direct line of communication for questions, concerns, or assistance regarding the event.
How to Use:
- Navigate to the Event Contact Persons section within the Customise Registration form module
- Click on the “+Add” button for adding the contact person
- Fill the form with required fields like First name, Last name etc. check below attachments:

User can “Edit” or “Delete” the created contact person at any time from the contact person menu options.
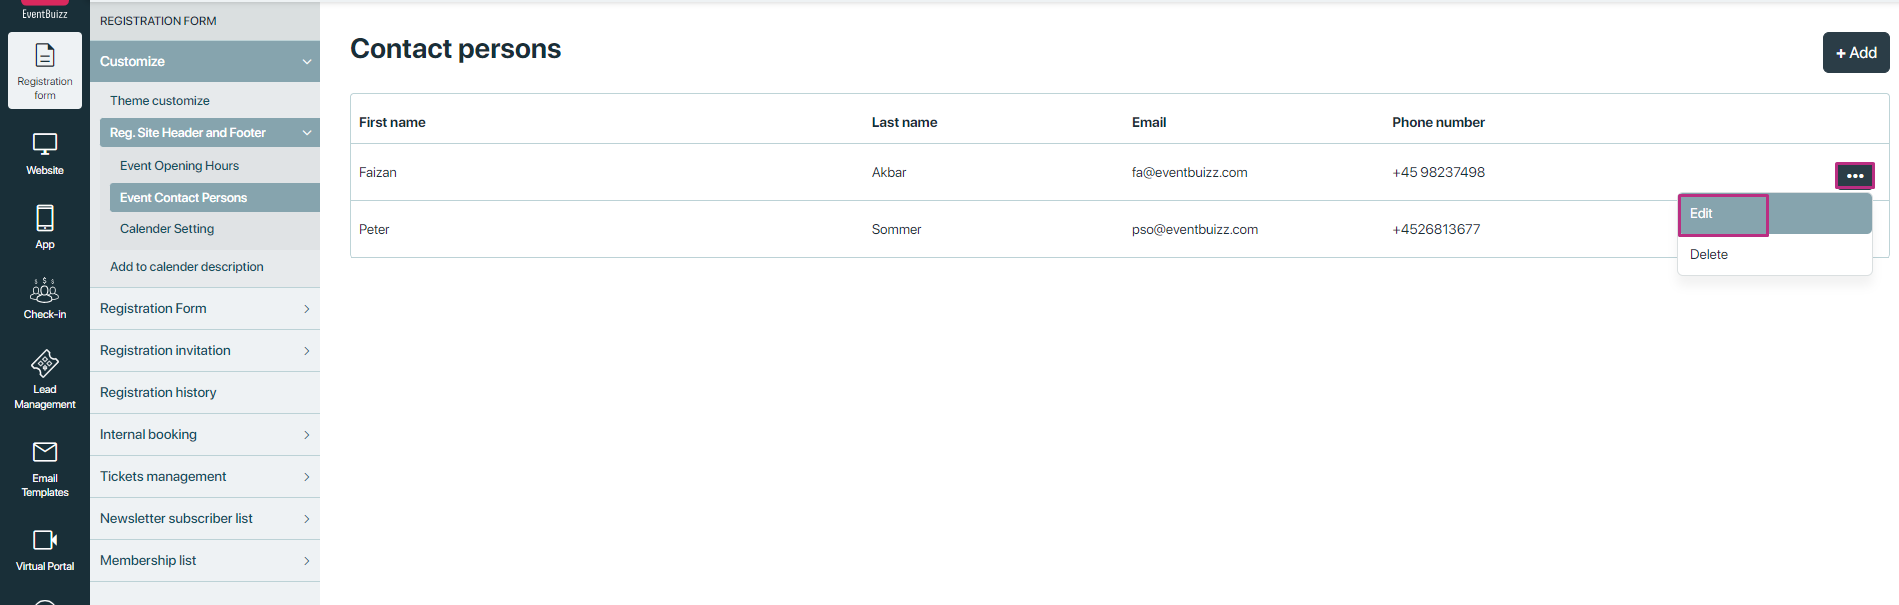
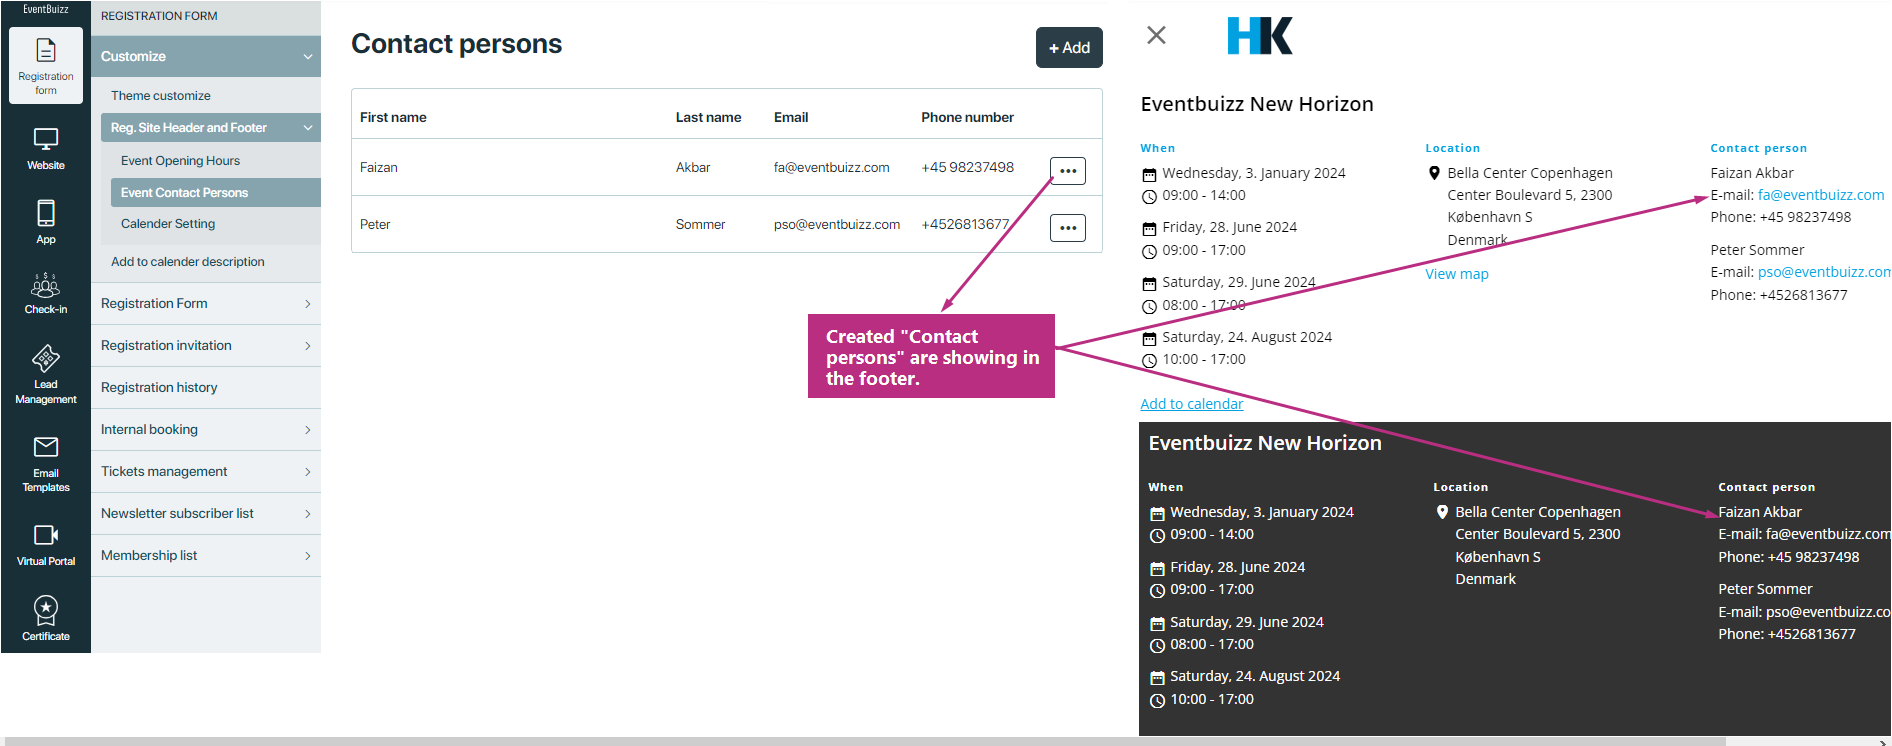
All added contact persons from the user will show in Footer section in the registration site. check attached screenshots:
Calendar Setting
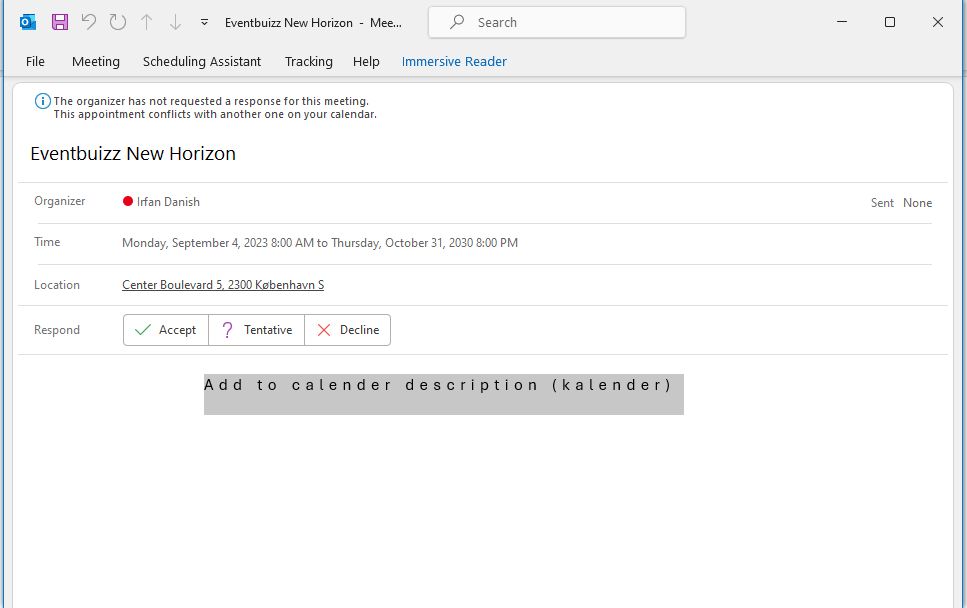
Enable “calendar setting” will show “add to calendar” URL in footer section, if user don’t want to show it, he can disable it as well. And when attendee click on that URL a .ics file will download, in this file attendee have info of event name, organiser name, event start date to event end date and time, also added calendar description from event organiser as well. Check attached screenshot, how it works:
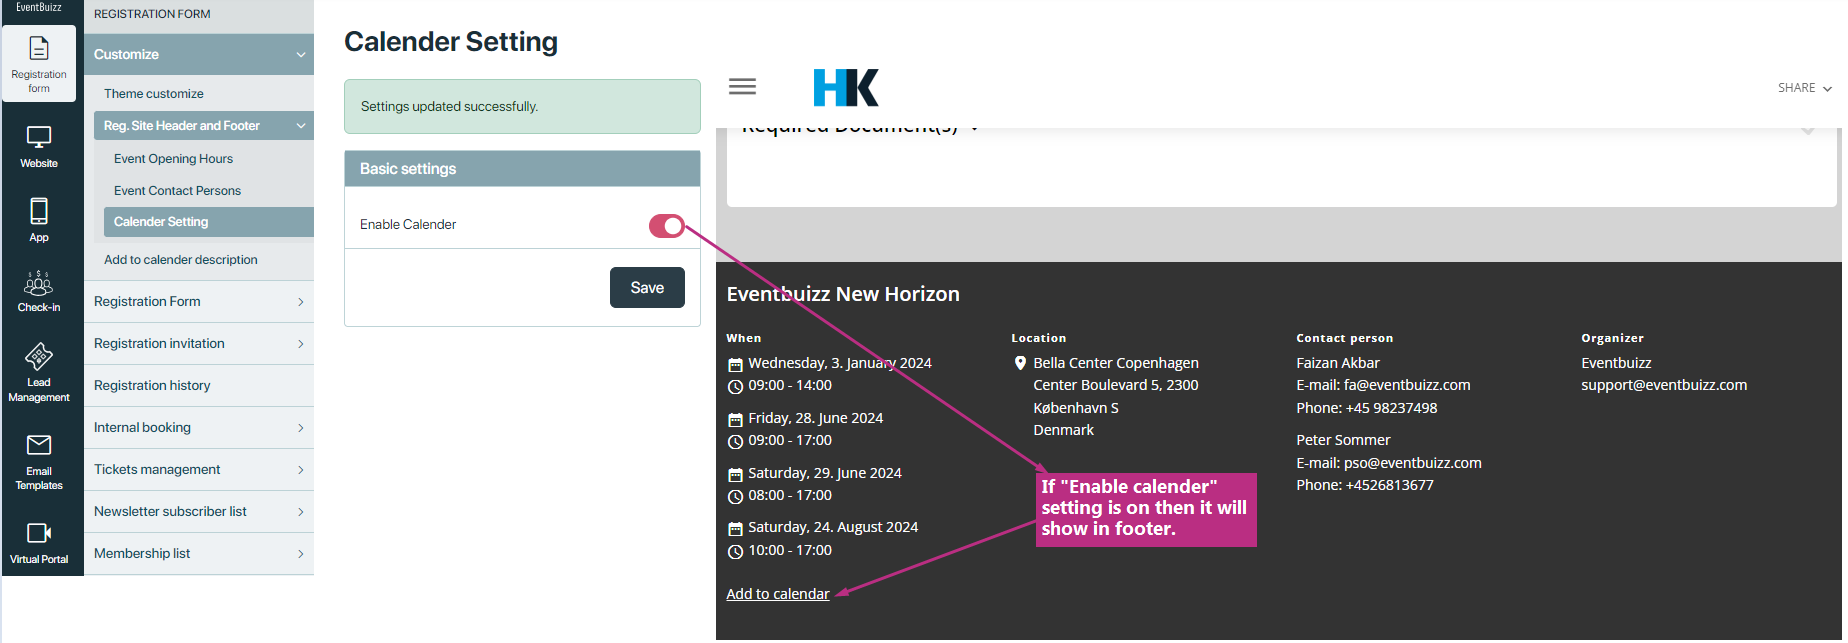
If “Enable Calendar” setting is disable then it will not shown in footer section.
And also after downloading file, when attendee open this file it will look like this:
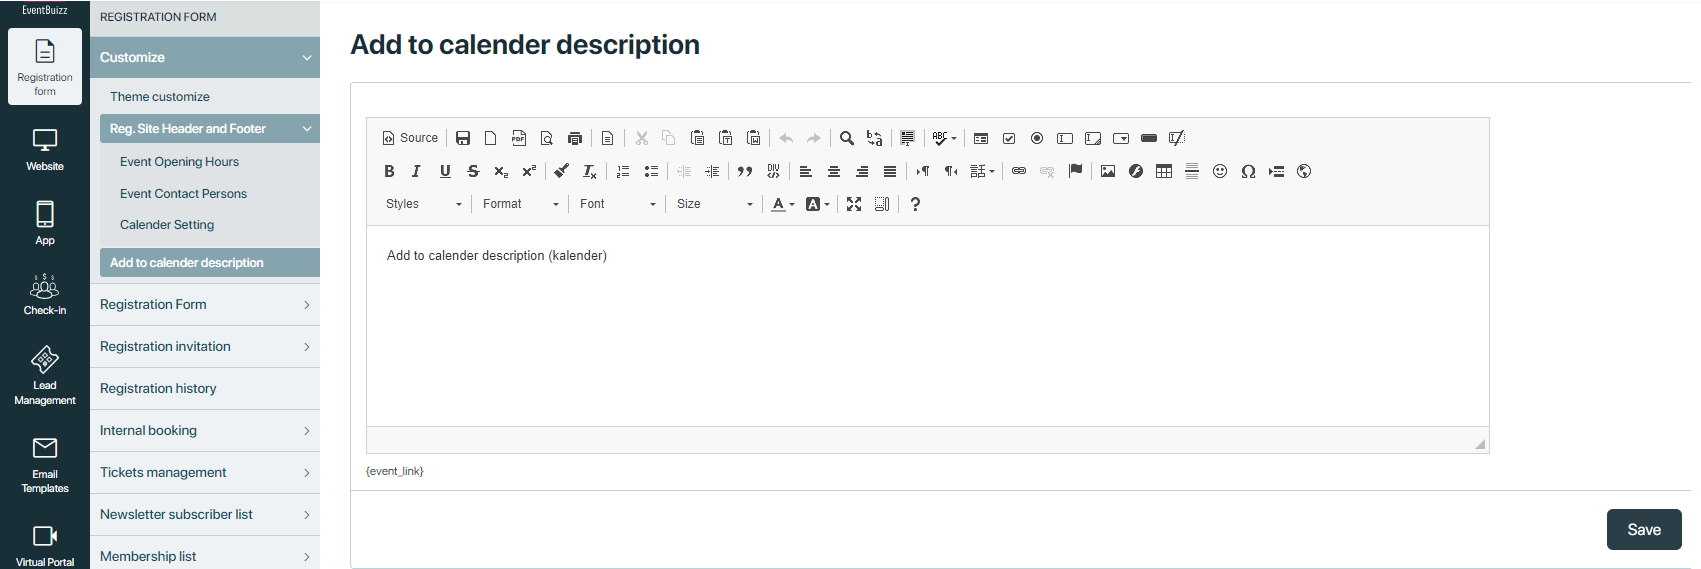
Add to calendar description
The “Add to Calendar Description” feature enables users to customize the event description that appears within the .ics (iCalendar) file when attendees download it to add the event to their personal calendars. This customisation allows event organisers to provide additional context, details, and instructions to attendees directly within their calendar applications. Here’s how users can utilise this feature:
Accessing the Feature:
- User navigate to the “Add to calendar description” and can customise description as he want
And in .ics file description will look like this.
