The “social media” module allows event organisers to link their event to various social media platforms. This provides attendees with easy access to the event’s social media presence, promoting engagement and interaction across different channels.
Functionality
Accessing social media module:
-
- Navigation path: Organisers can access this section through eventbuizz by navigating to:
- Eventcenter->app->social media

The social media module consist of two main sub-section, detail is given below:

Social media
Social media
Social media placeholders:
- Overview: The interface displays placeholders for various social media platforms such as Facebook, x, Instagram, LinkedIn, and others.
- Adding URLs:
- Input fields: Each placeholder has an input field where organisers can enter the URL for the corresponding social media profile or page.
- Save changes: After entering the URLs, organisers must save their changes to update the social media links.
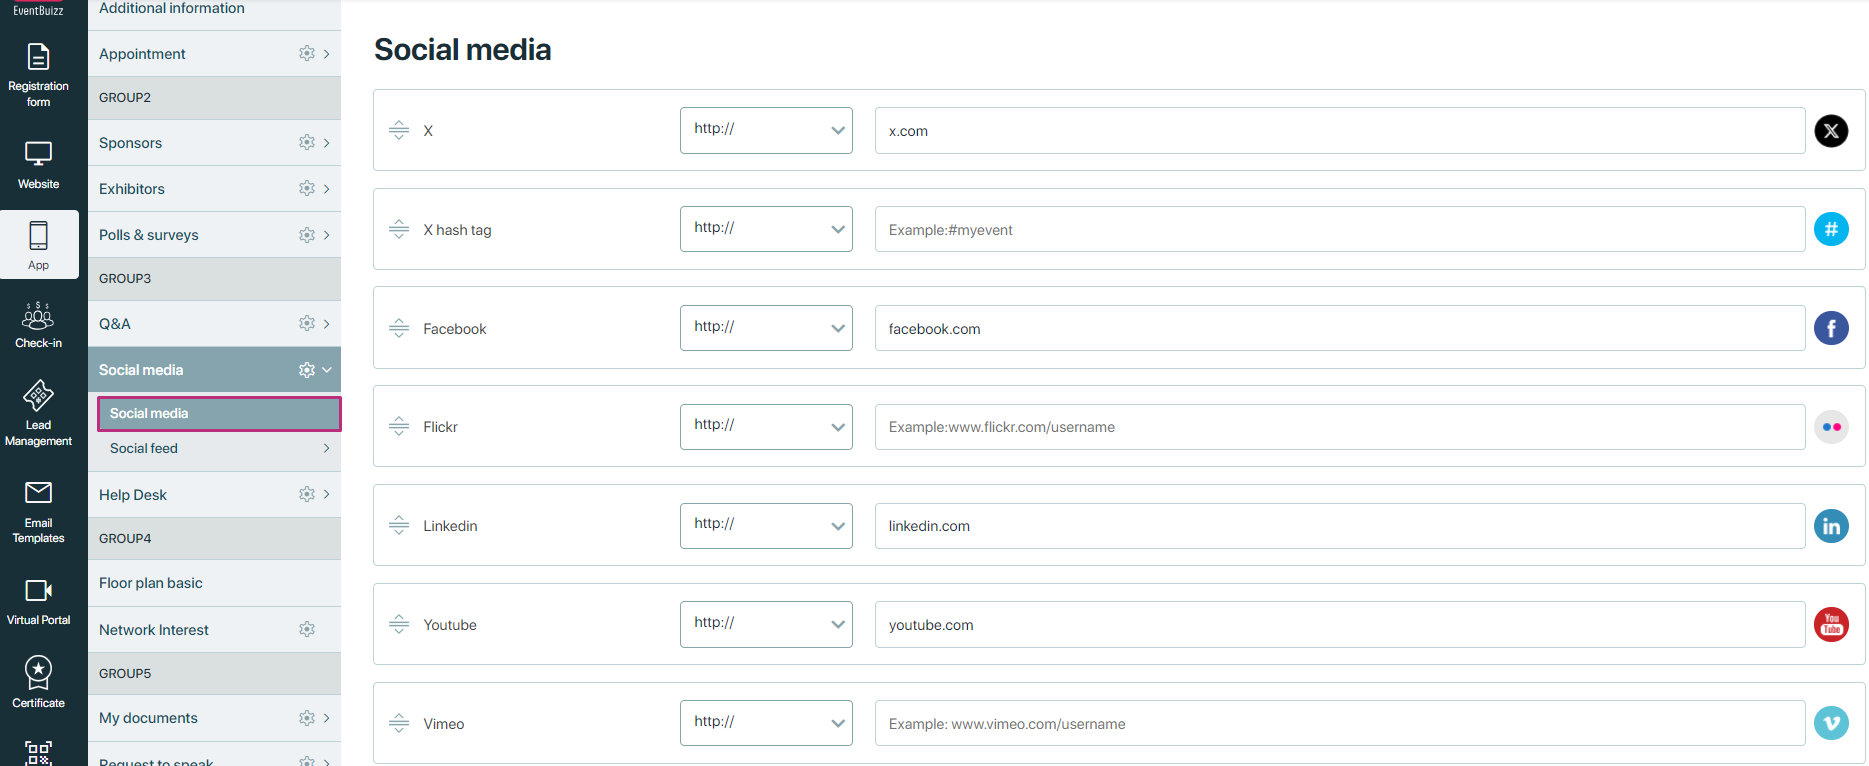
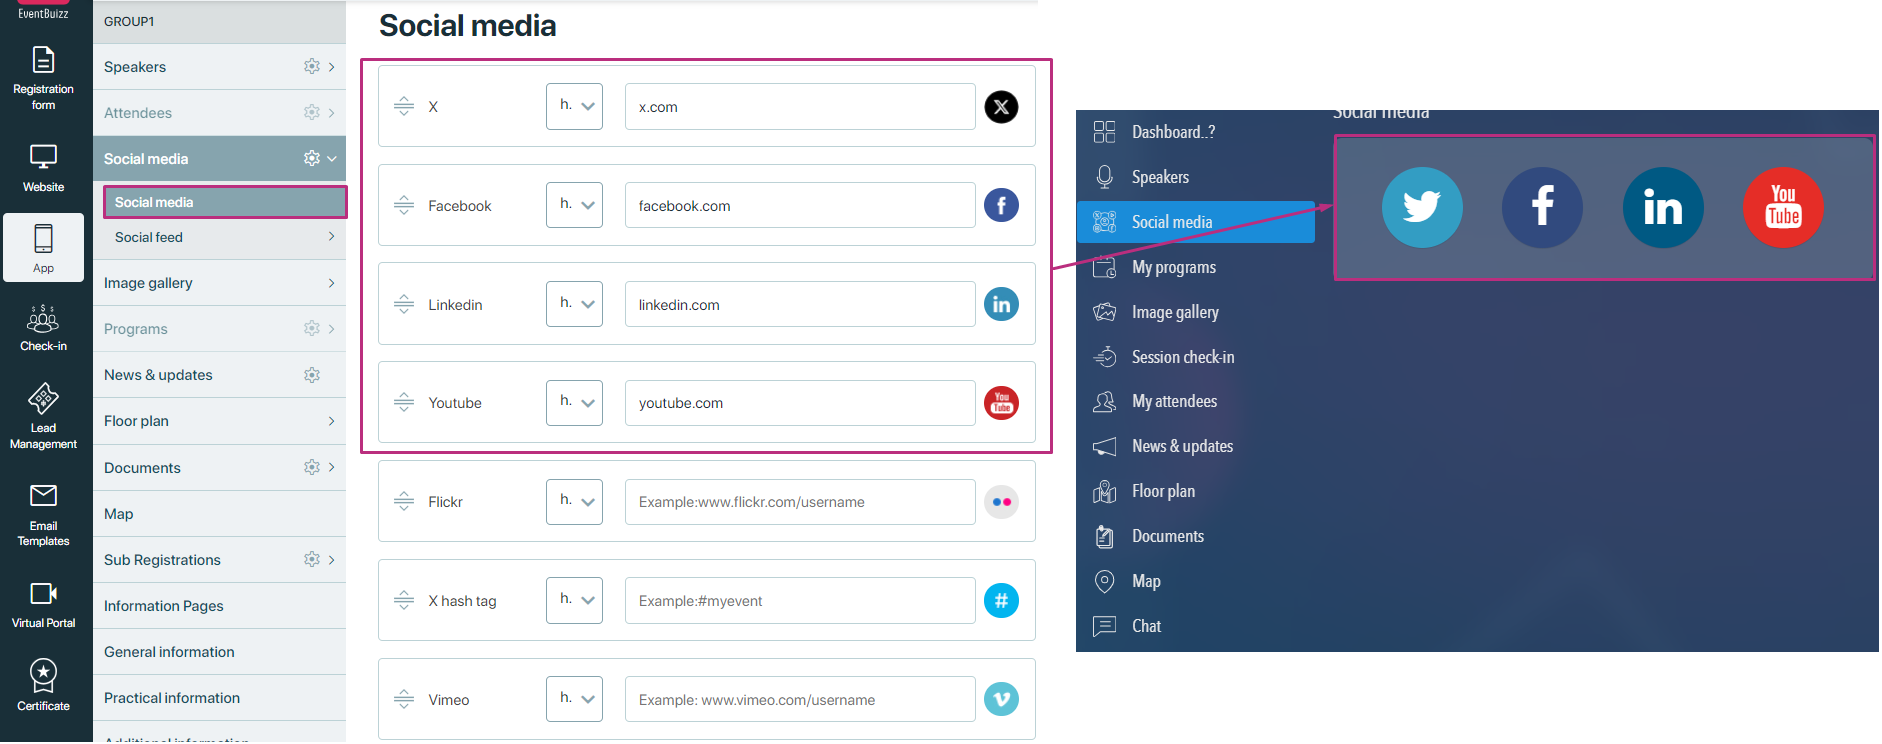
Once URLs are added and saved, corresponding social media icons will be displayed in the social media module on the event’s web app.
Accessing social media on web app:
- Visibility: Once URLs are added and saved, corresponding social media icons will be displayed in the social media module on the event’s web app.
- Interactive icons: Clicking on any of these icons will redirect users to the specified social media link, allowing attendees to view and interact with the event’s social media content.
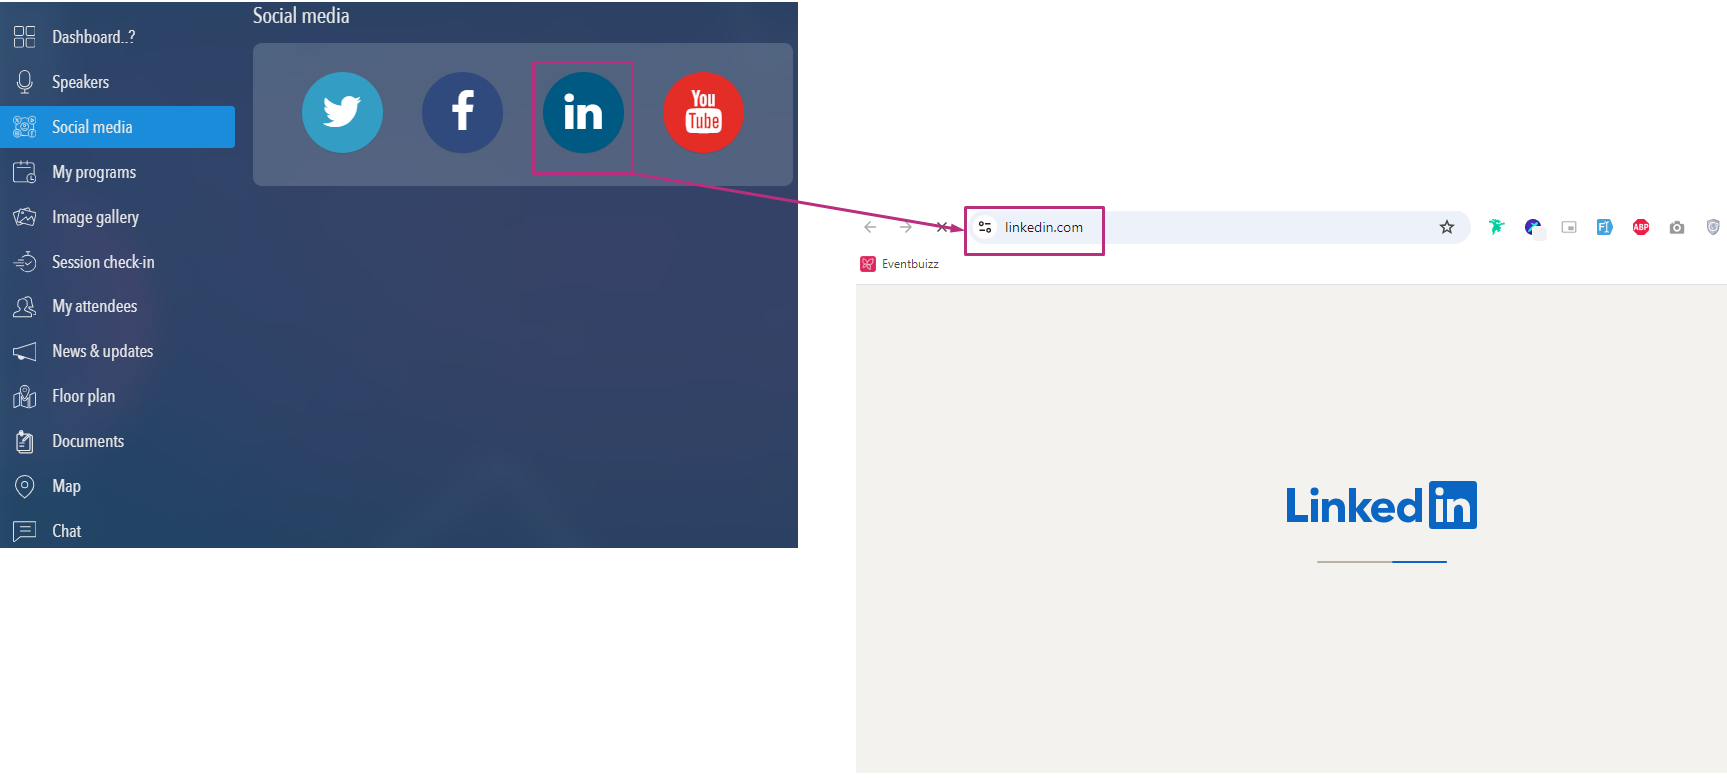
And when user click on any social media icon, it will redirect attendees on given URL which is added by organiser.
Social media setting
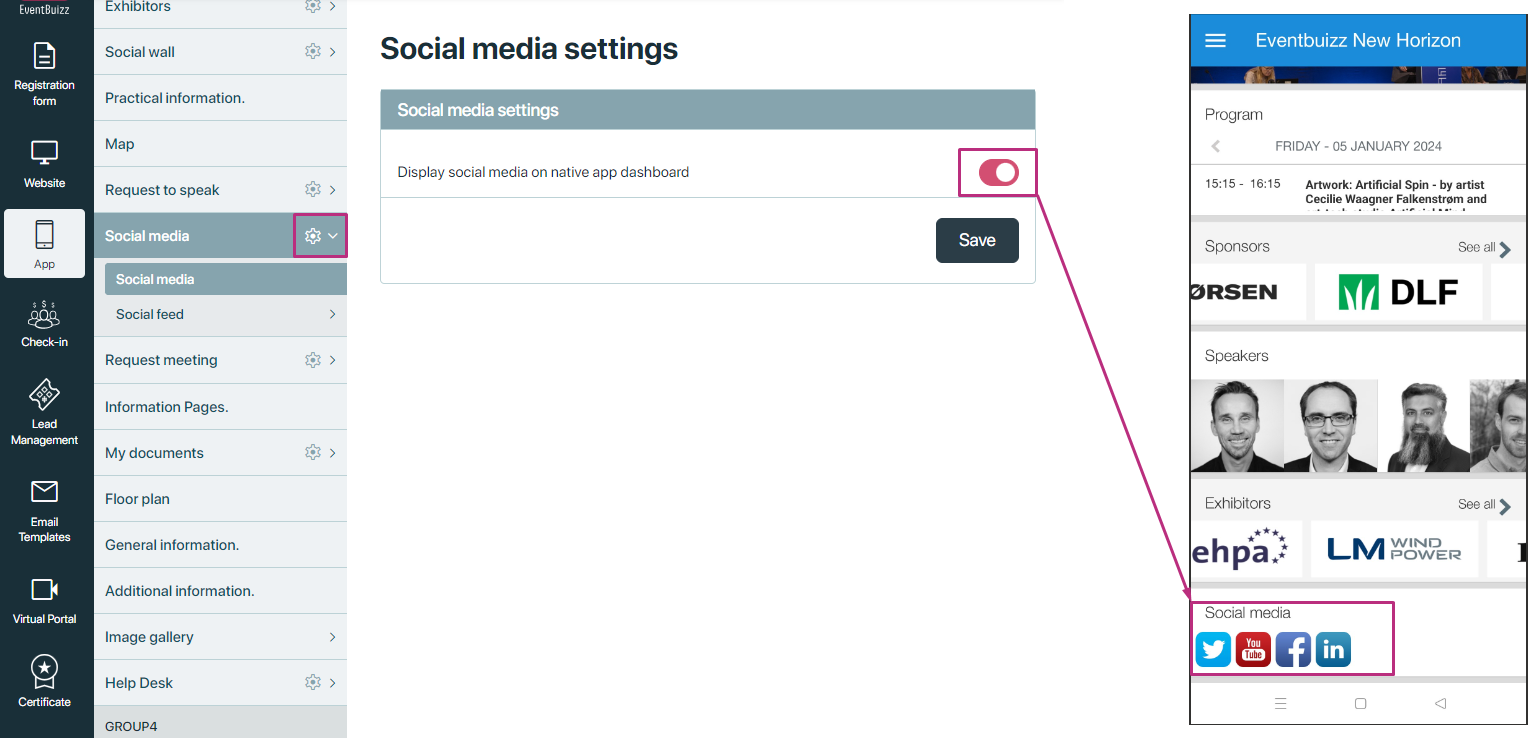
In the “social media setting” organiser can configure the setting of social media module. This setting allow organiser either he want to display social media on native app dashboard or not, if setting is off then it will not display on dashboard, and if setting is on, all the given social media link in place holder will display in social media container in dashboard. Here is the example how it works?
Social feed
Social feed
The “social feed” section in eventbuizz is designed to integrate and display live social media content during an event. Its primary purpose is to engage attendees by showcasing real-time updates, posts, and interactions from various social media platforms directly onto the event’s projector screen or digital display. This helps to create a dynamic and interactive experience for attendees, encouraging them to participate and share their own content related to the event.
Accessing social feed:
-
- Navigation path: Organisers can access this section through eventbuizz by navigating to:
- Eventcenter->app->social media->social feed
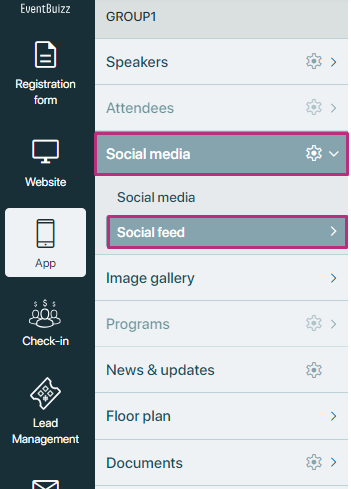
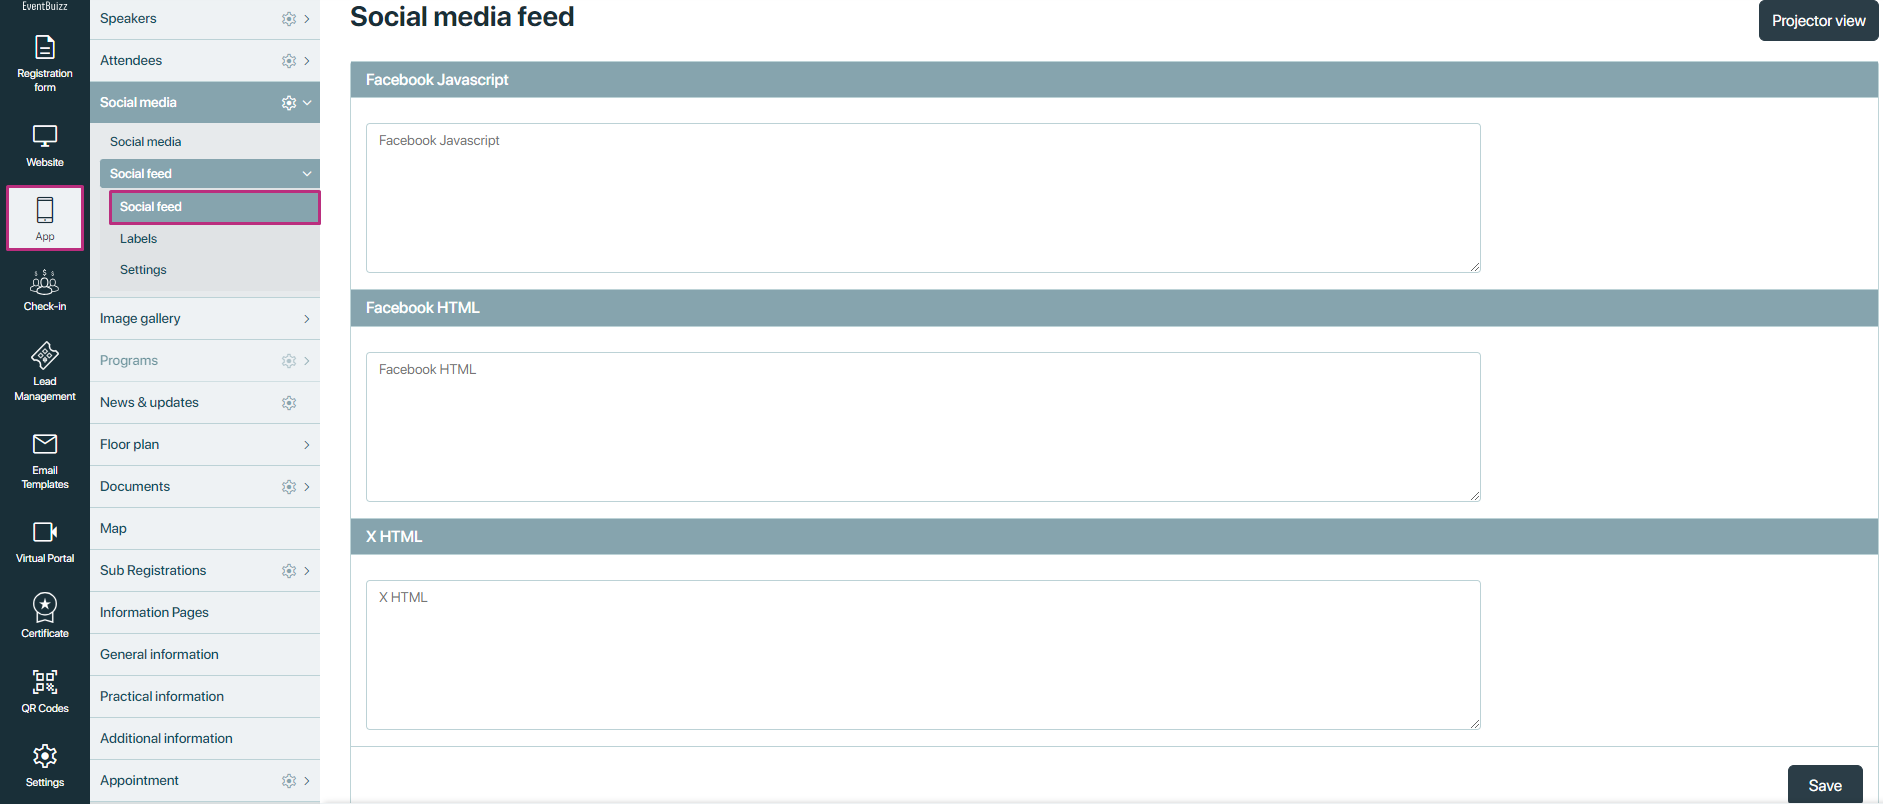
Social feed consist of three main options, detail is given below about each option.
Social feed
How it works?
Integration of social media content: The social feed allows event organisers to embed and display content from social media platforms like face-book. Organisers can choose from different embedding options, such as java-script or HTML, to integrate social media posts or profiles into the event display.
Embedding social media feeds
Organisers can use various editors to add social media feeds:
- Facebook JavaScript: Use JavaScript code to embed face-book content dynamically.
- Facebook HTML: Use HTML code to embed face-book content statically.
- X HTML: Utilize XHTML for embedding content, which is a more strict and standardised version of HTML.
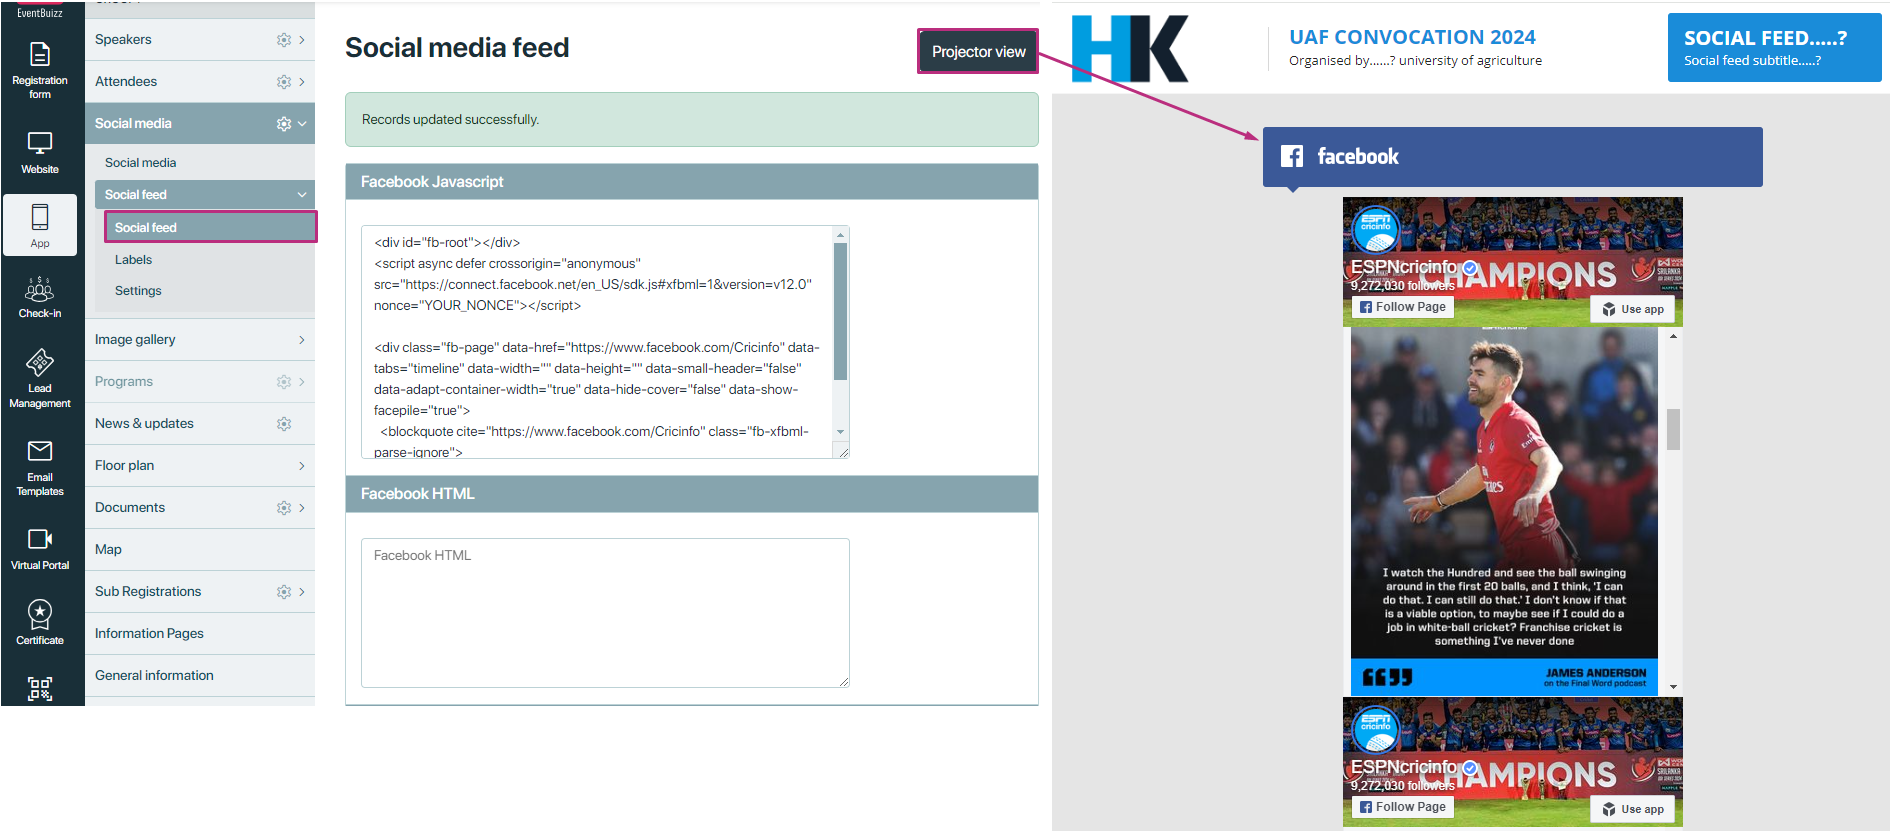
Here is the view of social feed section.
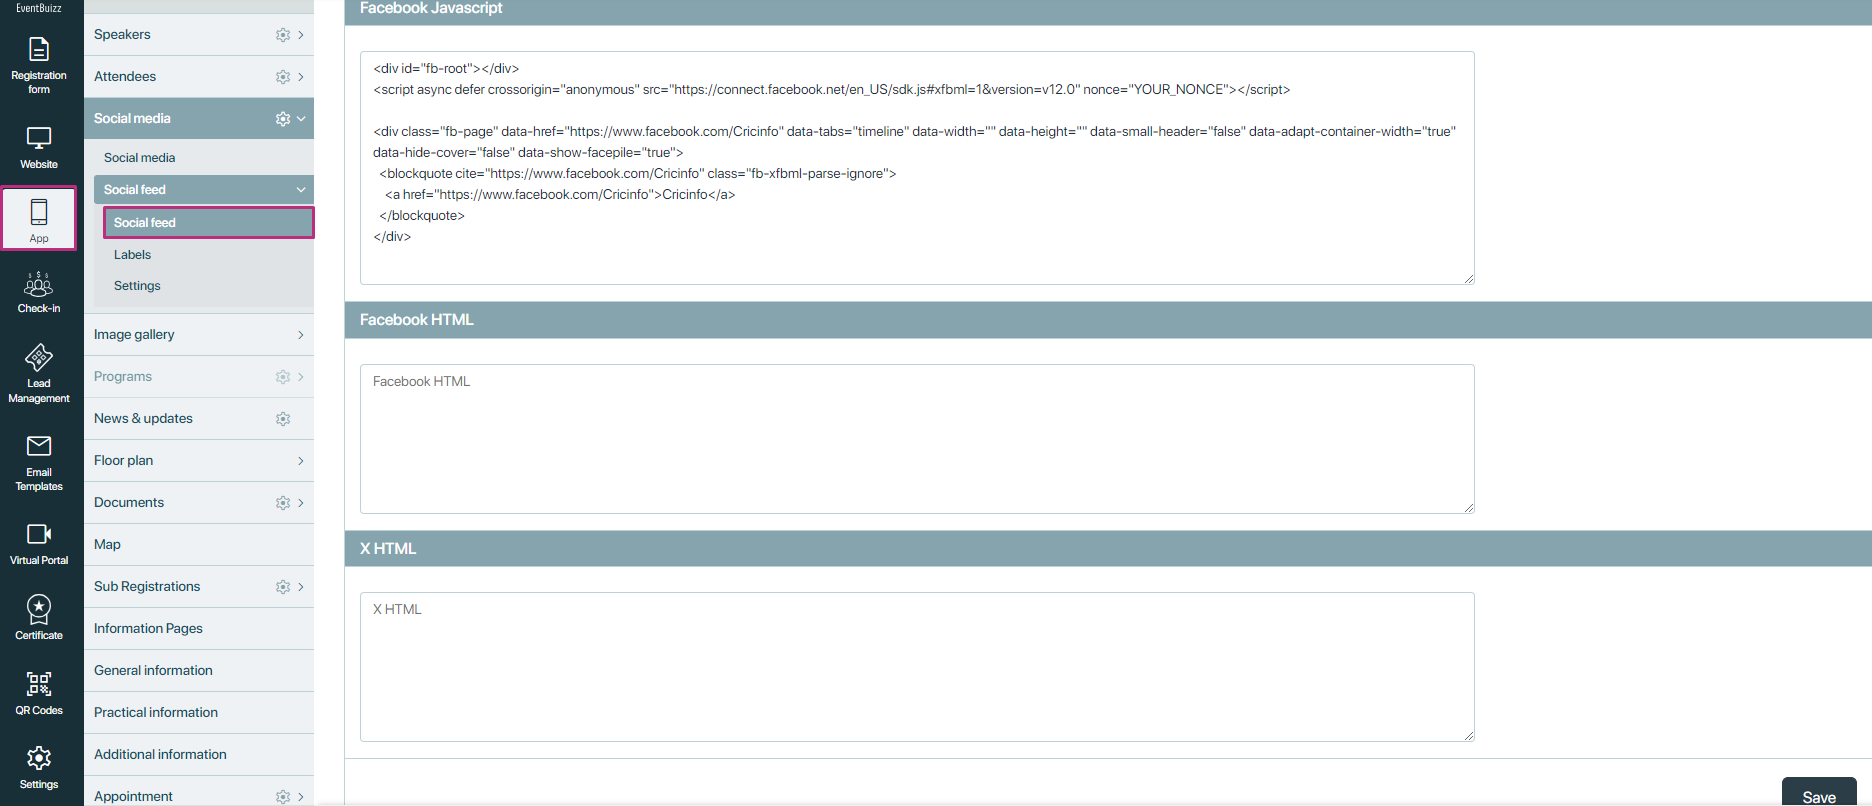
For instance, to embed a face-book page using the face-book java-script editor, organiser would insert a specific page java-script e that generates a live feed of the page’s posts and interactions.Here is the example given below how organiser will embed a face-book page or profile using script.
After “saving” the script given in editor, organiser found another option on social feed called “projector view”.
When organiser click the “projector view” button, this script will render the embedded face-book page on the projector screen.
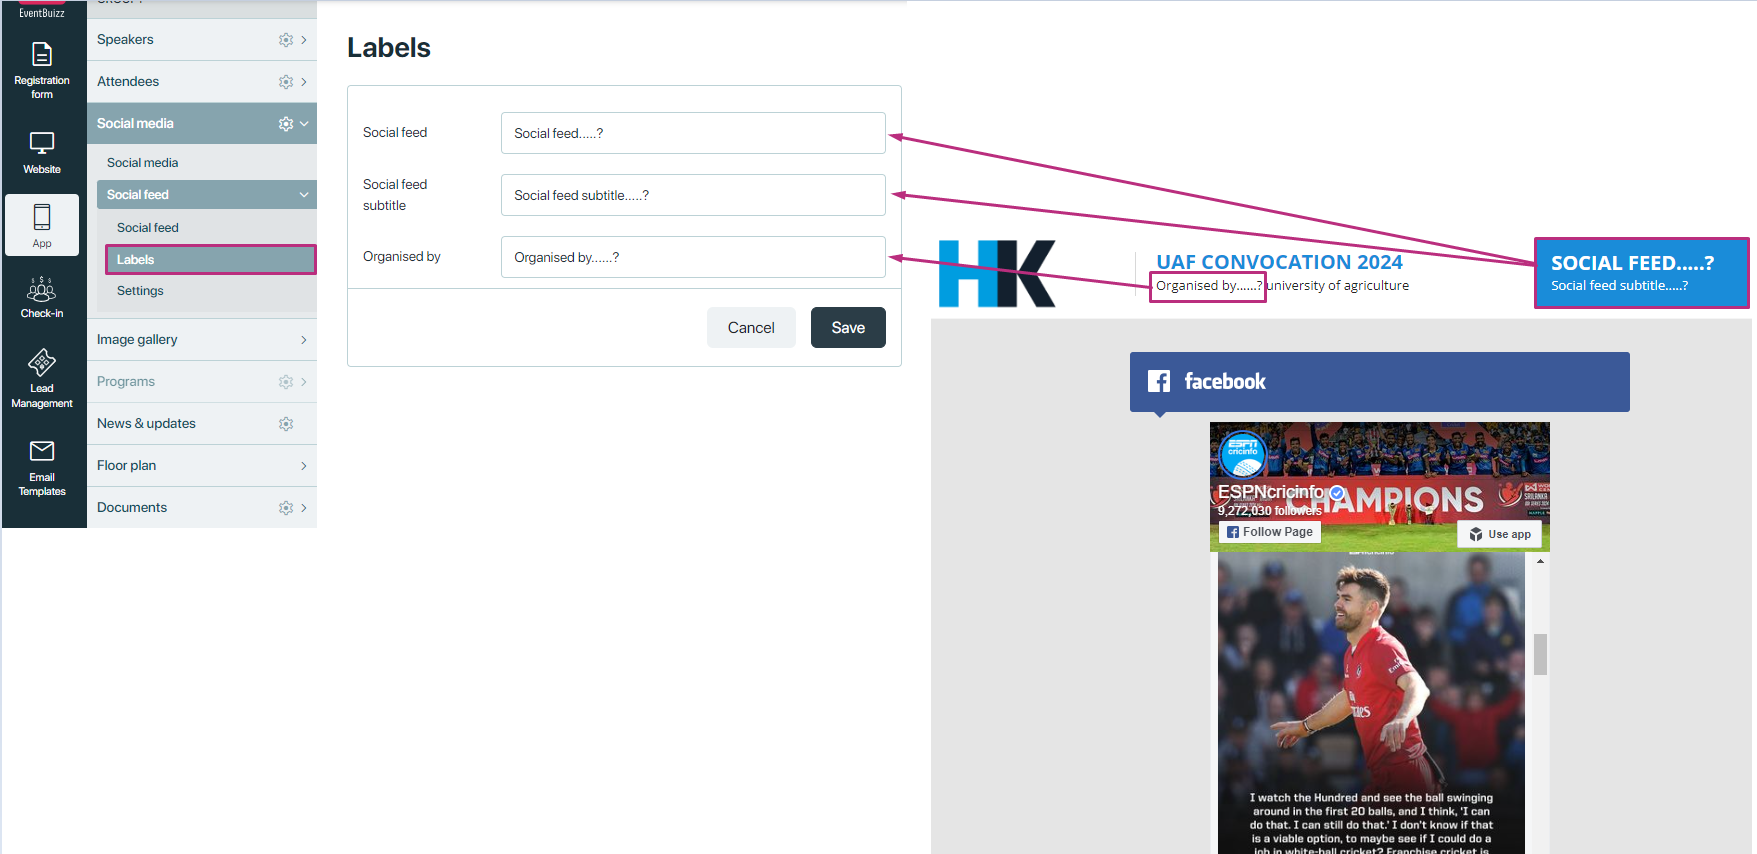
Labels
In the “labels” section, organiser can customise the text labels that appear on the projector screen for the social feed module. This allows organiser to personalise the display according to organiser event’s theme or requirements.
Example:
- Original label: “Social feed”
- Custom label: “Event highlights”
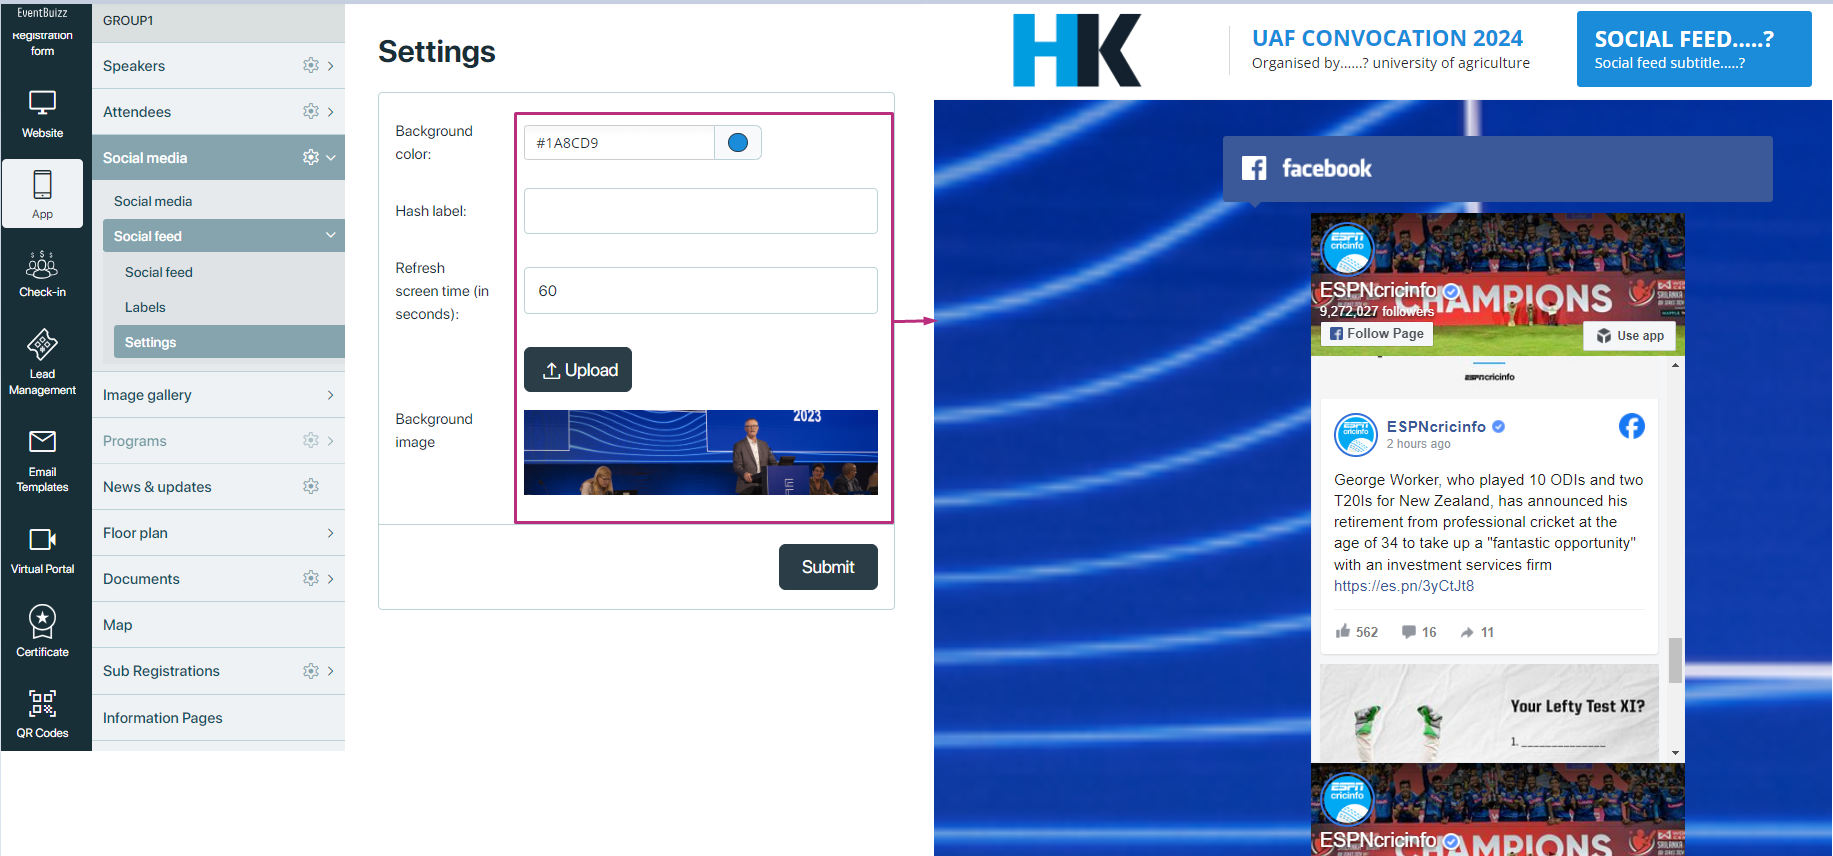
Settings
In the “settings” section, organisers can configure various display options for the projector screen.
-
Background colour: Choose a colour for the projector screen background. This can be done by selecting a colour from a colour picker tool or entering a hexadecimal colour code. And most of the time when organiser don’t want to upload background image then he can set the background colour.
-
Hash label: Enter a custom hashtag that may be used to aggregate or identify posts related to the event.
-
Refresh screen time (in seconds): Set how frequently the projector screen should refresh to display new content. For example, if you set this to 60 seconds, the screen will refresh every minute.
-
Background image: Upload an image that will be used as the background for the projector screen. This can add a visual element that aligns with the event’s branding or theme.
