Check-in through check-in app
Purpose: The section of the check-in module allows user admins to perform attendee check-ins using a dedicated check-in app.
Functionality:
- User admins use the check-in app installed on their mobile devices or tablets.
- They scan attendees’ QR codes to facilitate check-ins.
- Depending on their permissions, they can check attendees into programs, groups, or specific registration items.
Features:
- QR code scanning: The app allows user admins to scan QR codes provided by attendees for quick identification and check-in.
- Permission handling: Ensures that user admins can only perform check-ins within their assigned permissions (program, group, registration item).
- Real-time updates: Provides real-time updates to the eventbuizz system regarding attendee check-in status.
How check-in app works?
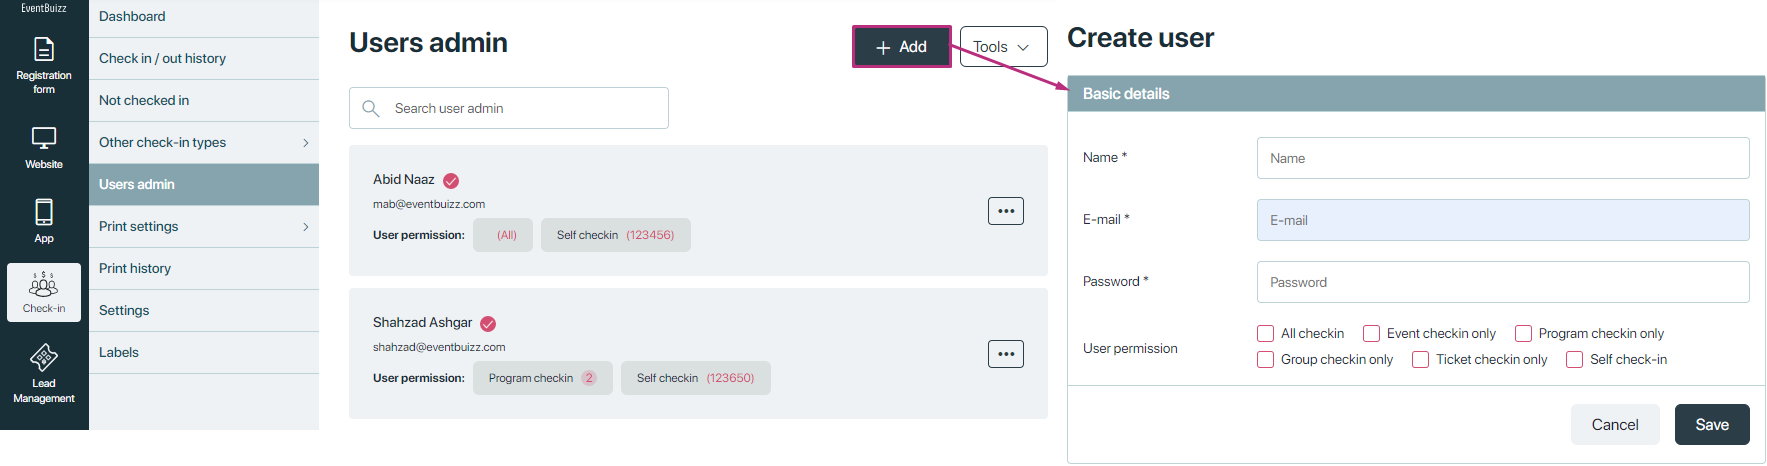
- First of all organiser need to create a user admin, who can login in check-in app, and how user admin will create for detail please click here
Newly created user admin will install the check-in mobile application from play store or app store, here are the links for download application for play store & app store:
- Play store app link: https://play.google.com/store/apps/details?id=com.eventbuizz.checkin&pcampaignid=web_share
- app store app link: https://apps.apple.com/us/app/eventbuizz-checkin/id1097079544
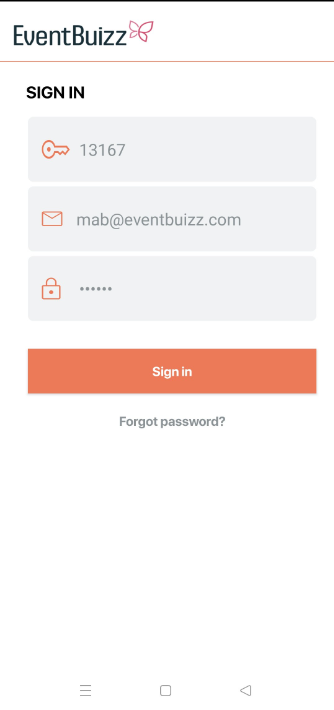
After installation of check-in app user admin will land on login screen:
After sign in user admin land on screen where user admin can see his own information like user admin name, email, event name, event code, event start and end date. Also with this information user admin found a check-in type drop down, by clicking on this drop down user admin can see the assigned permissions by organiser:
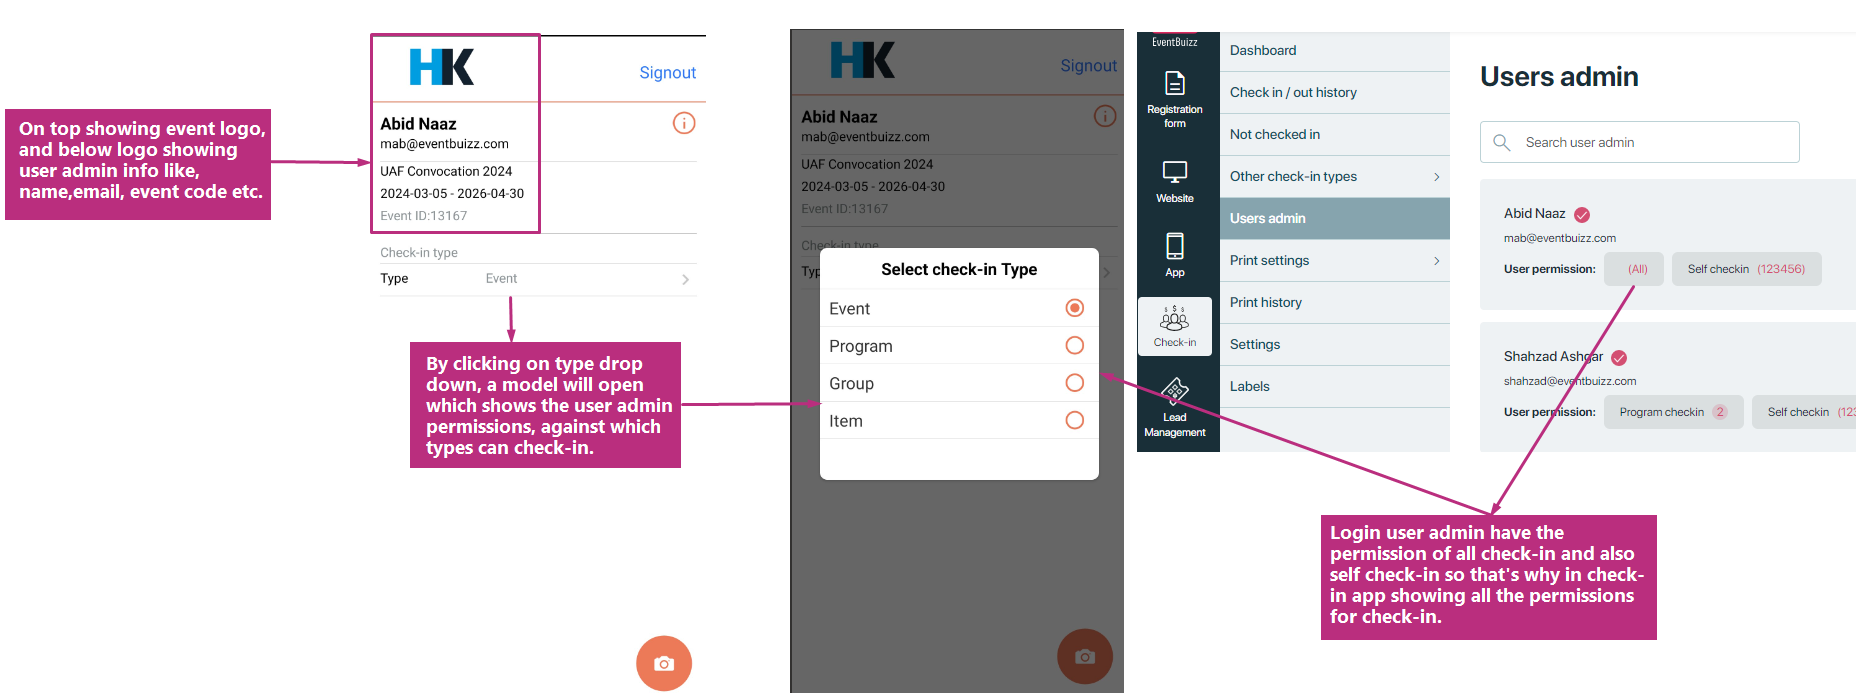
Organiser can also change permission at any time of any organiser from the eventcenter:
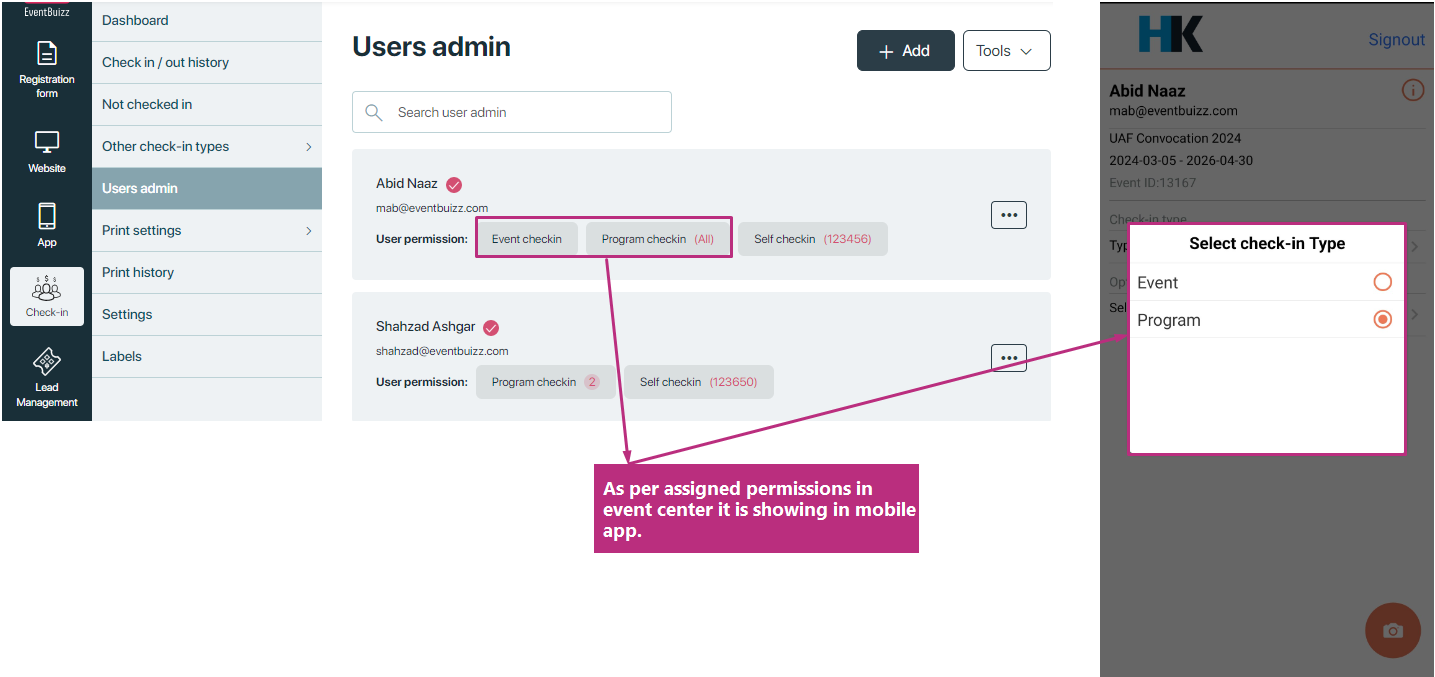
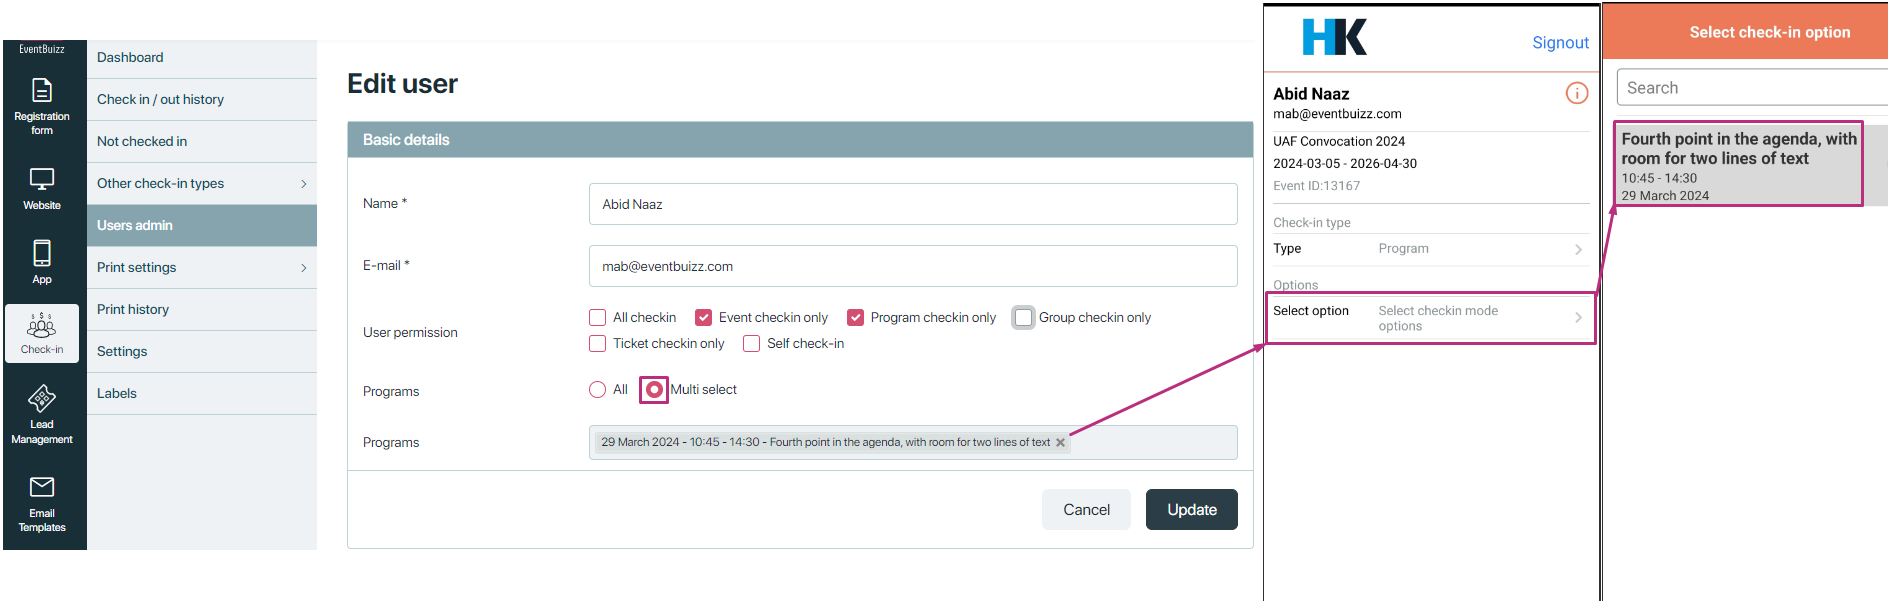
Organiser can also assign all program/group/ticket permissions to user admin or can multi select, if organiser want user admin just only check-in related to specific group/program, so organiser can also control it from the eventcenter:
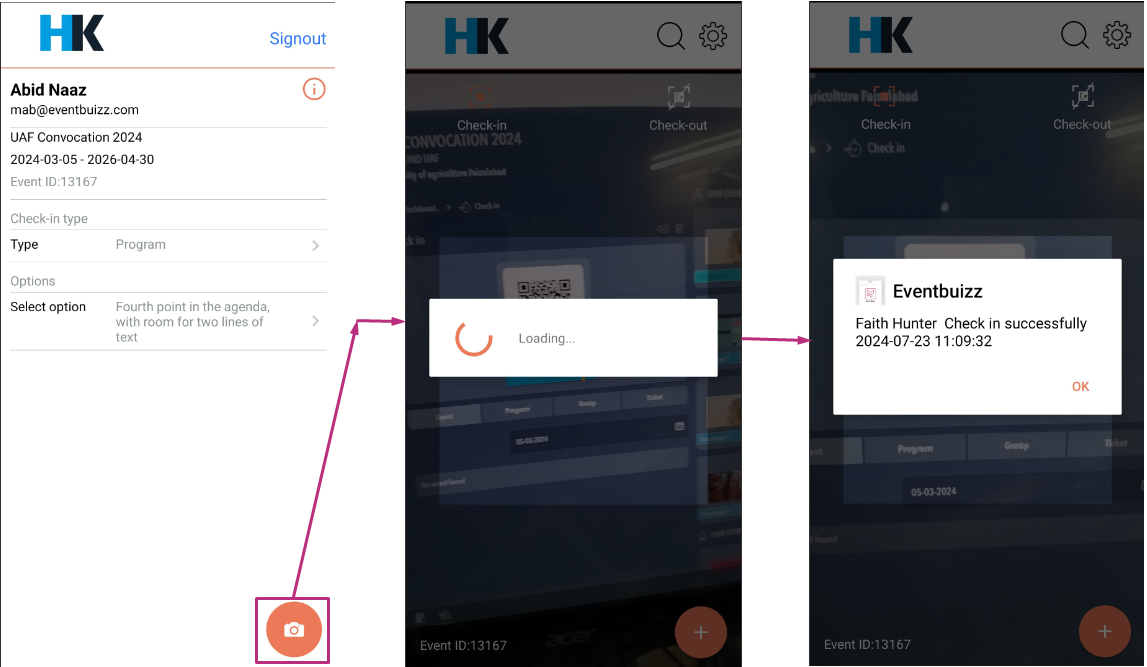
After selecting check-in type, against which check-in type user admin want to check-in the attendees, will click on “Scanner button” ![]() and move on the QR code scanning screen, where user admin will scan QR code and check-in attendee successfully.
and move on the QR code scanning screen, where user admin will scan QR code and check-in attendee successfully.
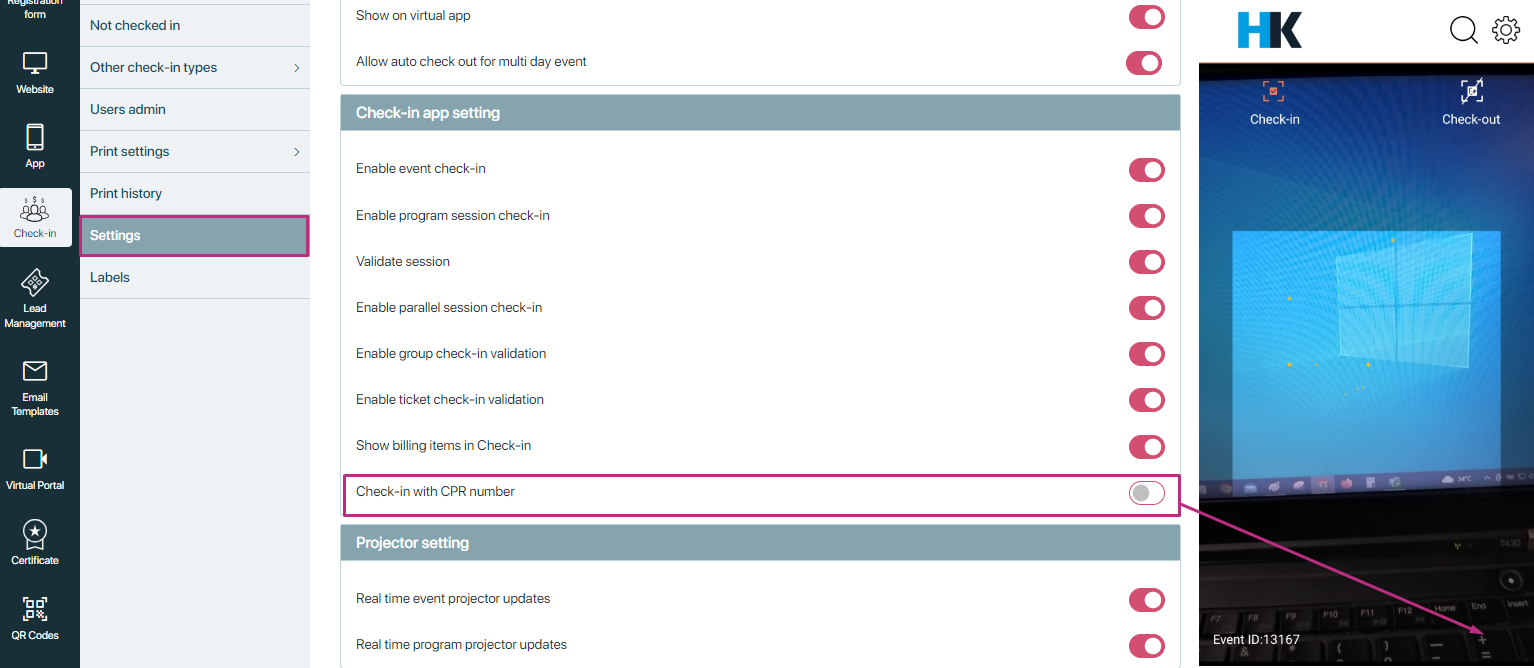
Also on QR code scanning screen there is a additional “![]() “icon which is basically used for check-in attendee through CPR number, and each attendee have individually CPR number, which is given by organiser when organiser create that attendee. After entering CPR number attendee can directly check-in, there is no need to scan QR code.
“icon which is basically used for check-in attendee through CPR number, and each attendee have individually CPR number, which is given by organiser when organiser create that attendee. After entering CPR number attendee can directly check-in, there is no need to scan QR code.
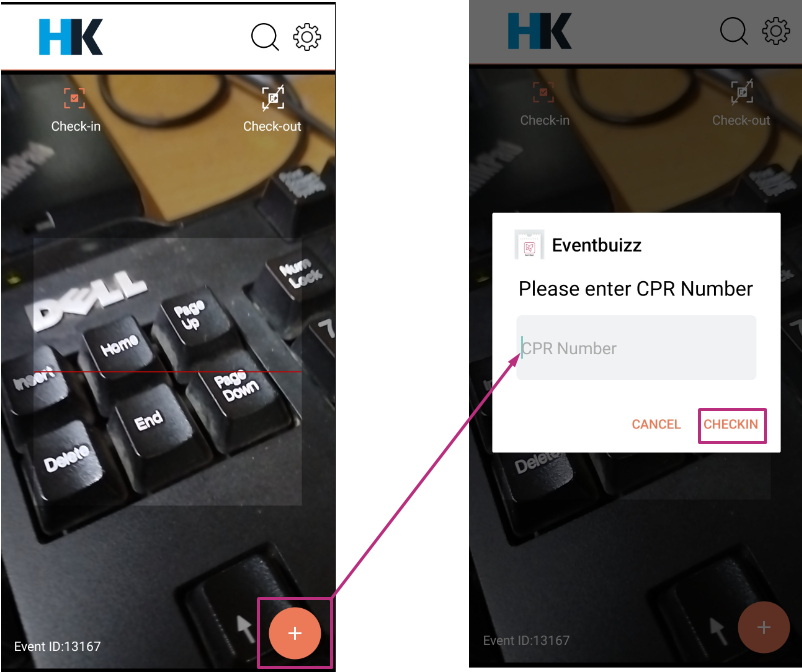
Also check-in with CPR number is based on setting, if organiser will on this setting then user admin can use this setting otherwise this icon![]() will not appear in check-in app.
will not appear in check-in app.
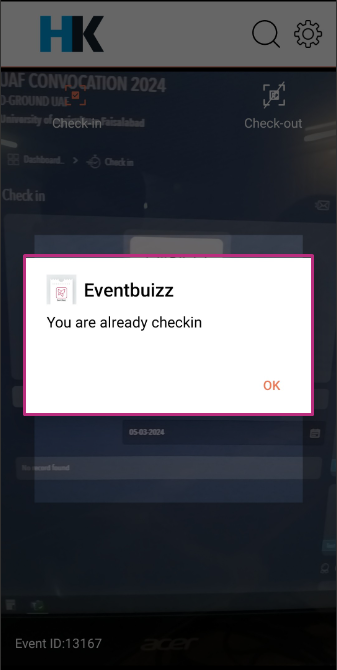
Also on QR-code scanning screen, there is another button called check-out, by clicking on check-out button attendees will check-out, otherwise till that time it will only check-in the attendees:

If check-out button is not selected and same QR-code is scanned by user admin again, it will show “you are already check-in” alert message.
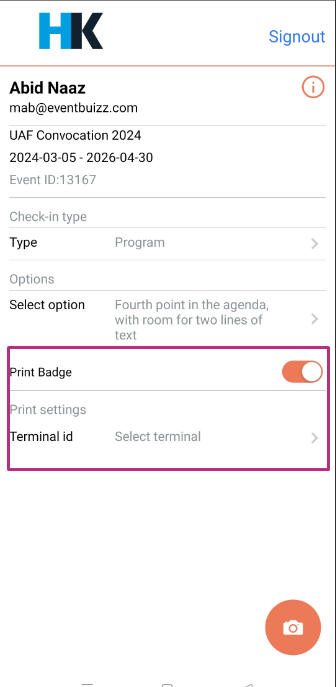
Additionally there is another feature which is used in check-in app called “print badge” which facilitates badge printing for different attendee roles using designated terminals:
Print badge setting in check-in app
Enabling badge printing mode
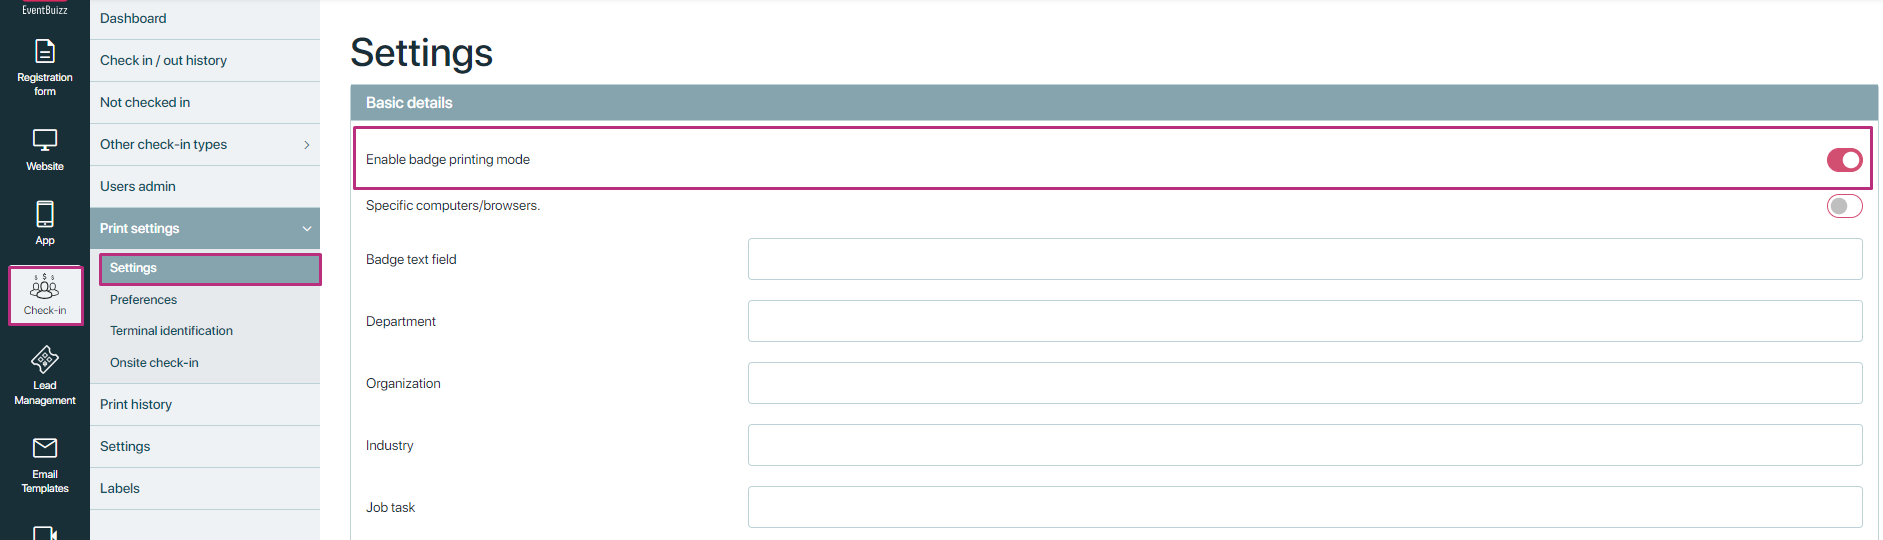
Organiser setup:
- The organiser configures the print settings in the check-in module to enable “Enable badge printing mode”.
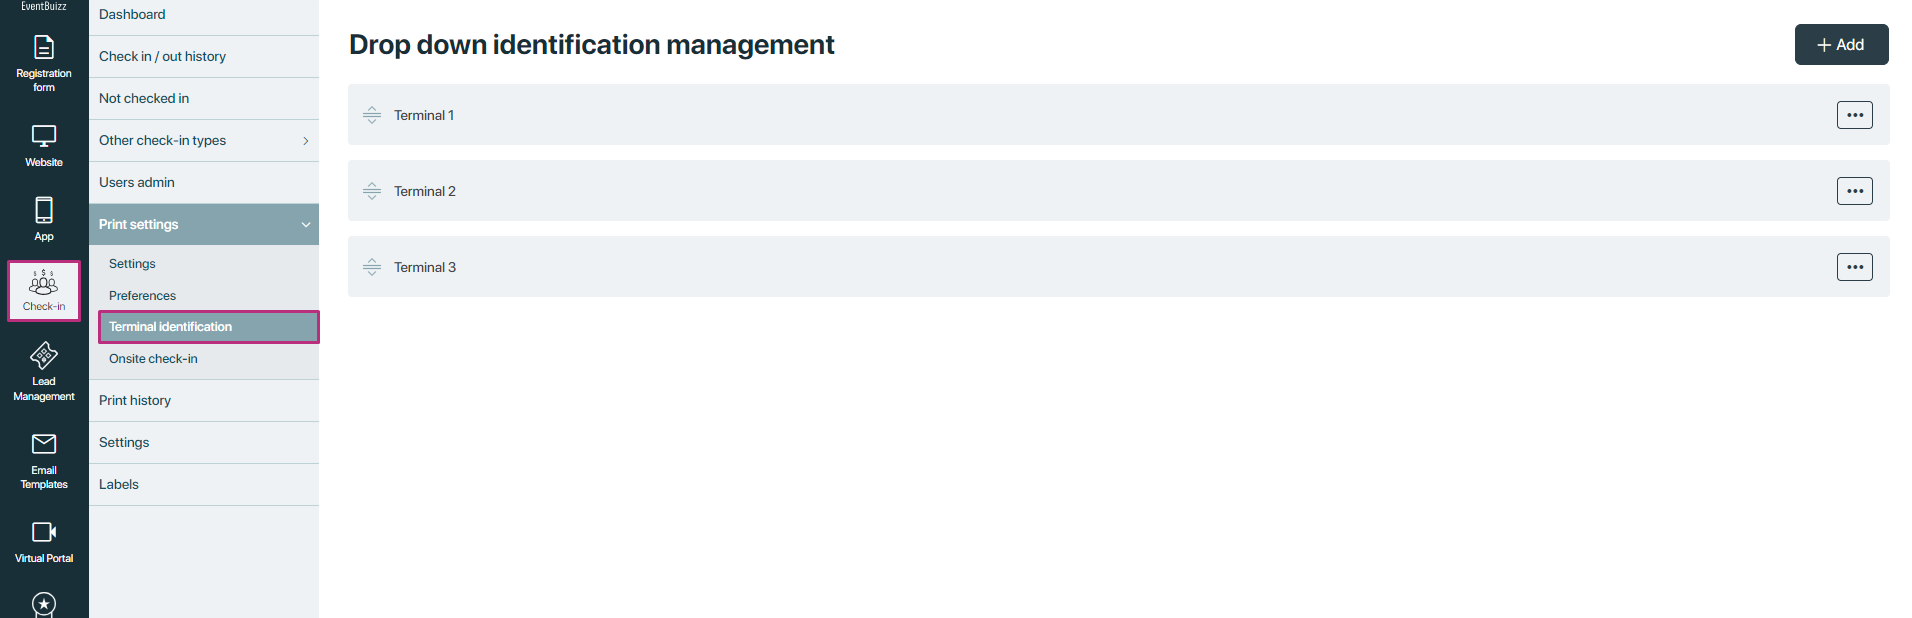
Terminal creation:
- Organisers define terminals that will be used for badge printing at the event venue.
- Each terminal is associated with a specific role (e.g., Terminal 1 for attendees, Terminal 2 for speakers).
User admin interface
User admin access:
- User admins log in to the check-in app using their credentials and access permissions.
Enable badge printing:
- When the “Enable badge printing mode” is enabled by the organiser in the eventcenter settings, a toggle button appears in the check-in app interface.

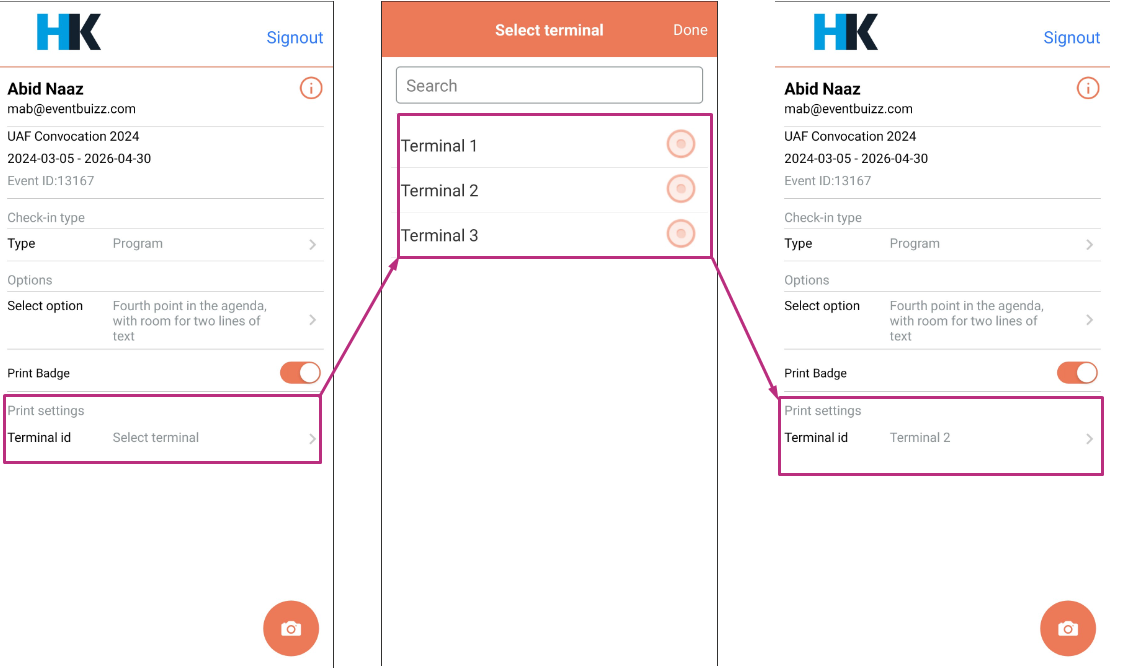
Select terminal:
- Upon toggling on the badge printing mode, a drop down menu labelled “Select terminal” appears in the check-in app.
Terminal selection:
- User admins select the appropriate terminal from the drop down menu based on instructions provided by the organiser.
- Instructions specify which terminal to use for each attendee role (e.g., Terminal 1 for attendees, Terminal 2 for speakers).
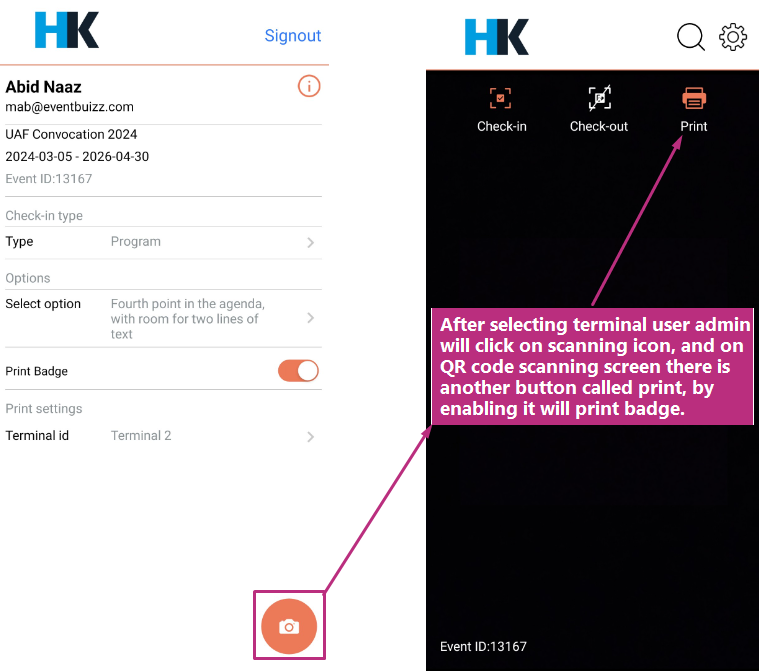
Badge printing process
QR code scanning:
- An attendee arrives at the user admin booth with their unique QR code (provided by the event organiser).
Permission check:
- The Check-in app verifies the user admin’s permissions to ensure they are authorised to perform badge printing for the attendee’s role based on the selected terminal.
Badge generation:
- Once verified, the user admin initiates the badge printing process using the selected terminal.
- The Check-in app generates a badge specific to the attendee’s role (e.g., attendee, speaker) based on predefined templates configured by the organiser.
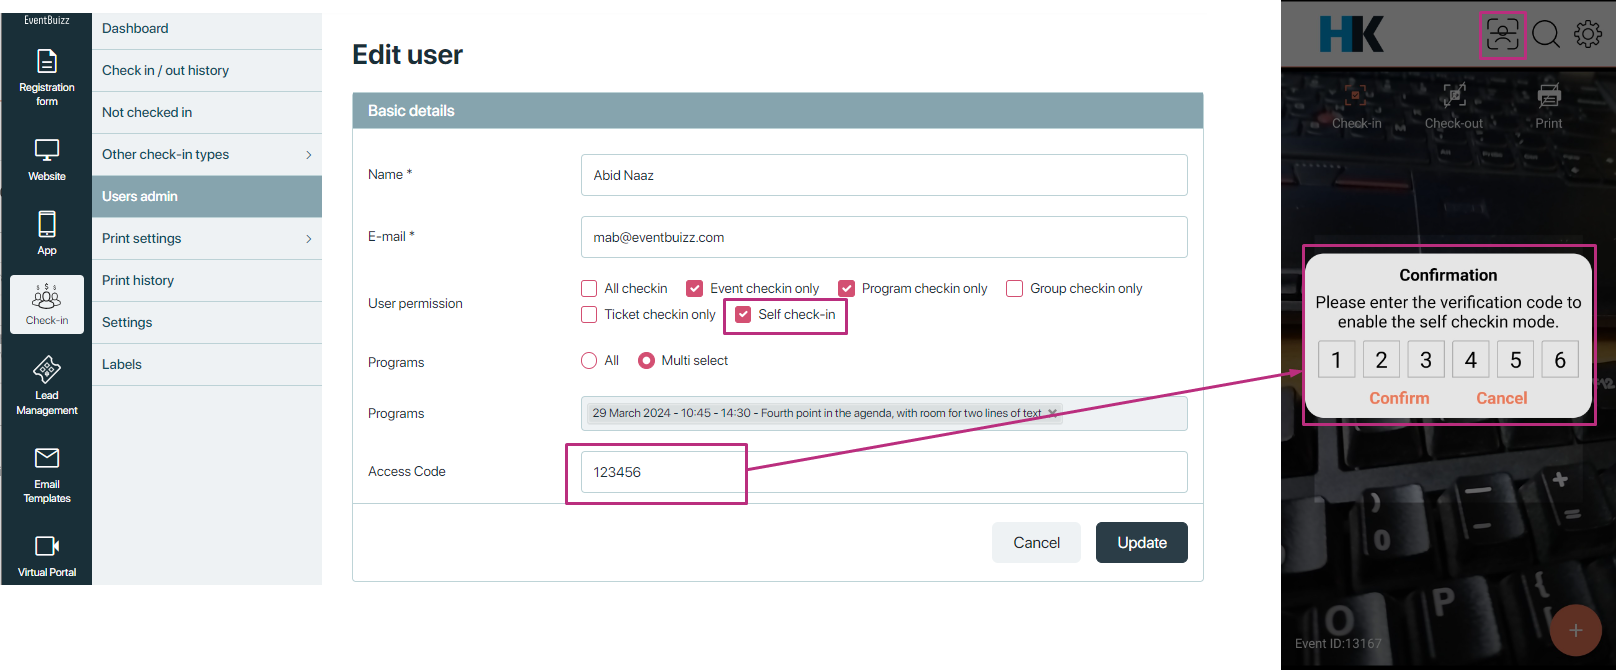
Also there is a self check-in feature in check-in app, for user admins to check-in himself as well, this feature is also setting base, if organiser enable the self check-in setting, then only user admin can self check-in.
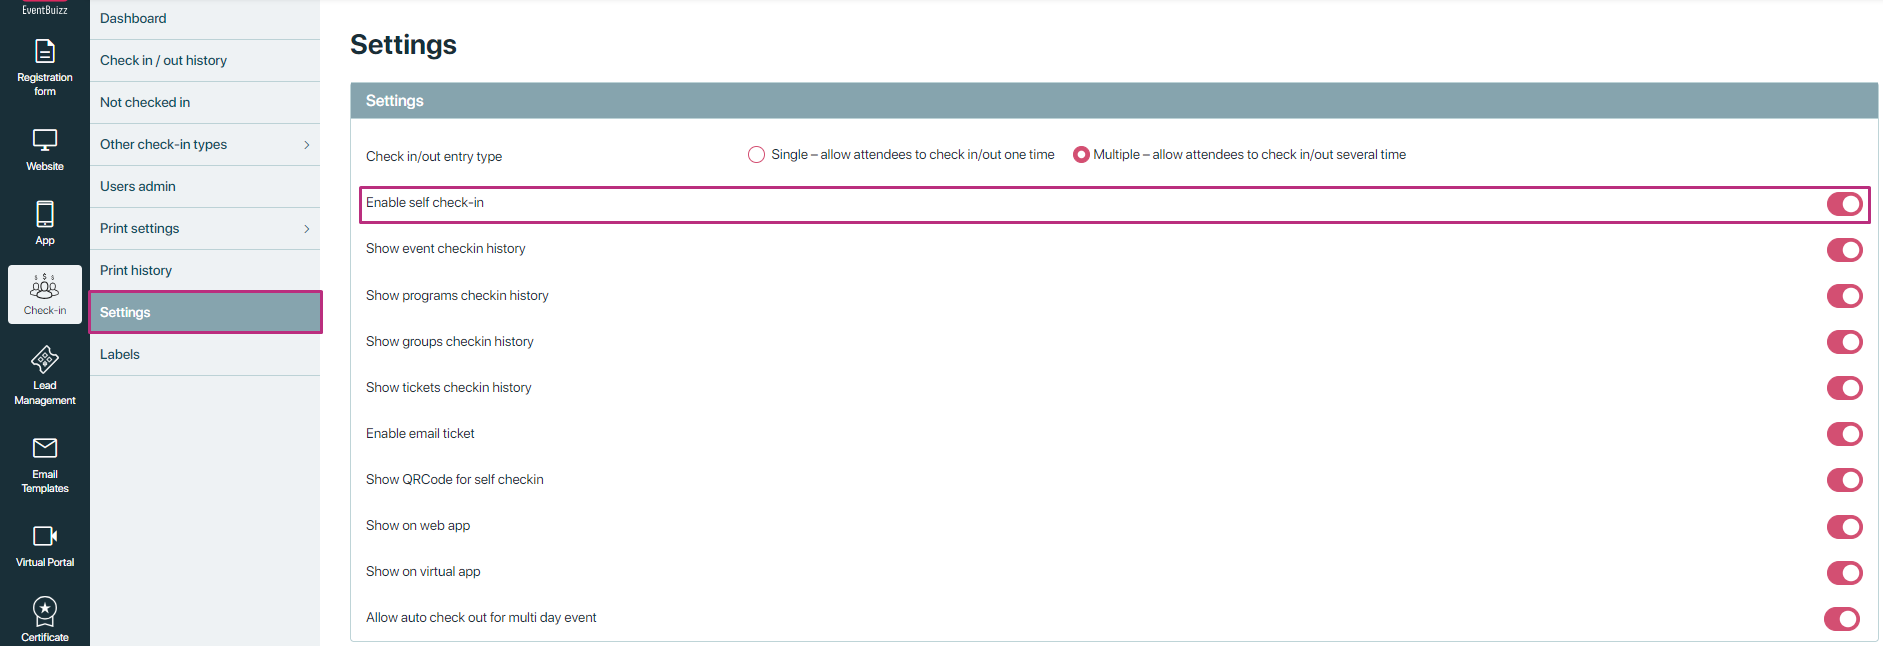
when “Enable self check-in” setting is on, in user admin permissions organiser can assign that permission to user admins:
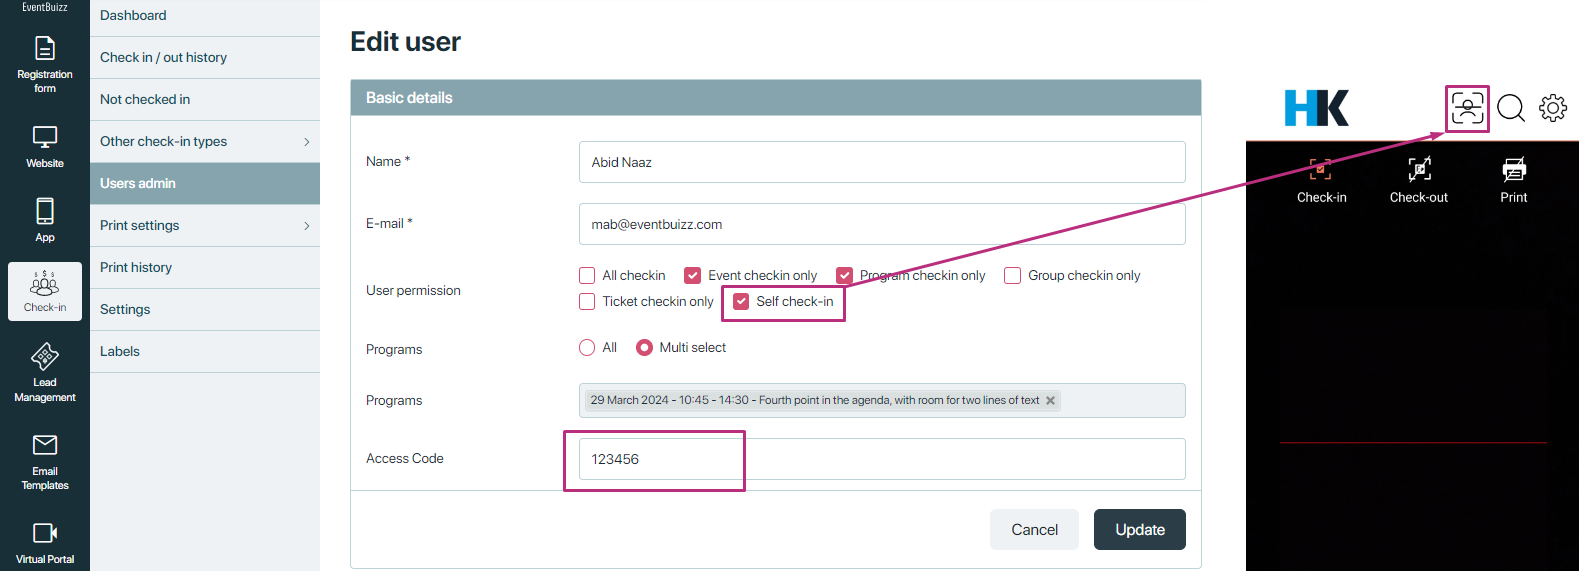
And after clicking on self check-in icon, a model will open where user admin will enter access code, and can check-in himself, this access code is settled by organiser when organiser created that user admin, it can be different for all user admins.