A fixed list of attendees can be invited to register in the Event center. The key to register is the link to the registration site – the URL that appears when clicking Reg. Site Preview. This can be distributed in different ways. When uploading your guest list in the Event center, you will keep track of attendees not registered and declined the invitation to register.
Customizing the registration invite template
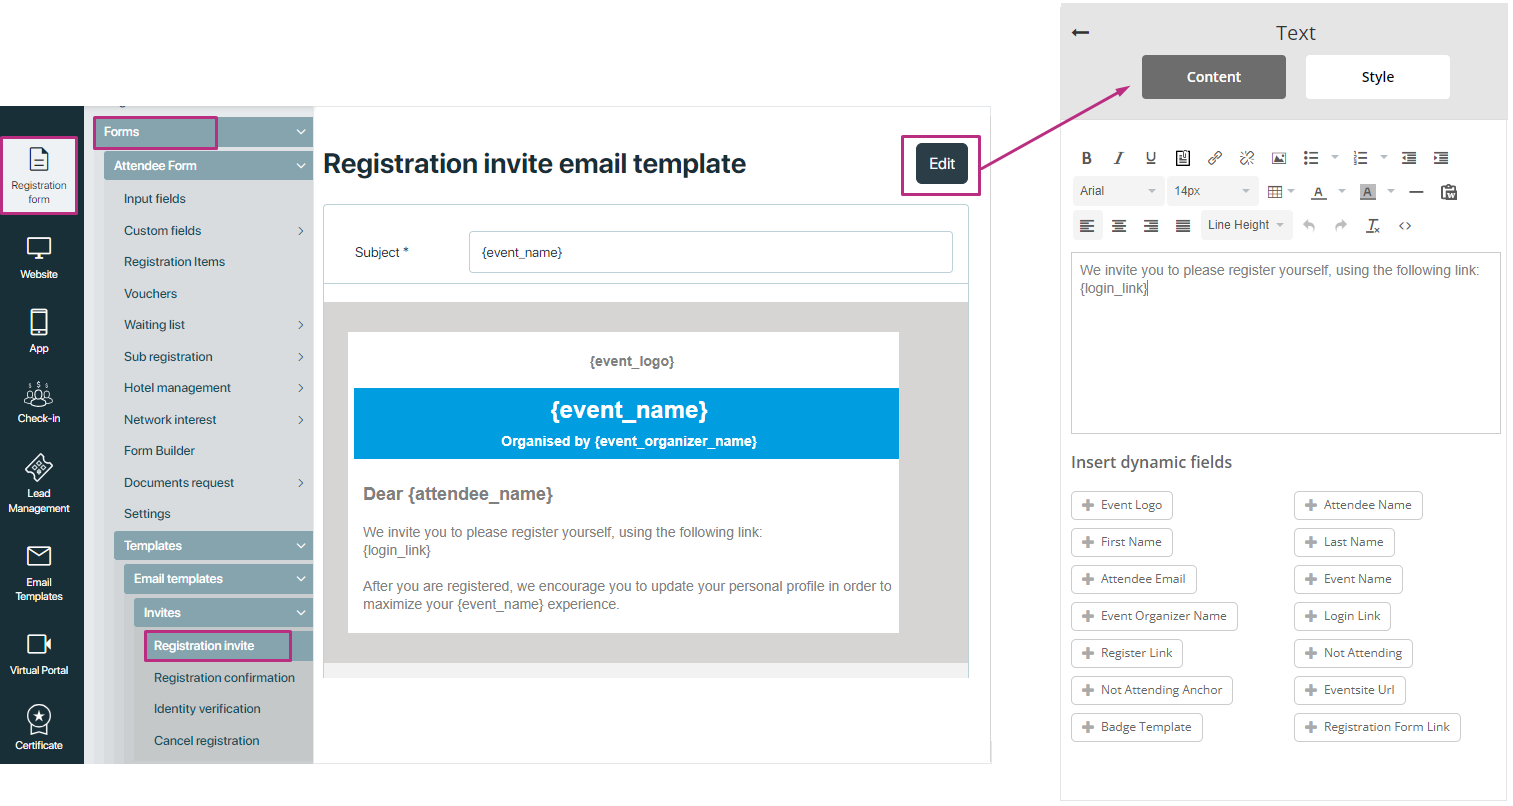
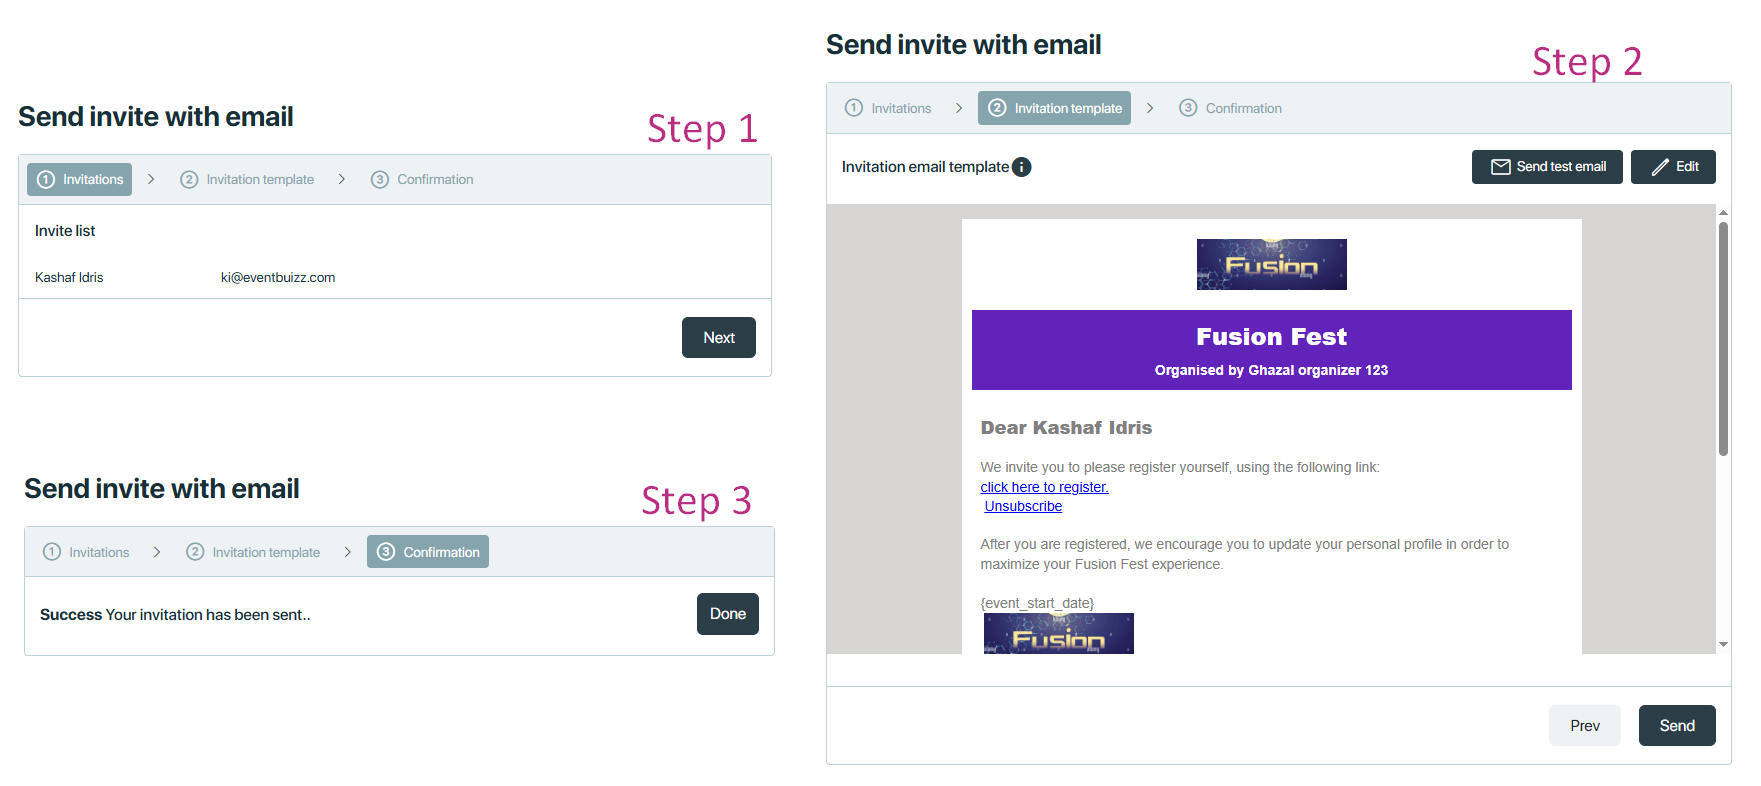
The email template has a number of dynamic fields. Click edit to open editor of the form to edit the invitation template and add desired dynamic field. If you use <attendee_ name> the system automatically integrates the name of the possible attendee that you wish to invite.
The dynamic field {not_attending} can be used if you wish to keep track of the people who has declined your invitation to register. In the invitation, you can write something like:
“If you are not able to attend, please click here: {not_attending}”
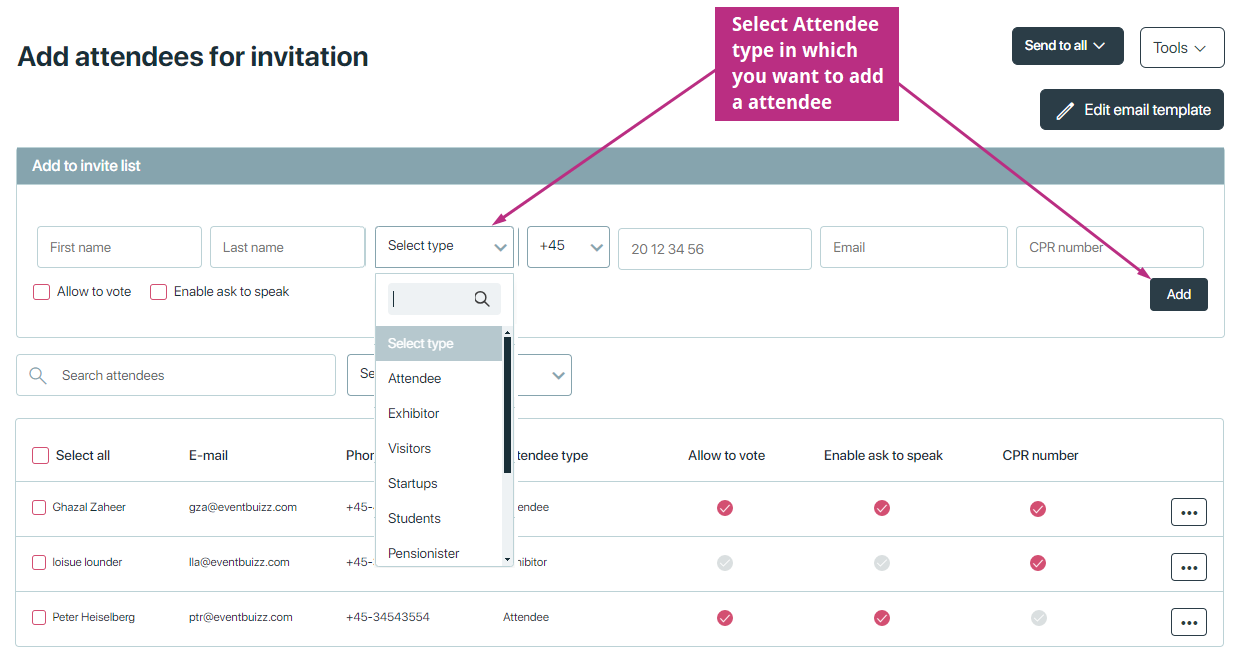
Add Attendees for registration
Add Attendees for registration
Once the invitation template is ready next step is to create the list of people you wish to invite for registration. you can add list of attendees here. Fill in the first name and email address as a minimum and click add. You can either import your list from a CSV file directly or add people one by one.
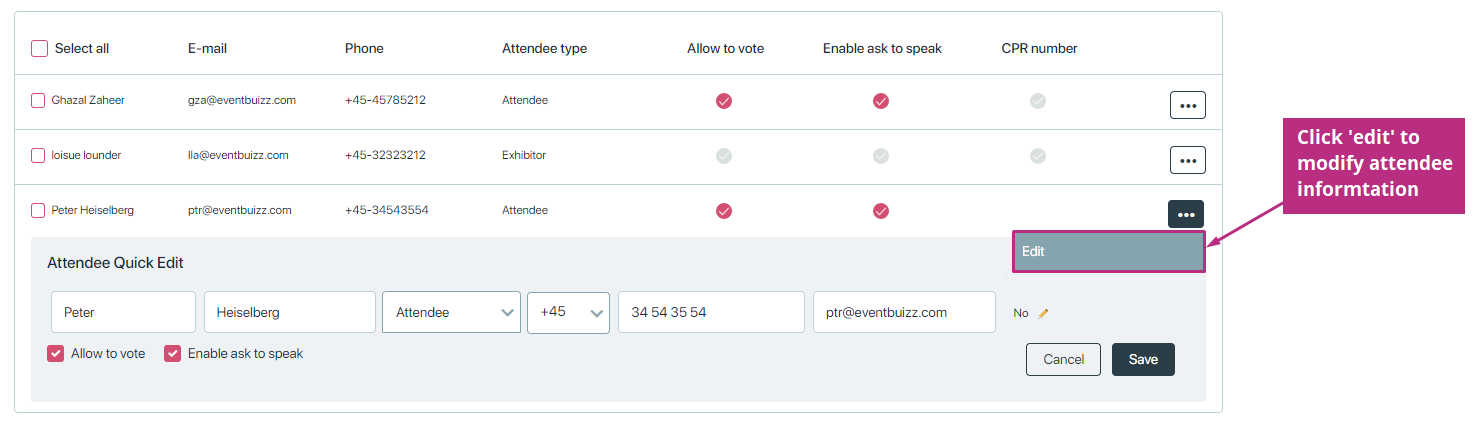
If you want to modify the information, Click three dots icon ![]() , click edit
, click edit
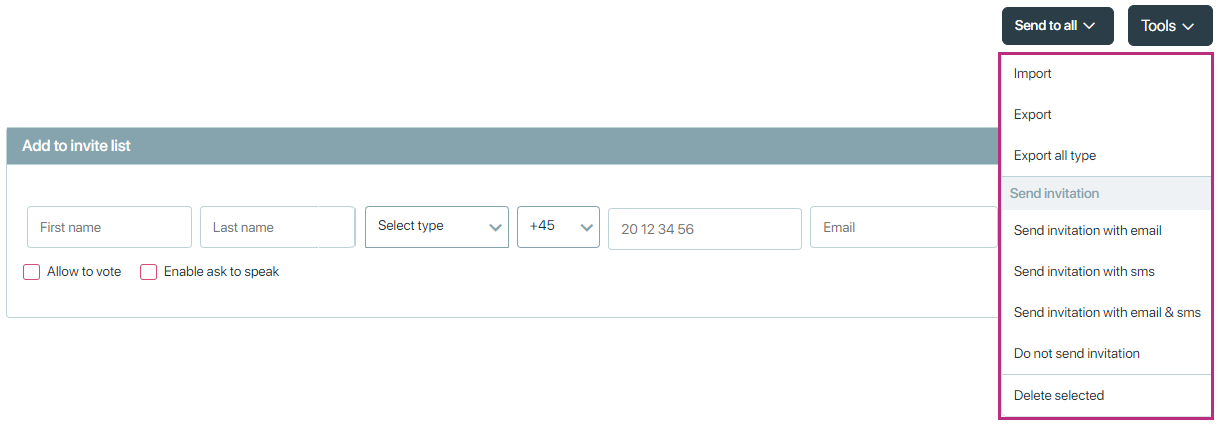
Import
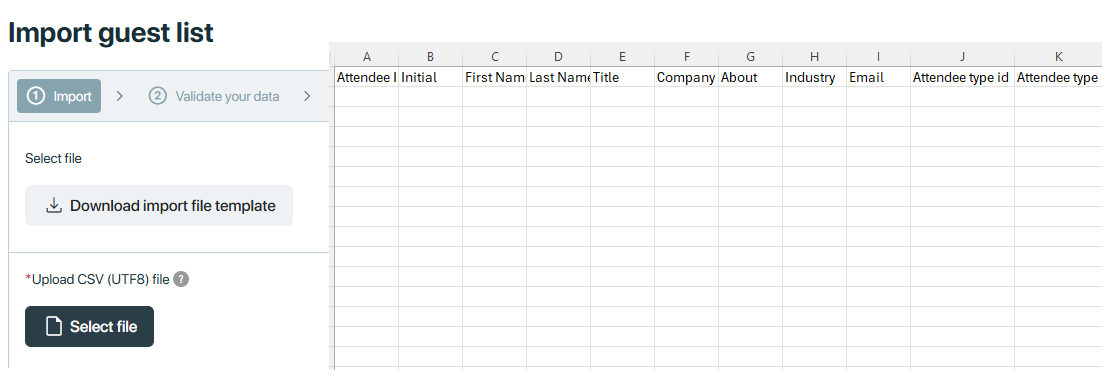
If you have a long list of guests to invite, it is faster to import them all at once, using a csv file. Click tools -> Import
Import guest list from a csv file
A CSV file, is an excel file saved in a comma separated version. Insert your list of guest in a CSV file. As a minimum, you must fill out the columns First name and Email. Then select file and upload the file and click next.
Validate that the data is listed correctly . First name = Ghazal, Last name = Zaheer etc. Click next
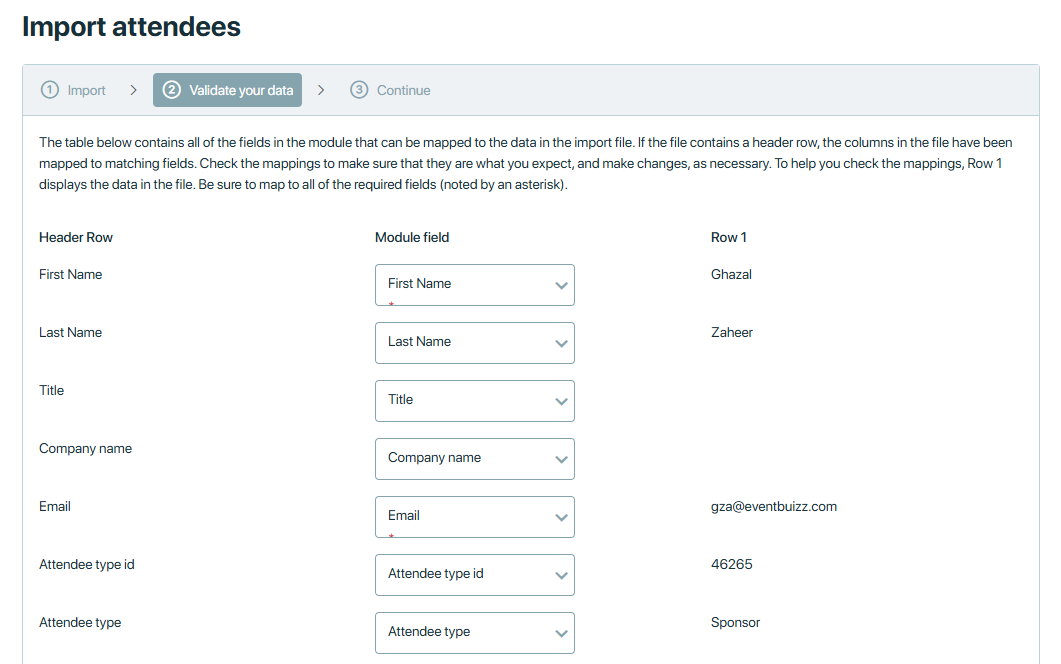
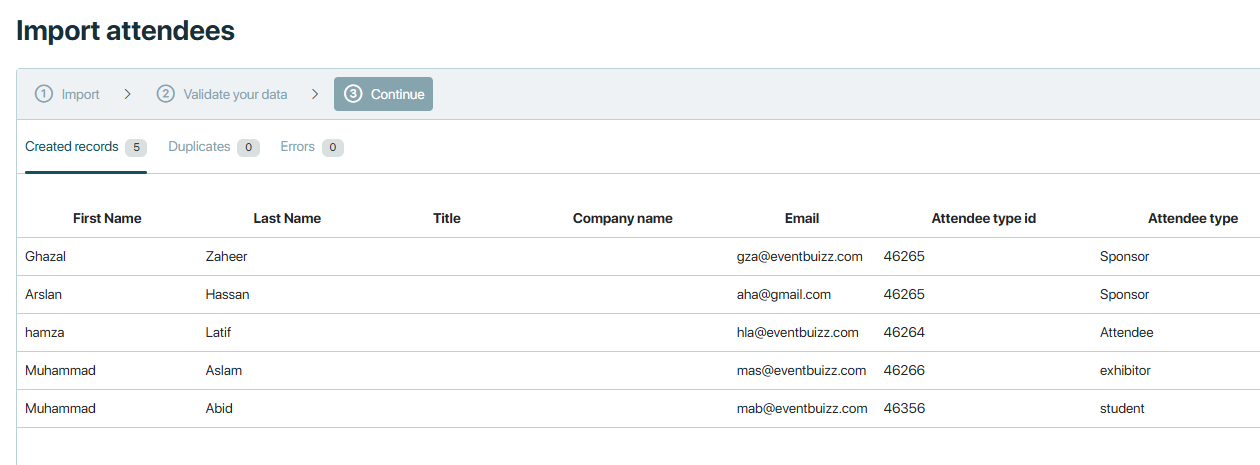
The system will inform you about invalid email addresses – click on errors to see which if any. Please correct, import and go through the same process again. You can re-use the CSV file to import again. The system will list emails of duplicates who received the invitation before – and not send the invitation again.
Export/ Export all type
-
-
- Export: This export a list of all attendees invited for event
- Export all types: This CVS file contains three sheets having all records in invitation list, registered attendees list and not attending list
-
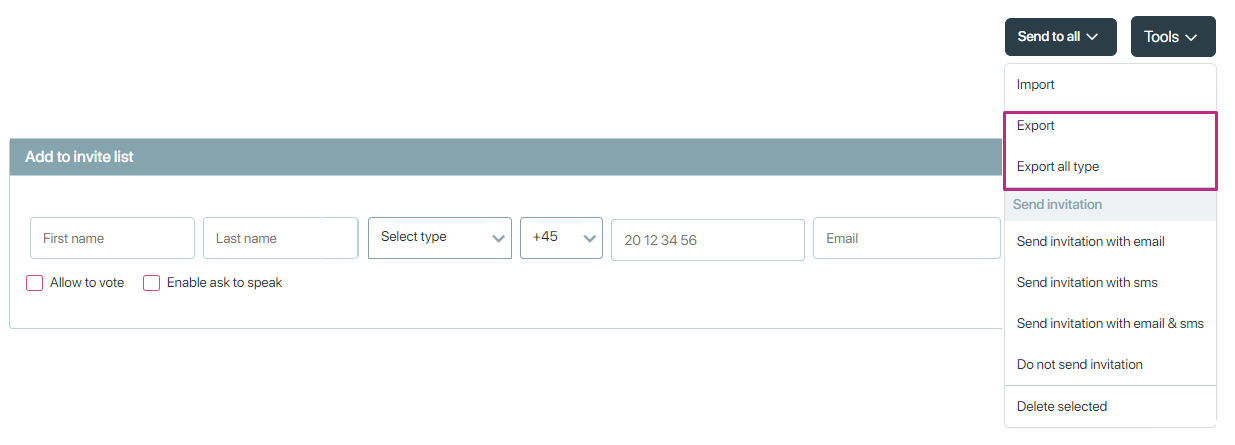
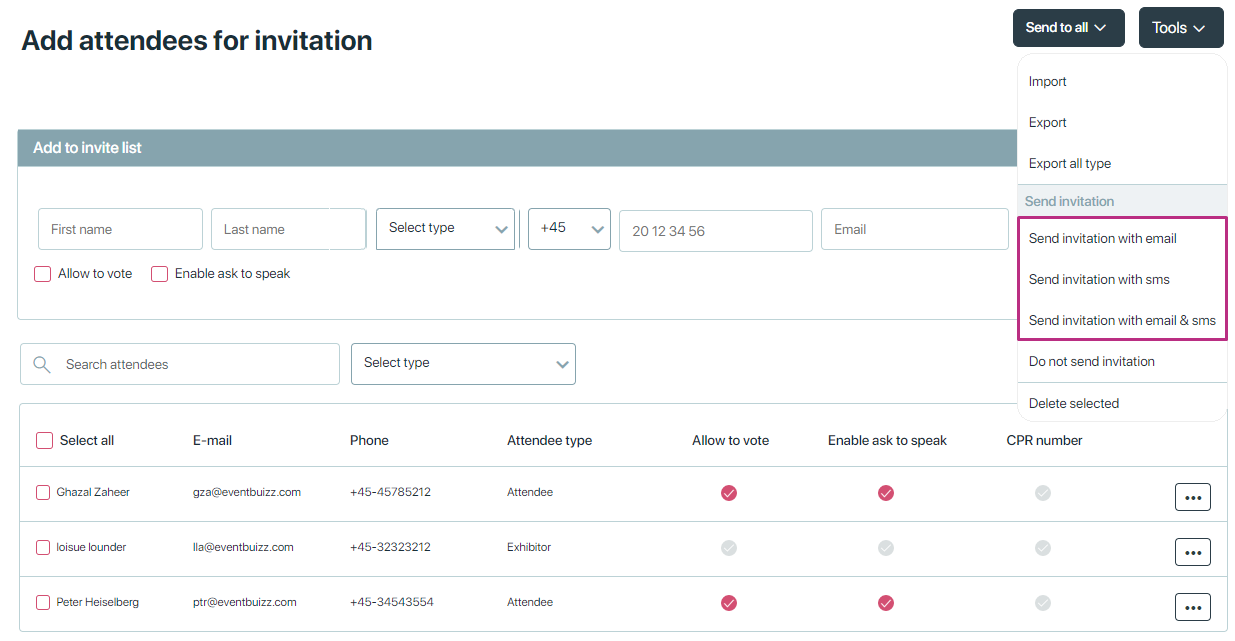
Send Invitation
You can send invitation by three ways:
-
-
- Send Invitation with email.
- Send Invitation with sms.
- Send Invitation with email and sms.
-
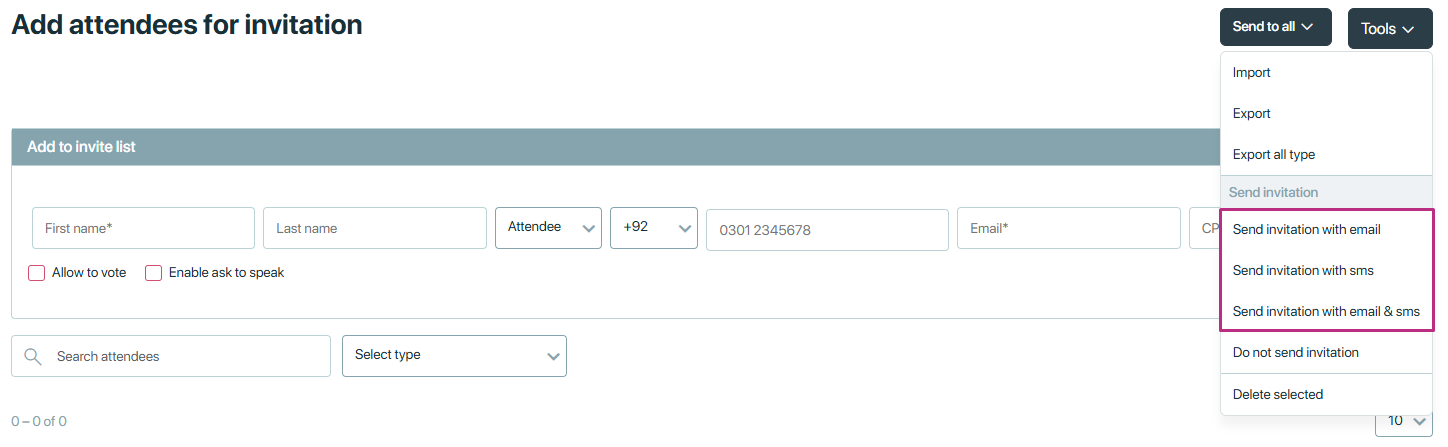
Do not send Invitation
The “Do Not Send Invitation” option controls whether or not an invitation email is sent to a participant when they are added to an event

Delete selected
The “Delete Selected” option allows users to remove one or more selected attendee from a invite list.

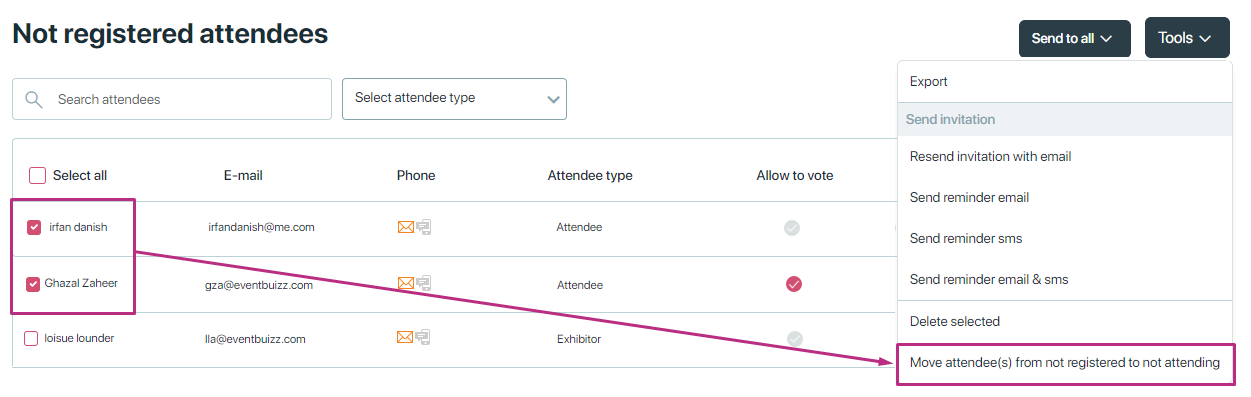
Not registered attendees
Not Registered Attendees
The term “Not Registered Attendees” typically refers to individuals who have been invited to the event but have not responded to the invitation or completed the registration process.
When the last day for registration arrives you might want to re-send the original invitation to the list of people on ‘attendees not registered’. Maybe you want to send a reminder with a slightly different wording. If so – make sure you customize the email template attendee reminder first.
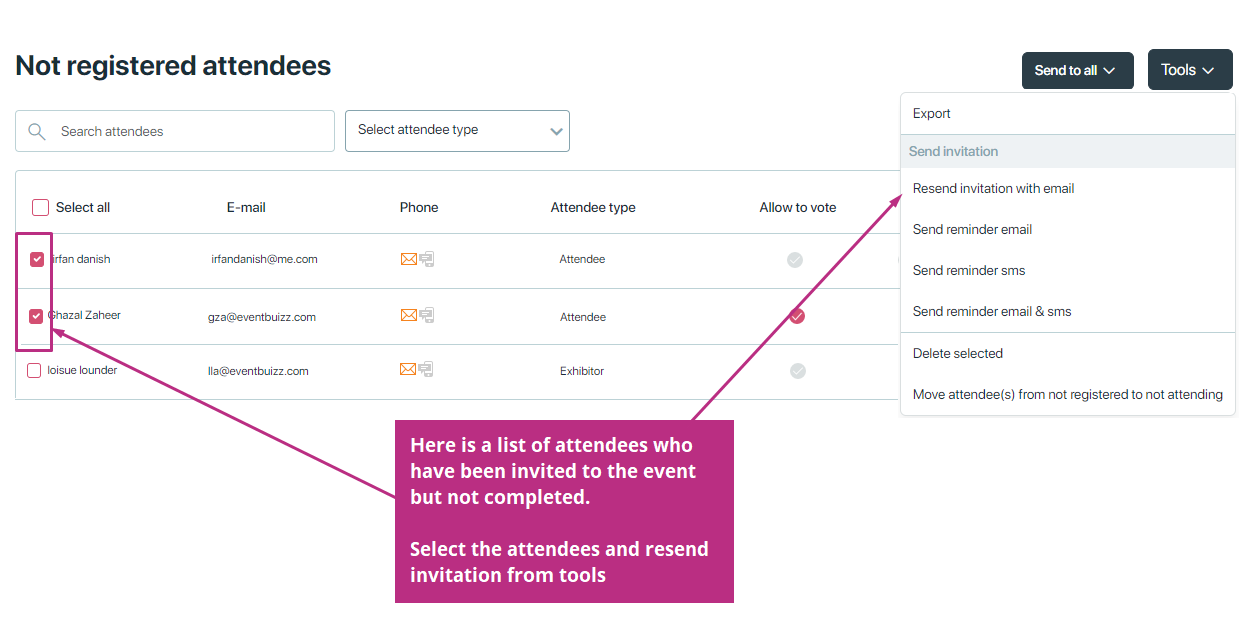
Resend invitation or send a reminder email:
Click tools to resend invitation or send reminder invitation.
Choose either resend invitation by email to use the original invitation or choose send remainder email to use the new customized email templates,
You can edit/ modify email template from Registration form -> Select form in which you want to send remainder email -> Email templates -> reminder -> attendee reminder.
Move attendees from not registered to not attending
It moves attendees who haven’t registered by a certain time (or based on organizer’s decision) to the “Not Attending” list.
This helps:
- Keep the attendee list clean and up to date.
- Clearly separate those who are still pending registration vs those who are confirmed as not attending.
- Avoid follow-ups or reminders to people who are no longer interested.
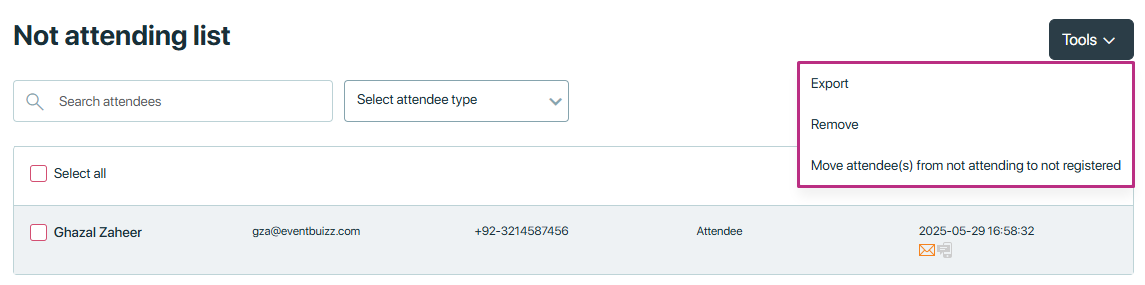
Not attending list
Not Attending List
The “Not Attending” list includes attendees who have been marked as not participating in the event.
-
- The invitation organizer has sent to them.
- Organizer has moved attendees from not registered attendees to not attending list.
This list helps organizers to distinguishes confirmed non-attendees from those who might still register, ensuring better event management and data organization.

Tools
We have two options in tools
- Export: This option allows you to download the list of individuals marked as not attending.
- Remove: This option allows you to delete individuals from the “Not Attending” list.
- Move attendee(s) from not attending to not registered: It moves selected attendees from the “Not Attending” list back to “Not Registered” — giving them another chance to register. This is useful when:
-
- Someone initially declined but later shows interest.
- An organizer mistakenly marked someone as not attending.
- You want to send them another reminder or invite to register.
If an attendee is not removed from the “Not Attending” list, you cannot resend the invitation to them. After removing them, you can add the same attendee again and resend the invitation.
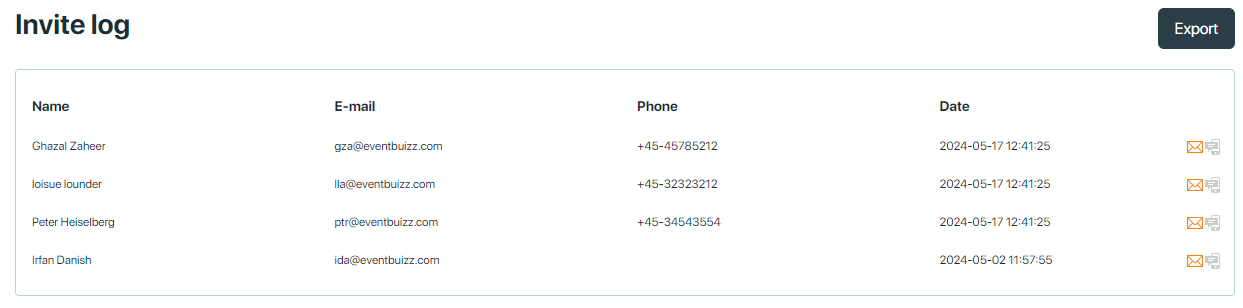
Invite log
Invite Log
The “Invite Log” of registration invitations tracks all sent invitations to potential attendees. It records details such as the recipient’s email, the date and time the invitation was sent, and the status on which date and time invitations has been sent to attendees.
This log helps organizers monitor the effectiveness of their outreach, identify any issues with email delivery, and manage follow-up actions. It ensures a transparent and organized process for tracking registration invitations and responses.
You can export invite log in csv file
Settings
Settings
Registration invitation has 3 settings:
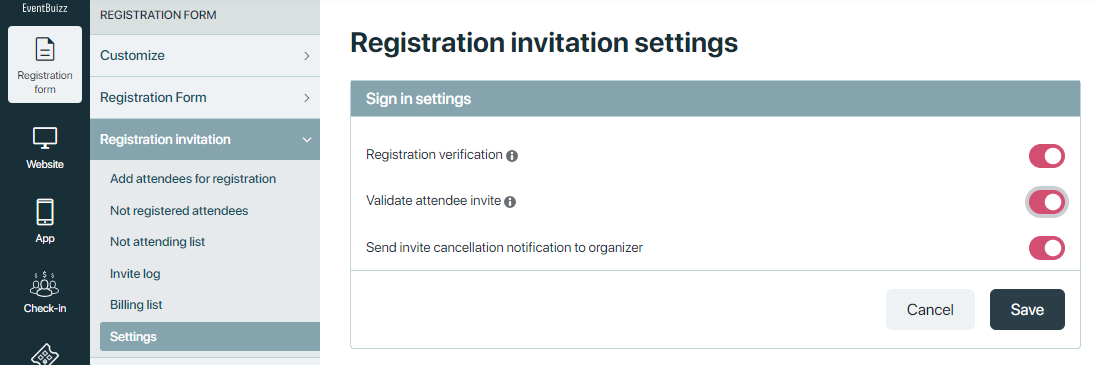
Registration Verification:
Attendees will be asked to verify there identity in an email, before registration is completed. If registration verification setting is ON. the attendees receives Identity verification email through which he/she can activate his/her account. click here for more details.
You activate the Verification setting here:
-
- Apps → Attendees settings -> Sign in settings -> Registration verification.
- Registration form → Registration Invitation → Settings → Validate attendee invite.
Validate Attendee Invite:
Registration only valid for invited attendees, validated by email address. If you only want to allow the guests you have imported on the guest list – and sent out the invitation to – to be able to register, then you can ask the system to do so.
You activate the validation here:
-
- Apps → attendees settings -> sign in settings -> Validate attendee invite.
- Registration form → Registration Invitation → settings → Validate attendee invite.
Now only these particular emails will be accepted. If you use this, be sure to tell the invited guests in the invitation, that they can only sign up with the email they receive the invitation on.
Send invite cancellation notification to organizer:
When this setting is ON, if an attendee clicks the non-attending link in the registration invitation, the organizer will receive an email notification. This email informs the organizer that the attendee will not be attending the event.