The Exhibitor portal in eventbuizz is a specialized platform designed for exhibitors participating in events. It allows exhibitors to manage their presence, interactions, and logistics for events effectively.
Key features typically include:
- Profile management: Exhibitors can create and update their company profiles, including contact information, logos, and descriptions.
- Booth management: Tools to manage booth details, such as location, size, and setup requirements, along with any additional services like electricity or internet.
- Product/service showcase: Exhibitors can list and showcase products or services they offer, often with images, brochures, and videos.
- Lead retrieval: Enables exhibitors to capture and track leads generated during the event by scanning attendee badges or receiving contact information.
- Meeting scheduling: Allows exhibitors to set up meetings with attendees, schedule one-on-one appointments, and manage calendars.
- Analytics and reports: Exhibitors can access insights like visitor numbers, lead details, and engagement metrics to evaluate their event performance.
- Document upload: Exhibitors can upload and manage important documents like contracts, terms, and exhibitor manuals.
Access the exhibitor portal
There are typically two ways to access an exhibitor portal:
1. Direct URL link
- How it works: Event organizers usually provide a direct link to the exhibitor portal. Users can click on this link, which leads directly to the login page.
This direct link is provided in event center > Admins > exhibitor portal > branding. Click here for more details.

2. Email Invitation
-
- How it works: Event organizers often send email invitations containing a personalized link or instructions to log into the exhibitor portal.
Once an admin has been created, an email invite with a link to the exhibitor portal will be sent from which they can gain access to the platform.
- How it works: Event organizers often send email invitations containing a personalized link or instructions to log into the exhibitor portal.

When you open the URL, a login screen will appear. Enter your credentials, and you will be taken to the dashboard.

When user click on the login button, he goes to the authentication screen where the user must enter a code received via email to complete the login process. Here is the email which user receives. For more details click here.


After login dashboard
After login user redirects to dashboard where all the sponsors and exhibitors from different events who have been assigned to the current admin will be shown on the dashboard of exhibitor portal.

Click on exhibitor portal which has following sections related to a company profile:
latestnews
Latest News
The “Latest News” section in an exhibitor portal is a dedicated area where event organizers share important updates, announcements, and information relevant to exhibitors. This may include details about upcoming events, changes in schedules, new regulations, or any other pertinent information to help exhibitors stay informed and prepare effectively for their participation.
The news are created by organizer. for more details. click exhibitor admin to see how organizer/ admin created news.

exhibitor-ROI
Exhibitor ROI
Exhibitor ROI (Return on Investment) in the exhibitor portal refers to a set of metrics and data that helps exhibitors track the performance and effectiveness of their participation in an event. The goal is to measure how well an exhibitor’s presence is converting into tangible benefits, such as leads, social engagement, and interactions with attendees.
It keep track of how the attendees use the event app to interact with your company profile during this event. This dashboard generates an overview of which touch points are the most engaging when an attendee shows interest in your company profile.
Here’s how Exhibitor ROI works in the exhibitor portal:
Key Metrics of Exhibitor ROI:
- Company Profile Visits: Tracks how many attendees have viewed the exhibitor’s profile within the event platform. It provides insight into how much visibility the company is receiving during the event.
- Document Downloads: Measures how many event attendees are downloading brochures, product sheets, or other documents shared by the exhibitor. This can help gauge attendee interest in the exhibitor’s offerings.
- Leads & Sign-ups: Shows how many attendees have provided their contact information or signed up for more information, which directly indicates the potential business opportunities the exhibitor is generating.
- Website Visits: Tracks the number of clicks to the exhibitor’s website, which can indicate how many attendees are interested in learning more about the exhibitor’s products or services.
- Social Media Visits (LinkedIn, Facebook, Twitter, etc.): Measures how many attendees are visiting the exhibitor’s social media profiles from the event portal. This helps exhibitors assess the level of social engagement they are driving through the event.
- Form Responses: Captures how many attendees have filled out any forms set up by the exhibitor (like surveys, inquiries, etc.). This metric shows attendee engagement and feedback, which can be valuable for follow-up or lead generation.

companyprofile
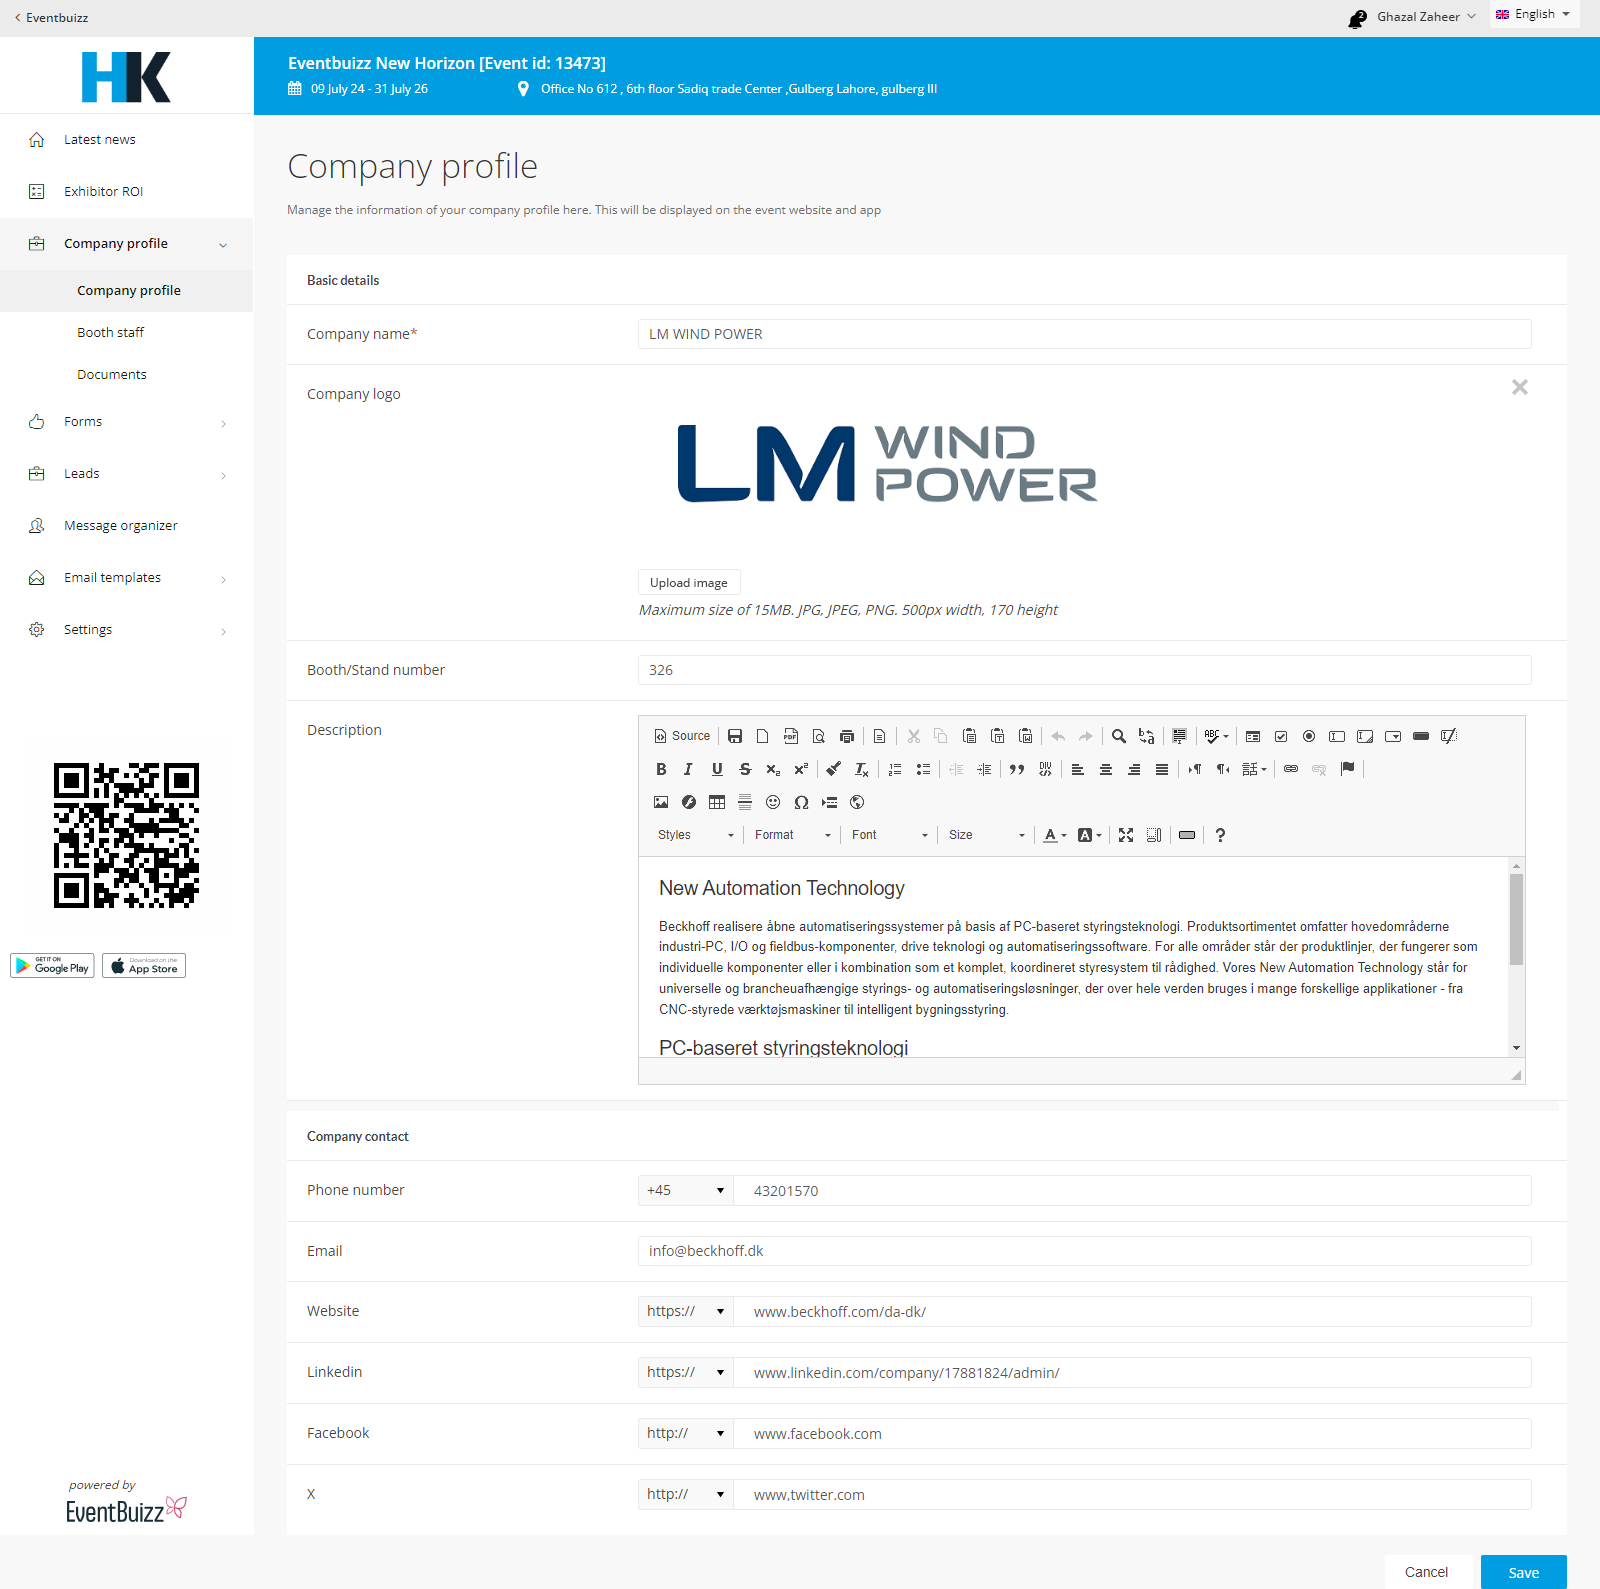
Company profile
Manage the information of your company profile here. This will be displayed on the event website and app.
This section contains details about the company that exhibitors want to display to attendees and other exhibitors. It may include:
- Company name, logo, and description.
- Contact information.
- Social media links.

Booth Staff
Booth staff refers to the individuals who will be managing the booth during the event. This will be displayed on the event website and app. This staff also gains access to the Leads app:
Let’s see how to add booth staff member:
Navigate to company profile > Booth staff > and click +Add button.


Documents
Exhibitors may need to upload or manage various documents in the portal related to company or products, such as:
- Product brochures or catalogs.
- Company presentations.
- Compliance certifications.
- Shipping and logistical information (e.g., booth setup, teardown schedules).
- Contracts or agreements with the event organizer.
Navigate to company profile > Documents > and click +Add button.
Clicking the “Add” button reveals two options:
- Create Folder: Enables organizers to create a sub folder within the selected program folder.
- Inside the newly created folder, the same “Add” button and options are available, allowing for nested organization.
- Create File: Allows organizers to upload files directly into the program folder.
- Organizers can select and upload multiple files of various types (e.g., documents, images).
- There is an option to schedule the release of files if needed, specifying when they should become accessible to users.

File Upload and Management
- Upload Process:
- When uploading files, organizers can select files from their local device.
- Uploaded files are immediately available within the program folder for viewing and downloading by authorized users.
- Organizers have the flexibility to schedule file availability to ensure timely release of event-related materials.

Uploaded file have the following different options in menu.
- Delete (Delete option will delete that file permanently against that program)
- Rename (Rename option will give the permission to organizer to rename the file name)
- schedule ( Organizers have the flexibility to schedule file availability to ensure timely release of event-related materials)
- download (Download option will download the uploaded file)

billinghistory
Billing history
In the billing history, all the orders made with the current company are shown. We can edit these orders from this section. Whenever an order is placed, the attendee receives a registration confirmation email from the exhibitor portal.

portalforms
Forms
These forms can be used as ‘call to actions’ in the form of competitions, or to get sign ups for products and services. The forms are displayed on the leads app on your company profile. For example, this can be used to attract more attendees to your booth by displaying the answers of a quiz locally at the booth which engages the attendees to come and visit you. This, in return, can generate traffic, leads, and business for your company.
Forms have two sub sections:
Click add button in the form section to create questionnaire.

How to Choose Question Types
Form offers nine different question types. Here’s what each one does:

Single type question
A one selection question, often implemented using radio buttons, is a type of multiple-choice question that allows respondents to choose only one option from a list of predefined answers. This type of question is particularly useful when you want to ensure that attendees select the most relevant or preferred choice among several alternatives.
You can add more options by clicking on the “Click to add option”.

Multiple Type Question
Multiple-choice questions can be structured to allow either single or multiple selections from a predefined list of options. These questions are highly effective for collecting structured and specific information from attendees. This question is useful where multiple answers are possible or expected.

Response type question
A “response question” typically refers to open-ended questions that allow attendees to provide detailed, qualitative answers. These questions can be used to gather specific information, preferences, or feedback from attendees.

Number type question
A “number type question” is a type of question that prompts respondents to input numerical data as their response. This question type is useful for collecting quantitative information from attendees, such as age, years of experience, or numerical ratings.

Date type question
A “date type question” is a type of question that prompts respondents to input a specific date as their response. This question type is useful for collecting information related to dates, such as event preferences, availability, or important dates.

Date and time question
A “Date and Time” question is a type of question that prompts respondents to input both a specific date and time as their response. This question type is particularly useful for collecting information related to scheduling events, appointments, or meetings at specific times.

Dropdown question
A “Dropdown” question is a type of question that presents respondents with a list of predefined options from which they can select a single choice. This question type is useful for scenarios where you want to provide a compact and structured list of choices to respondents.

List of forms
After the form is added, it will appear in the “List of Forms” section. You can click the three dots icon to view the questions, clear the results, or delete the entire form.
In the form, there is a “Tools” option. Click on “Tools” to export all the form results.


Response overview
In the exhibitor portal, the “Response Overview” in the forms section provides a summary of the responses collected from attendees or users who filled out the form. It typically includes:
- A breakdown of answers for each question.
- Overall statistics or trends from the responses.
- An overview of how many people submitted the form.
- Key insights based on the collected data.
This overview helps exhibitors quickly assess the feedback or information gathered through their forms.

Clicking on the tools from “response overview” with allow you to clear and export results.

portalleads
Leads
Leads refer to potential customers or interested individuals who have shown interest in the exhibitor’s products or services. You can add leads from exhibitor portal as well. Click leads with exhibitor portal to learn how to create leads using the app.
Let’s take a look at how to add leads from the exhibitor portal. Click on “Leads” -> “Add Leads.” A new form will appear where you can fill in all the required details.

This is how you create leads.


This is the list of leads captured from your stand by the booth staff. You can edit/ delete leads by clicking on the three dots icon.

Click ‘Tools’ to export leads.

Let’s get an overview of product catalogue and consent management.
Product catalogue
The product catalogue for leads in Eventbuizz involves listing and managing products or services that are specifically tailored to potential attendees (leads). This can include:
- Event Tickets: Offering different types of tickets to attract leads.
- Special Offers: Providing discounts or early bird pricing to convert leads into attendees.
- Customized Packages: Creating packages that may appeal to specific segments of leads.
- Promotional Items: Showcasing merchandise or other items that can entice leads to engage more with the event.
This catalogue helps in marketing and selling to leads, making it easier to convert them into actual event participants.
Product catalogue can be added by two ways:
- Event center > Apps > Sponsors/ Exhibitors > click three dots icon
 > Product catalogue.
 - Exhibitor portal > Select Sponsor/ Exhibitor > leads > Product catalogue.
Here we can show you how to add product catalogue from exhibitor portal. Click Leads management to check how to add from there.


If the check box is selected, product catalogue will appear when creating leads in the app and in exhibitor portal.
After creating the product catalogues, all catalogs will start appearing in the list. To edit, delete, or perform active/inactive actions, click on the three dots icon ![]() .
.

Consent Management:
Consent management for leads in Eventbuizz focuses on obtaining and managing the permission of leads to use their personal data. This includes:
- Consent Forms: When a lead shows interest or signs up for more information, they can be presented with a form to agree on how their data will be used (e.g., receiving newsletters, marketing materials).
- Tracking Consents: Keeping a record of which leads have given consent, detailing what they have consented to and when.
- Managing Preferences: Allowing leads to update their consent preferences, enabling them to opt in or out of certain communications or data uses.
This ensures that the interaction with leads is compliant with data protection regulations, and that leads’ preferences regarding their data usage are respected and managed properly.
Consent Management can be added by two ways:
- Event center > Apps > Sponsors/ Exhibitors > Click three dots icon
 > Consent management.
 - Exhibitor portal > Select Sponsor/ Exhibitor > Leads > Consent management.
Here we can show you how to add consent management in exhibitor portal. Click Leads management to check how to add from there.


If the checkbox is selected, consent management will appear when creating leads in the app.
After creating the consent managements, all catalogs will start appearing in the list. To edit, delete, or perform active/inactive actions, click on the three dots icon ![]() .
.

Terms and conditions
The “Leads terms & conditions” allows you to specify any legal or informational text that attendees and exhibitors need to agree to regarding the use of their information related to lead capture and management.

portalmessageorganizer
Message organizer
The Message organizer enables sponsors/ exhibitors to efficiently categorize and manage their communications, ensuring no important messages are missed, especially during busy events. As a central hub, it is essential for receiving and organizing all communication within the portal from event organizers. This tool helps exhibitors stay connected with key stakeholders, including organizers, attendees, and other exhibitors, streamlining their communication process for a smoother event experience.
To effectively manage incoming messages, you can organize them into relevant categories. The system allows you to view both messages you’ve sent and those received from the organizer. As an admin, it’s crucial to regularly monitor your inbox to ensure no important updates are missed.
How organizer send and handle messages to sponsor/ exhibitor admins, click here to see more details.
In messages, we have some sub menus:
- Inbox
- Starred
- Drafts
- Spam
- Trash
Let’s first have a look, how to add and send a message.

Once the recipient has been selected, Add the subject and message you want to send to desired sponsor/ exhibitor. Once the message is ready.
You can save the message as a draft to make changes later and send it afterward. You can also send it immediately by clicking the send button.

Inbox
In an exhibitor portal, the “Inbox” typically serves as a communication tool where exhibitors can receive and manage messages related to the event or exhibition. It might include:
- Messages from event organizers about important updates, schedules, or changes.
- Inquiries from attendees or potential clients regarding products or services.
- Communication with other exhibitors or partners.
- Notifications about deadlines, registrations, or documentation submission.
The inbox helps exhibitors stay informed and connected during the planning and execution of the event.
Click on “Inbox,” then click on the subject of the email. The email will open on the right side of the screen. From there, you can reply, forward, delete, or mark the email as important by clicking on the star button.
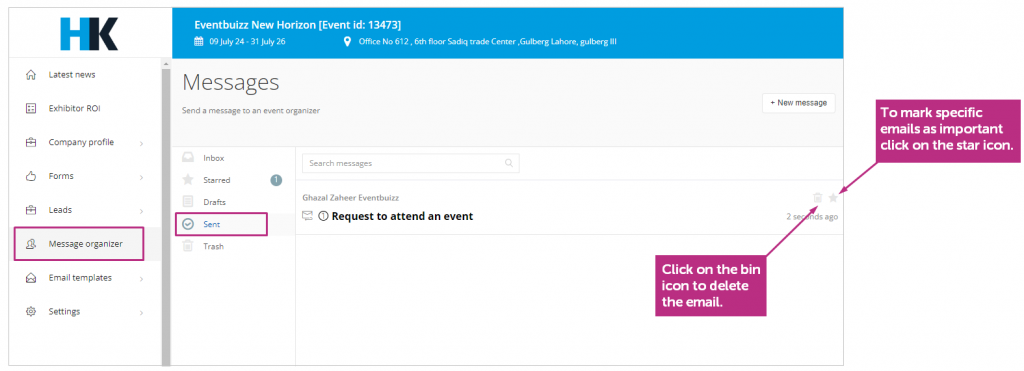
You can only starred message from inbox and sent folder. Star emails that they want to easily find later, such as urgent messages or those requiring follow-up. Starred emails are typically accessible from a dedicated “Starred” folder, making it easy to locate important messages without scrolling through the entire inbox.

Starred
The Starred feature allows users to mark specific emails as important or noteworthy. Users can star emails that they want to easily find later, such as urgent messages or those requiring follow-up. Users can star emails temporarily (for immediate attention) or keep them starred for longer periods based on their needs.
As soon as an email is marked as important, the star icon will change color. The number of starred emails will also appear in the Starred folder section.

Drafts
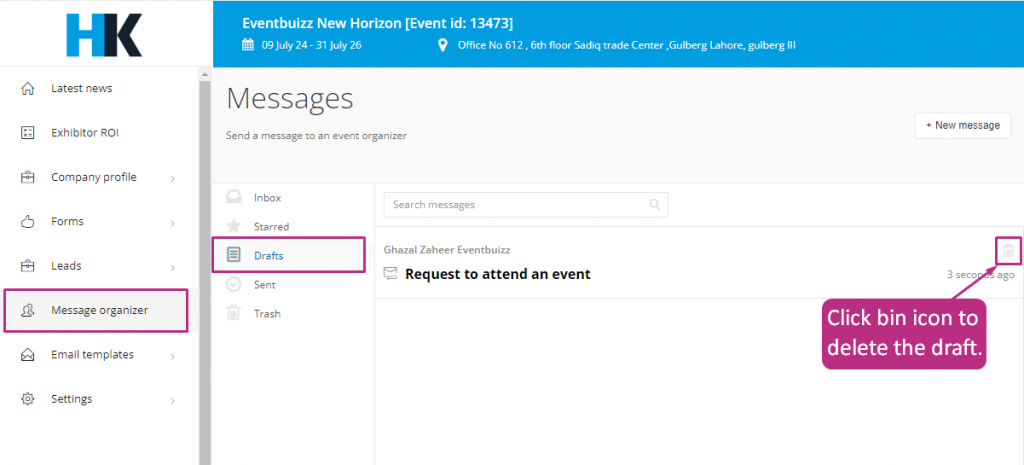
The messages save as a draft allows users to save an email that they are in the process of composing without sending it immediately ensuring that they don’t lose their progress.
Drafts can be opened and edited anytime before sending, allowing users to make changes as needed. You can create and save multiple drafts simultaneously, allowing them to prepare various messages for different recipients. Once the user is satisfied with the email, they can send it with a simple click.

Sent
Once you send an email, the Sent folder keeps a record of all your sent messages, so you can refer back to them later. You can see details like the recipients, subject lines, and timestamps for each email. This folder helps you track ongoing conversations by showing what you’ve communicated with others. If needed, you can easily find and resend any email from this folder. Overall, the Sent folder helps organize your email communication, making it easier to manage and reference your past messages.

Trash
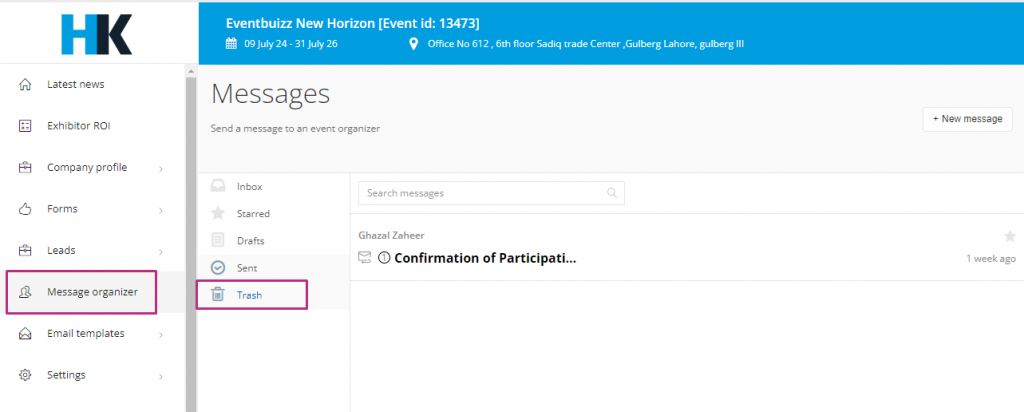
The Trash folder temporarily holds deleted emails, acting as a safety net to undo deletions before they are permanently removed. When you delete an email, it moves to the Trash folder instead of being immediately erased. If you accidentally delete an email, you can recover it from the Trash as long as it hasn’t been permanently deleted yet. Typically, emails in the Trash are automatically deleted after a set period (like 30 days), or you can manually empty the folder to permanently remove them.

portalemailtemplates
Email templates
Leads scan confirmation
This is an internal email that will be sent to your booth staff. It is sent every time a staff member has successfully captured a lead, given it is enabled.

Leads user promotions
A Leads User Promotion Email is an email sent to potential customers (leads) to promote a product, service, or event.

portalsettings
Settings
Admin
In an exhibitor portal, admins are users with special permissions to manage and oversee various aspects of the portal. They can control access, modify exhibitor information, manage forms, and ensure smooth communication between organizers and exhibitors. Admins may also handle technical support and assist exhibitors with their queries.
Add and manage the admins for your exhibition here. You can set the status of the admin as ‘active’ and ‘in-active’.

Once an admin has been created, an email invite with a link to the exhibitor portal will be sent from which they can gain access to the platform.

and you can edit admin by just clicking on the three dots icon ![]() .
.
